
Purpose
Streamline the creation and deployment of an Akumina Flow Survey. If you also want to display reports for a survey, add an instance of the AkuminaFlowReportWidget.
If you need the full feature set of Akumina Flow, create your survey in Akumina App Manager’s Akumina Flow Designer Management App and then add an AkuminaFlowUserWidget (https://www.akumina.com/community/akuminaflowuserwidget) to the desired page.
Details
The AkuminaFlowSurveyWidget has 2 modes: Edit and View. You enter “Edit” mode by changing the page to edit mode and then clicking the “Edit” button displayed on the widget. From “Edit” mode you can select an existing survey, create a new survey or edit an existing survey.
- Widget Name: AkuminaFlowSurveyWidget
- Available With: Release 7+
- Content App Type: N/A
- Content Type: N/A
- Content App Name: N/A
- List Name: N/A
- Recommended Images Sizes: N/A
- Dependencies: Optimizer License, Create and Edit Survey requires access authorization to Flow Designer Management App
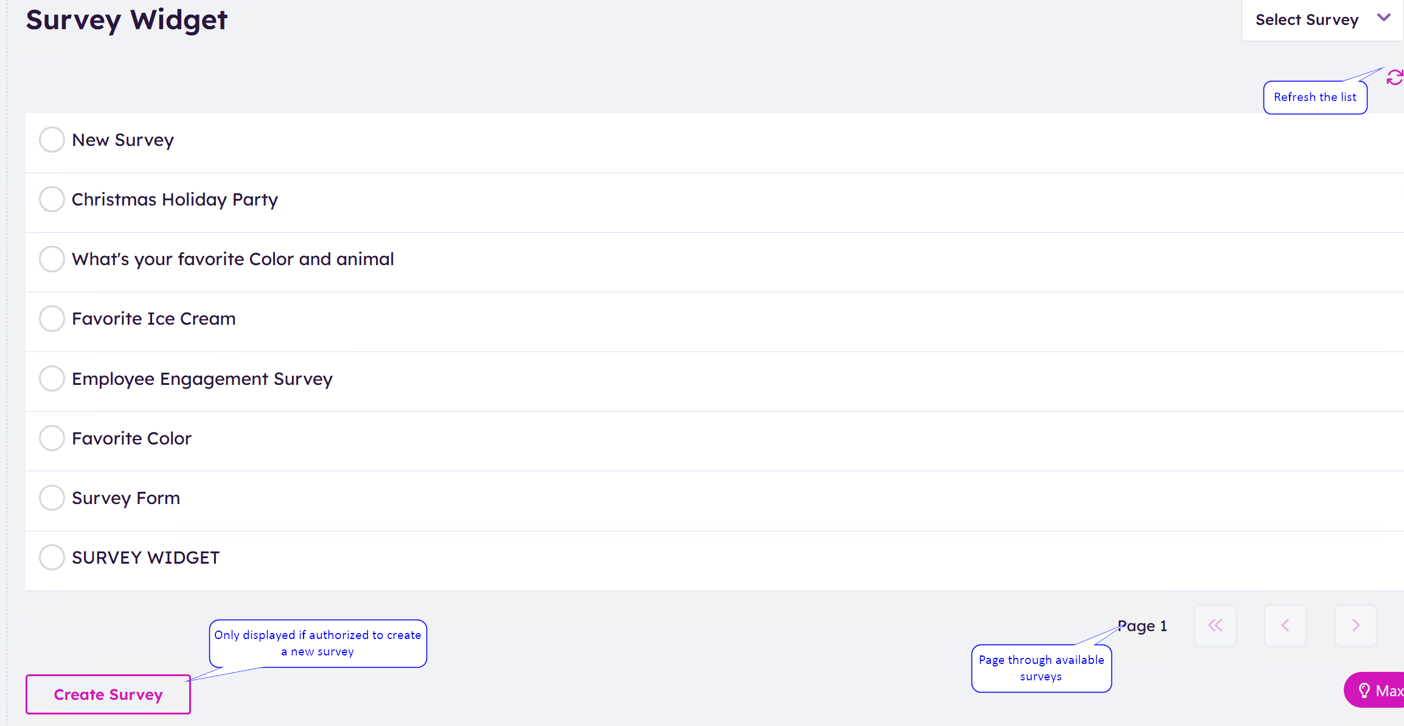
Select a Survey
Select one of the listed surveys to use for this widget. NOTE: if you do not have permission to create a survey (access to Flow Designer), only active surveys will be available to select from.
Edit a Survey
If you have access to Flow Designer, you can edit the survey directly from within this widget. Click on the “Edit” button.
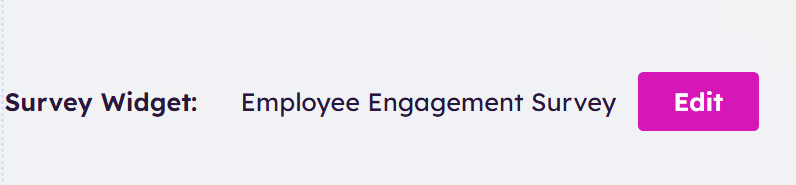
NOTE: Editing the survey will overwrite any custom survey HTML you have created within the Flow Designer. In general, you should not mix editing questions or survey HTML between the AkuminaFlowSurvey widget and Flow Designer. For simplicity, AkuminaFlowSurvey widget provides only a subset of the functionality available via Flow Design so there may be valid reasons for post editing in Flow Designer (e.g. Adding Owners, Changing Report settings, Notification settings).
See the “Create a Survey” section below for editing information.
Create a Survey
If you have access to Flow Designer, you can create a survey directly from within this widget. Click on the “Create” button.
Multilingual Text
All text fields for the survey support your sites’ languages. Enter the text for your currently selected language. If you have a language translation key, you will see the “Auto Translate” button at the bottom of each section. Clicking on this button will take the current entries for all text fields in that section and auto translate them for all of your supported languages.
If you do not have a language translation key or want to manually provide translations, change your current language preference and re-edit the survey. Do this for each of your supported languages.
Name and Descriptions
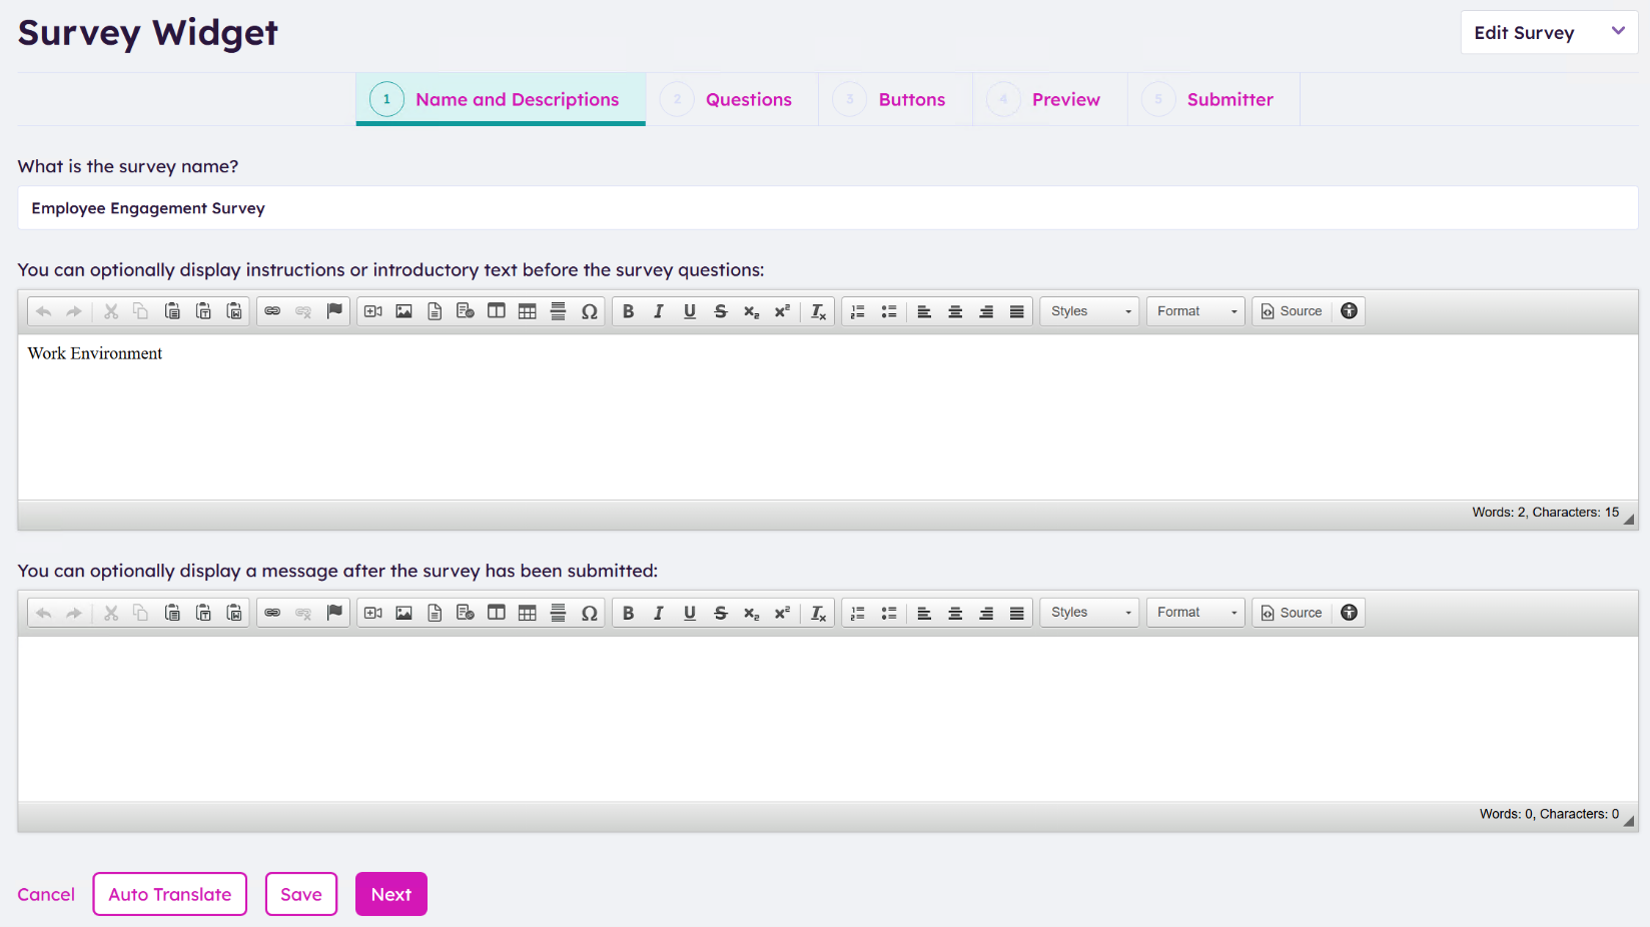
Provide a name for the survey.
Optionally provide a short introductory text for the survey. If provided, this is displayed above the survey questions or as the first step when opting to display your survey 1 question at a time.
Optionally provide a short message that will be displayed to submitters after they have completed the survey.
Questions
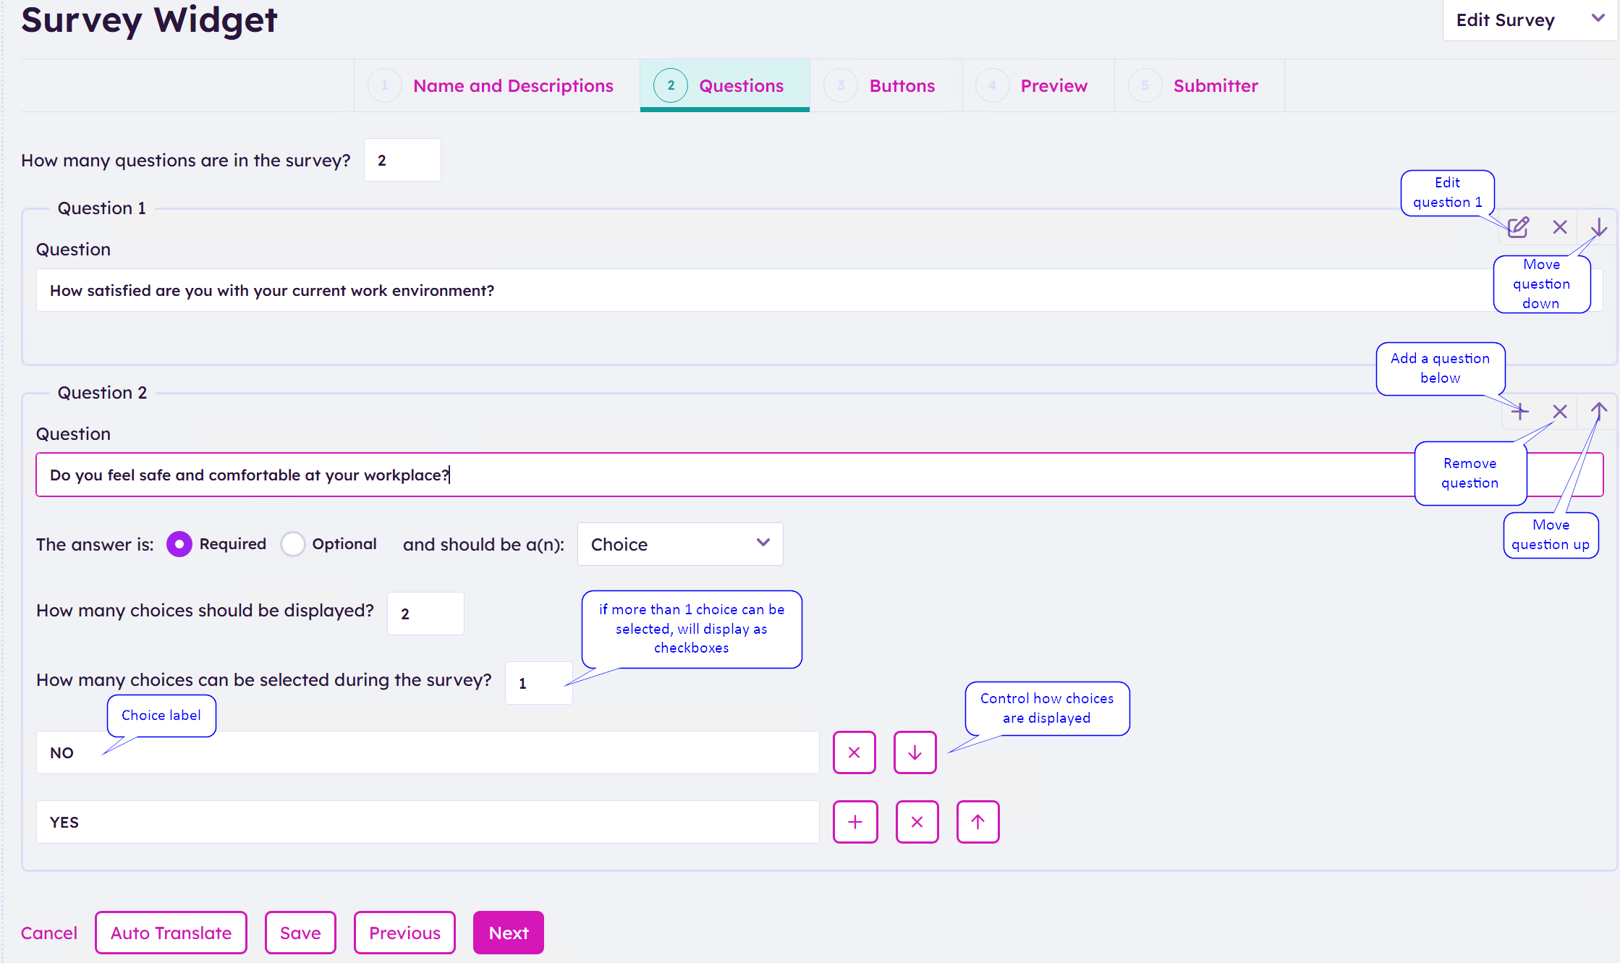
Provide the questions for the survey.
Question Types
After entering your question label, select what type of answer you are looking for.
Choice: a controlled list of answers. Will be presented either as a group of “radio” buttons or as a group of checkboxes if more than 1 answer is supported. You will need to provide each supported choice answer.
Date: presented as a date input field
Date and Time: presented as a “datetime-local” input field. Note that back-end stores all dates in UTC.
Embedded Image: provides instruction for pasting an image into the survey and an “img” element for displaying the pasted image
Memo: presented as a “textarea” element that holds up to 512 characters of text
Money: presented as a number input field that holds a number between 00.00 and 99999999.99
Number: presented as a number input field that holds a number between 0 and 99999999
Text: presented as a text input field that holds up to 80 characters of text
User: allows submitter to select an employee
Buttons
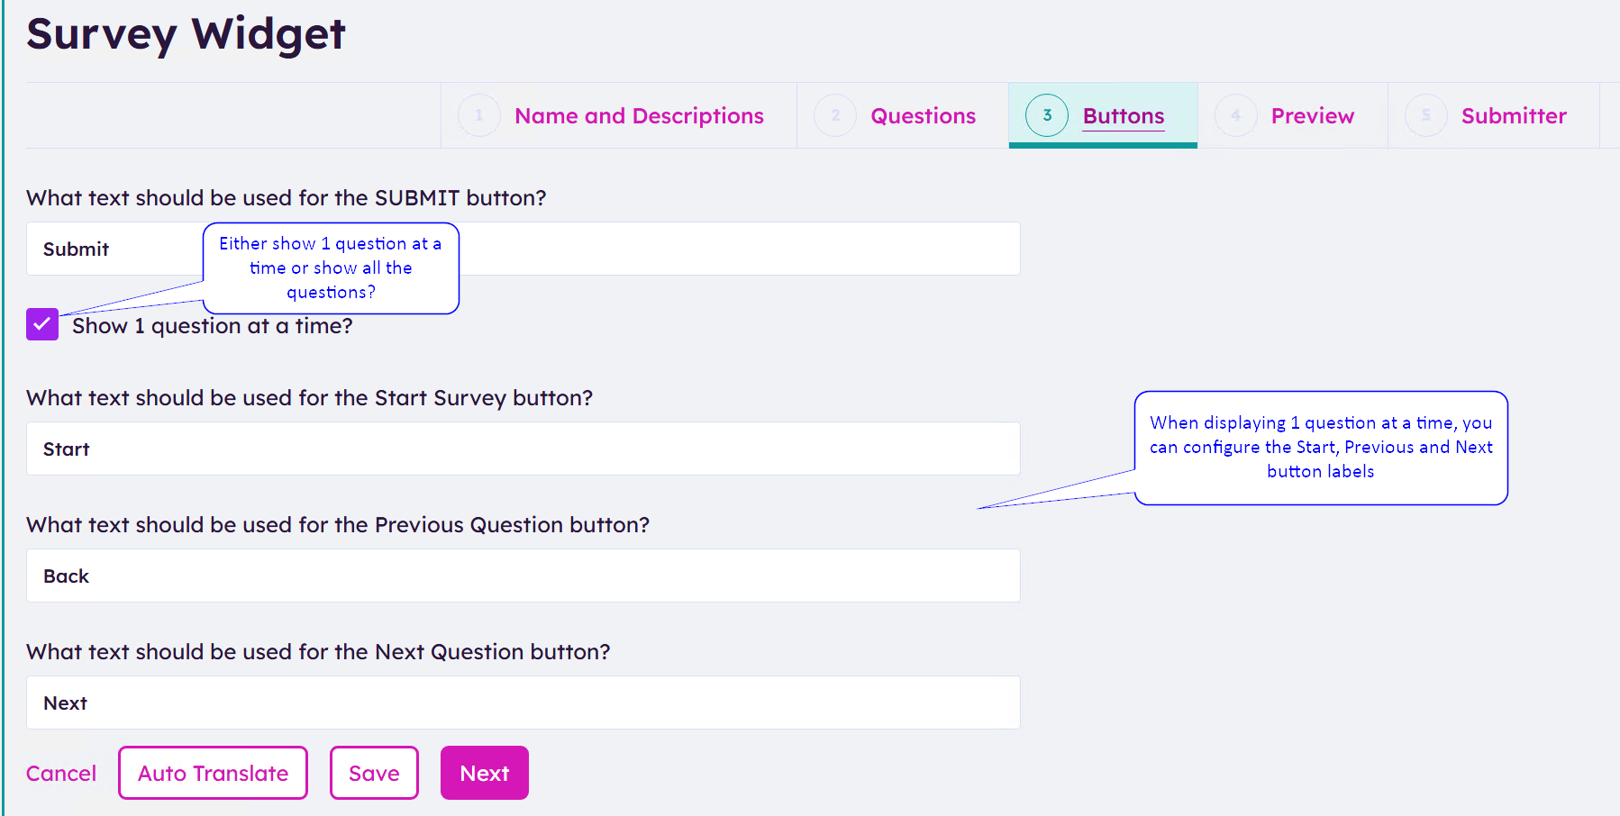
You can configure the “Submit” button label and whether you want all the survey questions to be show at once or 1 at a time. If you want to show the survey questions, 1 at a time, you can configure the “Next” and “Previous” button labels as well.
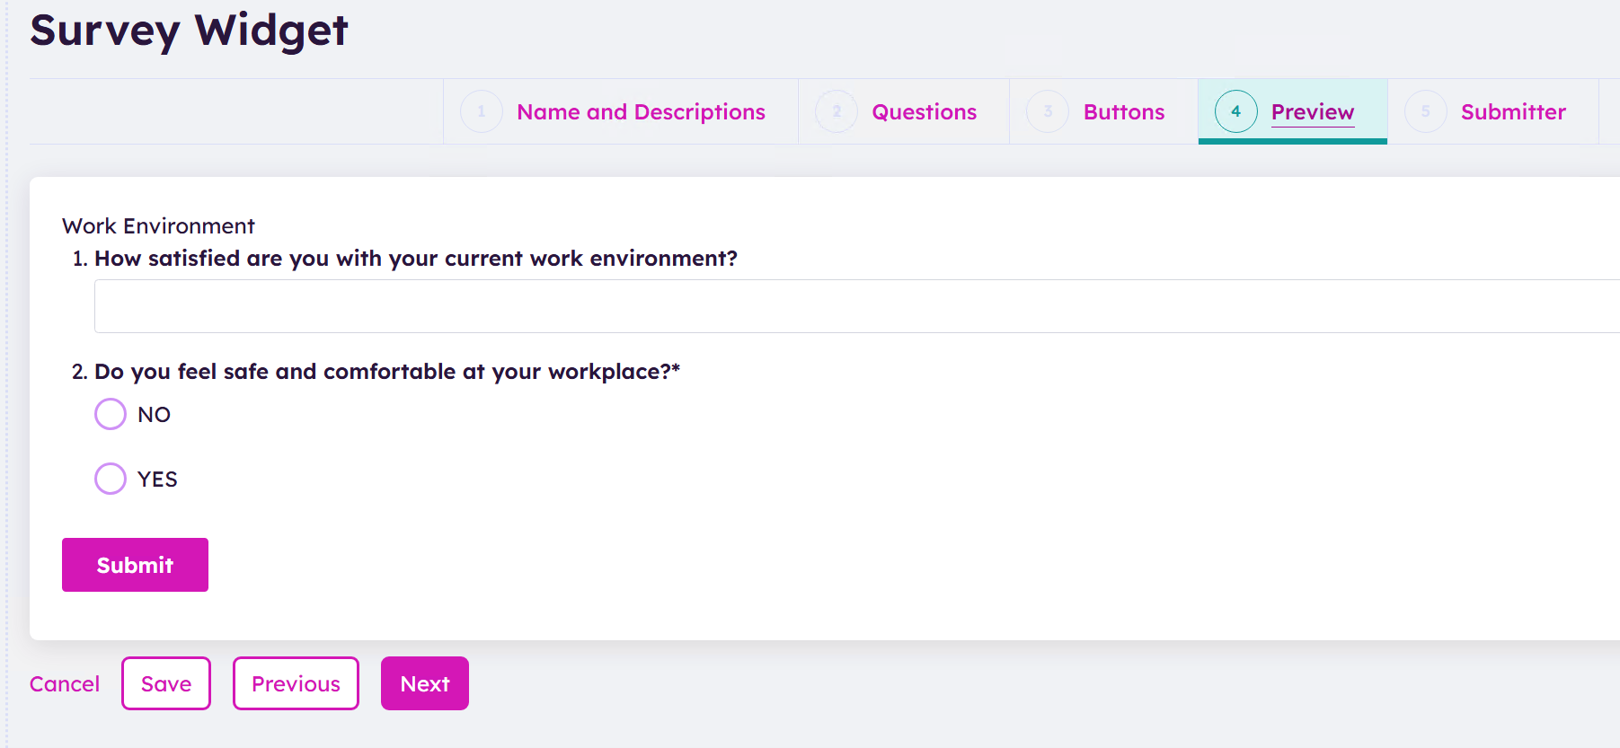
Preview
View your survey.
Submitter
Configure how the submitter will interact with your survey.
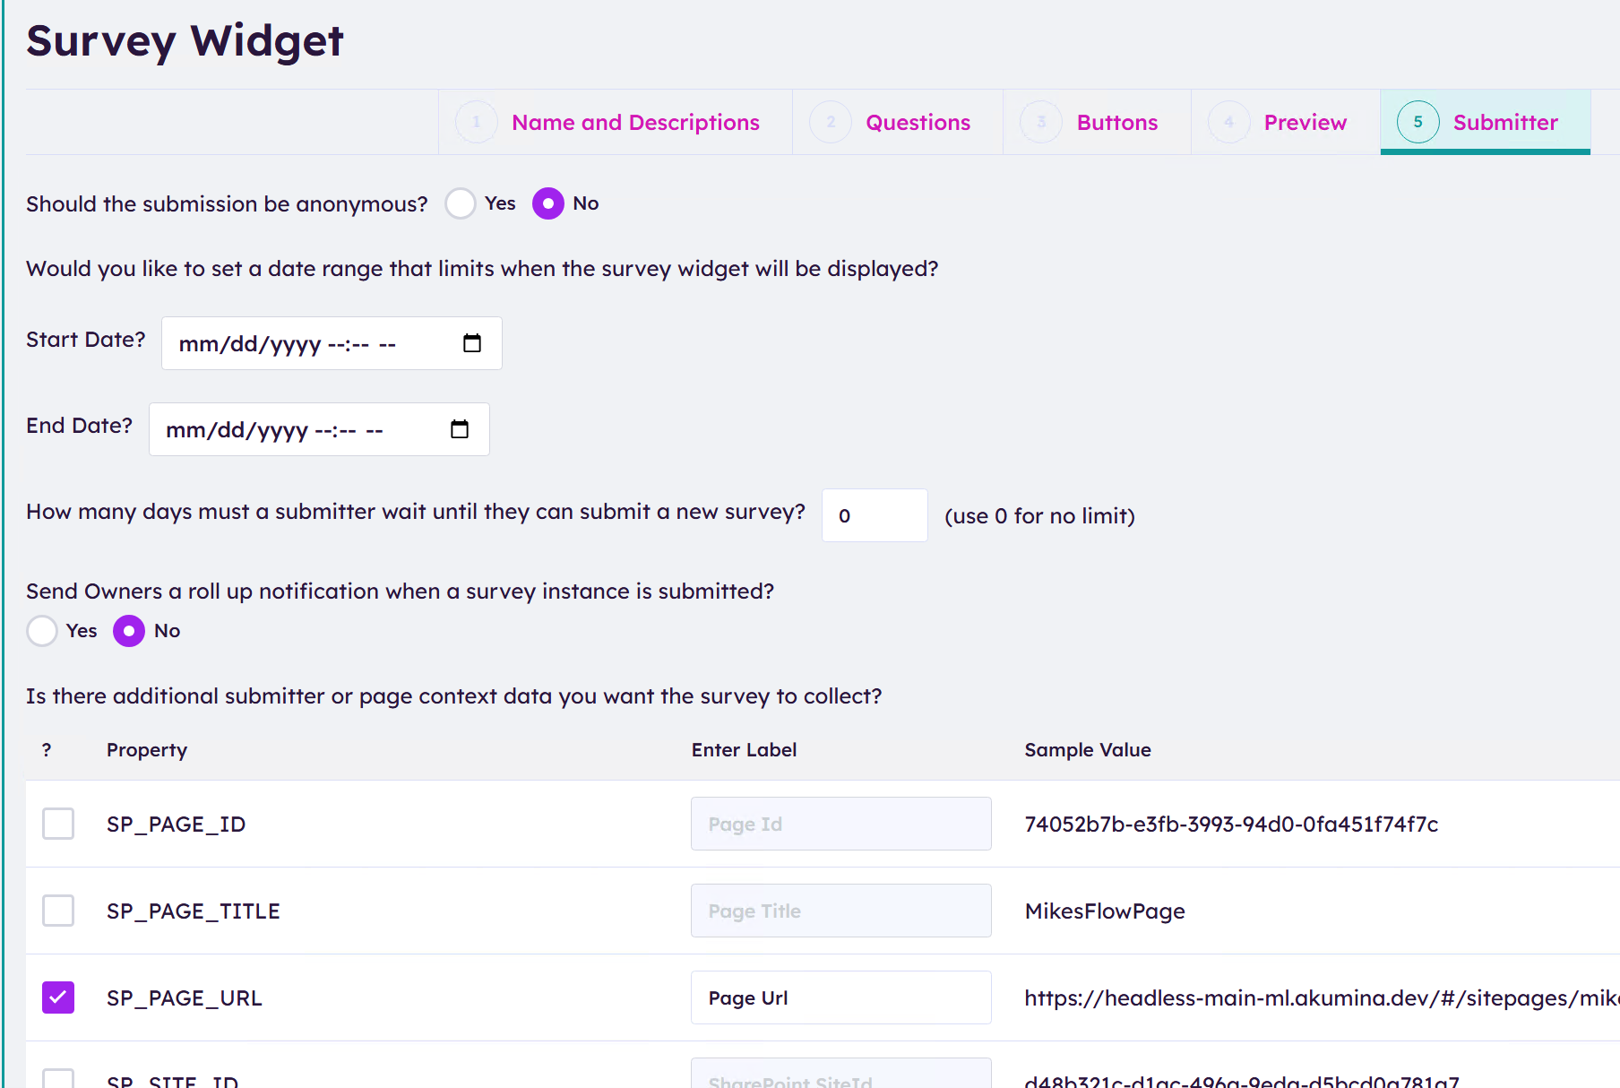
Should the survey be submitted anonymously?
Yes or No.
Do you want to limit when the survey is displayed?
Provide the date range that survey will be displayed. Leave empty if you don’t want to use the date range feature.
Do you want to limit how often an employee can make a survey submission?
Provide the number of days between submissions. Use 0 for no limit. Akumina can enforce this restriction even when anonymous submission is enabled.
Do you want to send a rollup notification to the survey owners when a survey submission occurs?
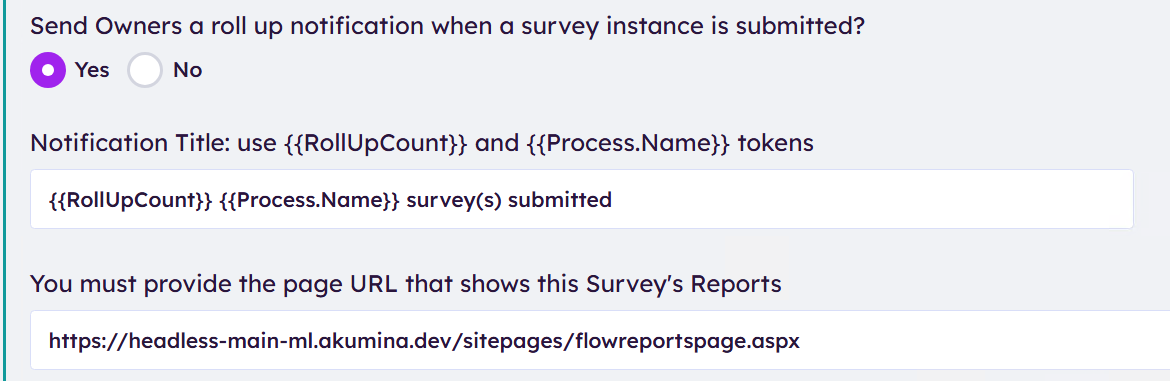
Yes or No. If “Yes” then provide the page URL where the survey reports will be displayed. See AkuminaFlowReportWidget documentation or deploying a survey report widget.
Is there any submitter data you want submitted with the survey?
Select desired submitter properties that you want included with the submission. Personal identification properties will not be displayed when autonomous submission is selected. FYI: Remember to use “Auto Translate” or manually provide translations for these included properties.
Click on the “Save” button to save and activate the survey and to save the widget properties. NOTE: be sure to publish the page for the widget properties to become available to everyone.
Properties
While a custom edit UI is provided, you can also directly edit the widget properties on the generic widget property panel (by clicking on the cog icon above the widget):
Akumina Flow Process Id: the ID of the survey
Start Date: optionally provide a date and time for when the survey should start being displayed. When changing directly on the generic widget property panel (vs the custom Edit UI), provide date/time in UTC (e.g. 2026-12-30T23:59:00Z)
End Date: optionally provide a date and time for when the survey should stop being displayed. When changing directly on the generic widget property panel (vs the custom Edit UI), provide date/time in UTC (e.g. 2026-12-30T23:59:00Z)
Widget Height: either CARD or FULL. CARD size is typically half the height of FULL.
Views
default.html: this is the view used when an employee is submitting the survey.
editmode.html: this is the view used in configuring the survey widget.