Broadcast Center Dashboard
Broadcast Center provides the ability for an authorized user to create a message from the front-end dashboard and send messages and announcements to a larger group of users via the notification bell, email, and site alerts. Broadcast Center incorporates a message workflow with review, approval, and analytics reporting capabilities.
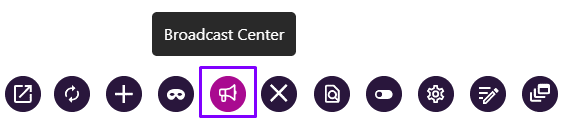
To access the Broadcast Center messaging system, click on the Broadcast Center button from the bottom tray. Only permissioned users will have access to the Broadcast Center.

The Broadcast Center dashboard provides access to available messages and reports, the ability to create new messages, and to configure taxonomy selection for the site. The dashboard provides the capabilities to sort, search, copy, or delete messages, and filter only items pending my review. The refresh button will reload the screen and update the message status as the message workflow is processed.
Broadcast Center Messages
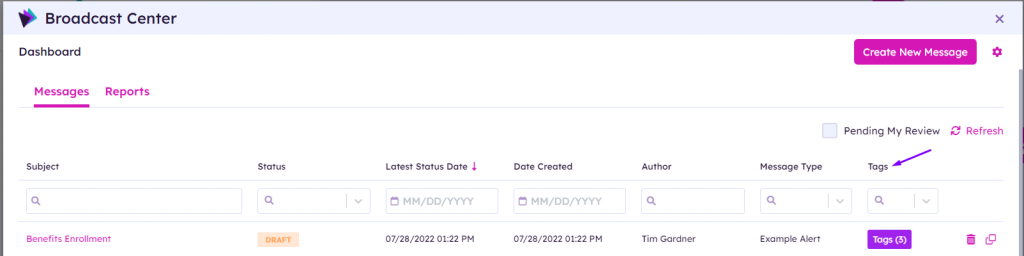
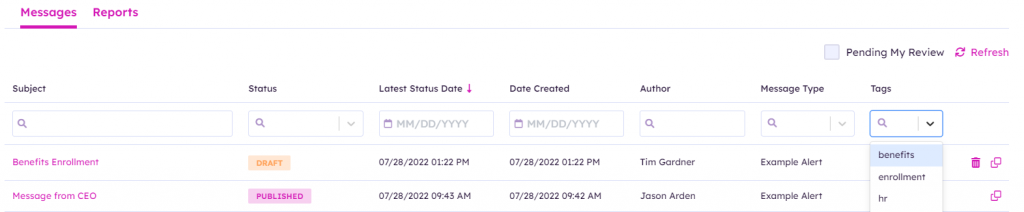
The Broadcast Center displays a list of available messages to the authorized user. Each message includes the message name, message status, latest status date, date created, author, message type, and associated tags (when taxonomy store is enabled). Each column can search by a filter for a specific message or sort the list based on the information selected. Clicking on a message name will navigate to the full message details page. Clicking on pending my review, will provide a list of messages in review status for the current user.
The list of available messages displayed to the authorized user is based on the user defined roles established in Akumina Flow. For example, a user can be permissioned in an author role or a reviewer role depending on the message type.
Based on their user defined role, the user will have the following capabilities in Broadcast Center:
- Users with access to Broadcast Center will see all messages.
- Authors can create new messages, edit, and delete their own messages.
- Reviewers can input comments, change message status (approve, rework), and cancel a message. If a reviewer cancels a message, a notification will be sent to the message author.
- Only Message Authors and Message Type Owners can edit and delete messages.
- Broadcast Center Message Type Owner has access to all messages with the ability to edit and delete any messages of their message type.
The message status and latest status date is updated as the message is processed. Based on the message type, the following message statuses will display on the Broadcast Center.
- Draft – author edits message and submits for review
- Review – optional review phase
- Rework – review rejected, author needs to update and re-submit
- Delivery – in process of delivering message or pending delivery
- Published – message delivery is complete
- Canceled – approver canceled request
- Completed – message is completed on message expiration date
Creating a New Message
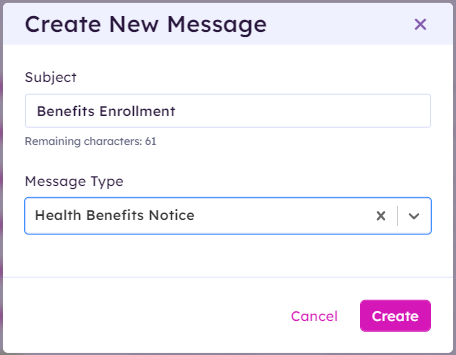
Click on Create a New Message button to initiate the workflow process using the modal.
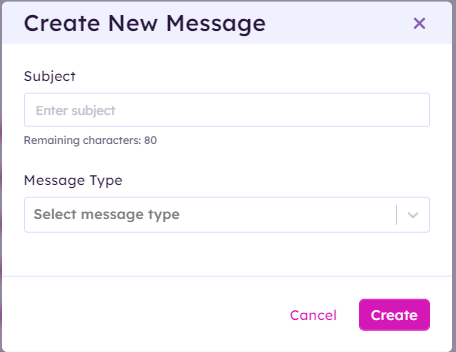
Enter the message subject and select a message type and click create.
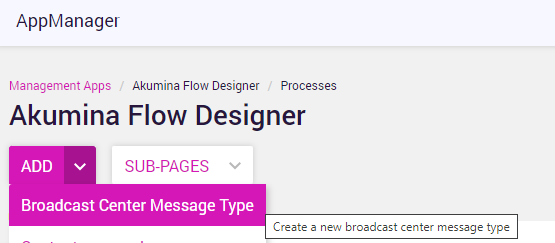
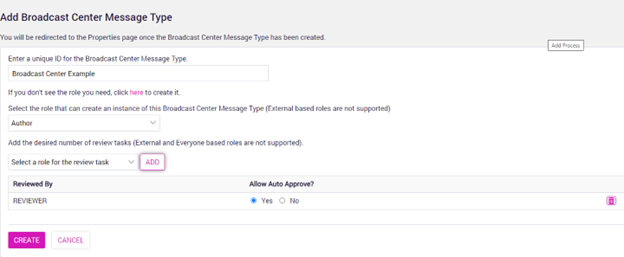
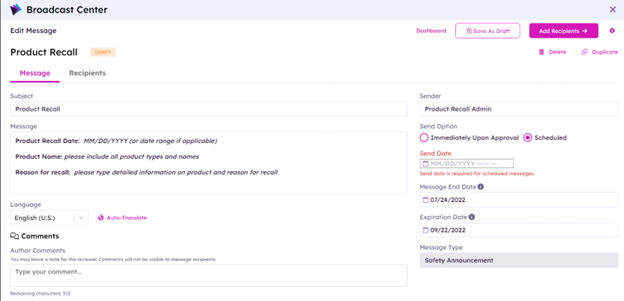
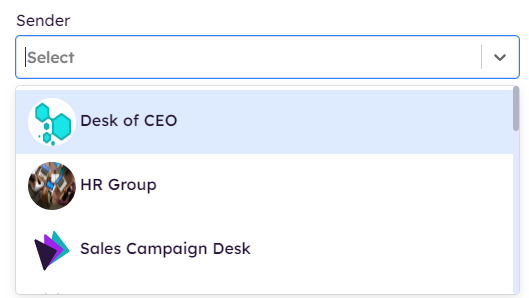
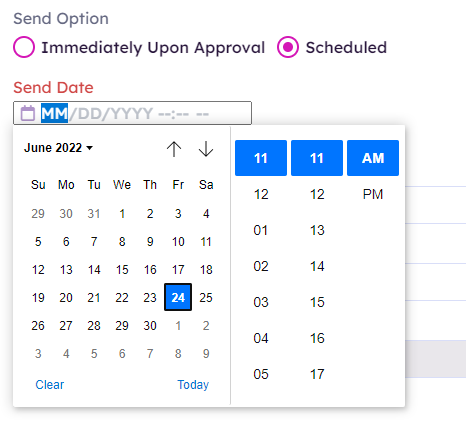
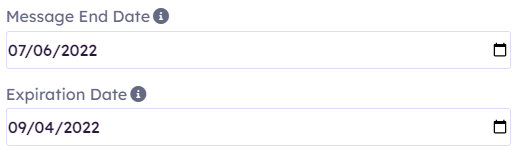
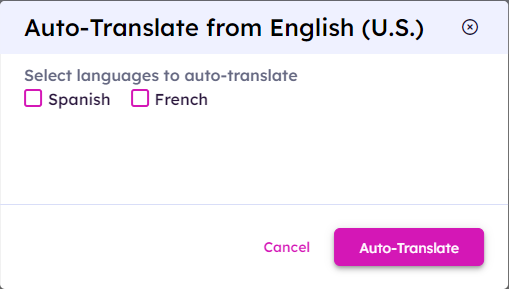
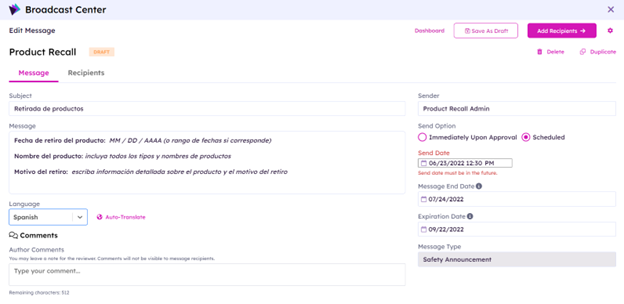
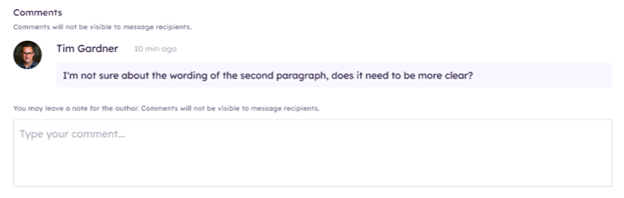
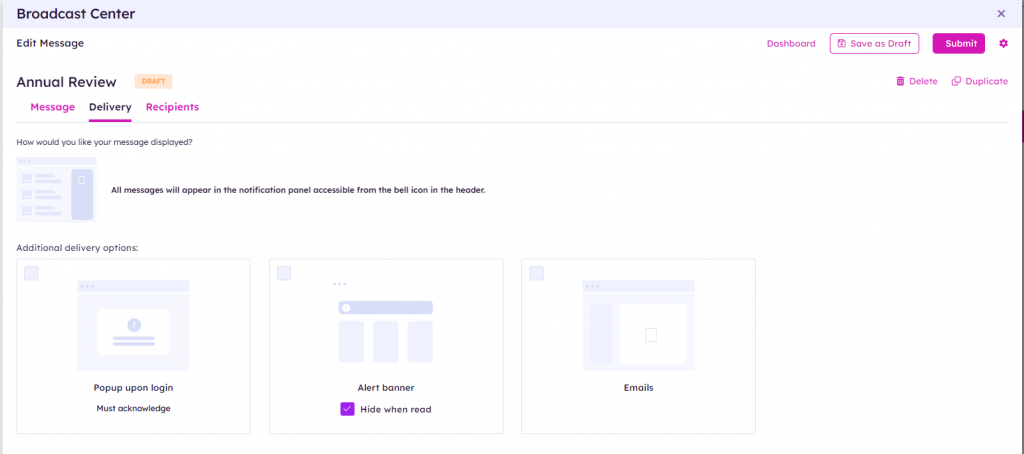
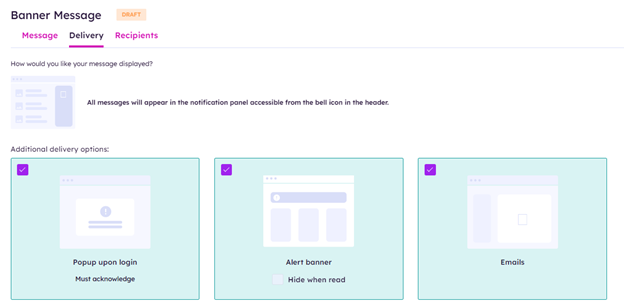
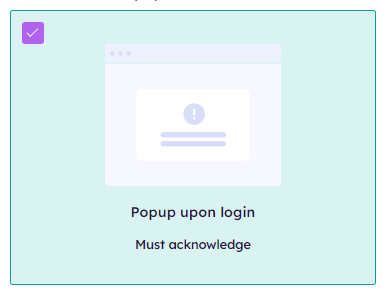
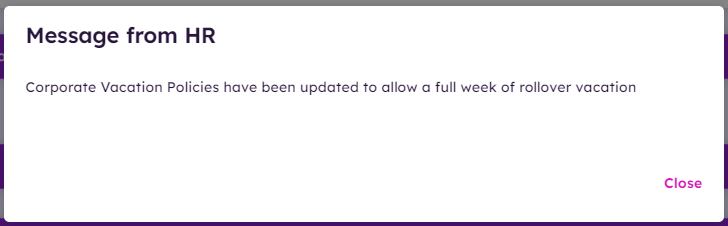
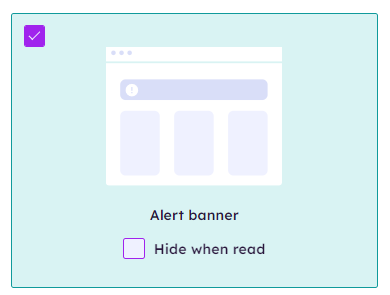
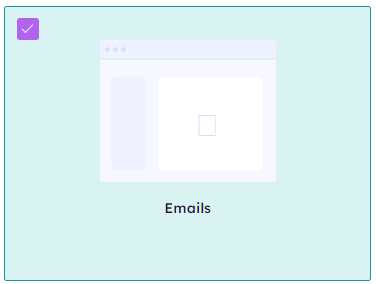
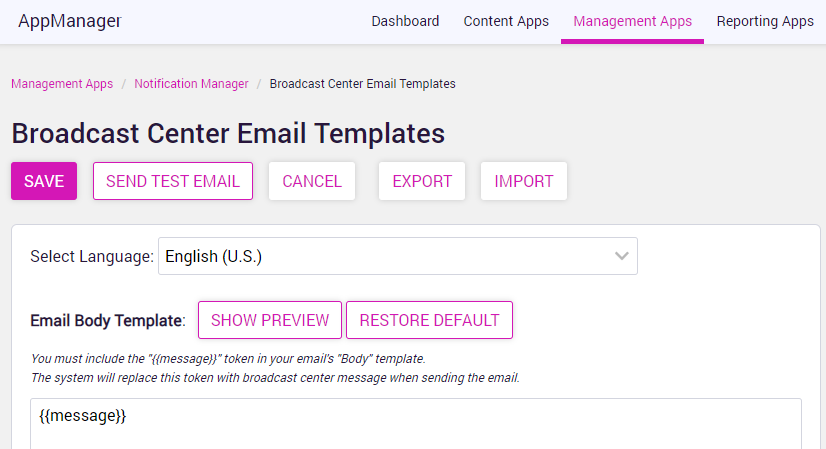
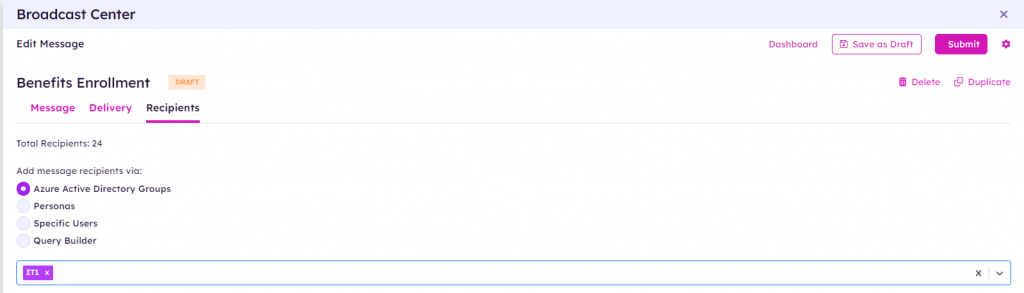
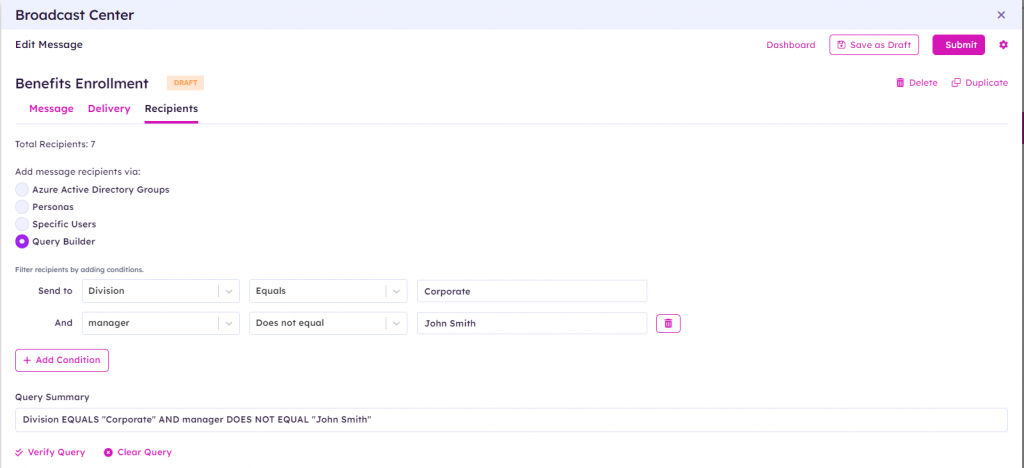
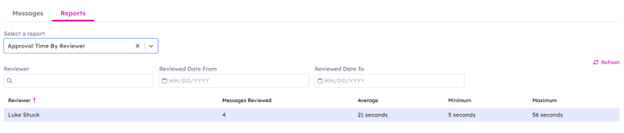
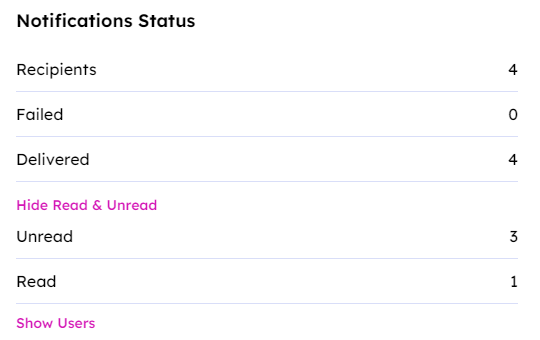
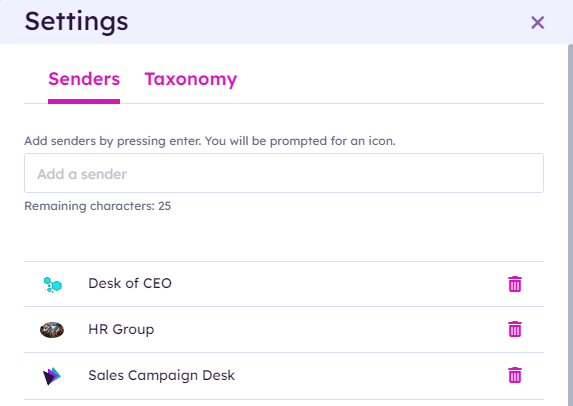
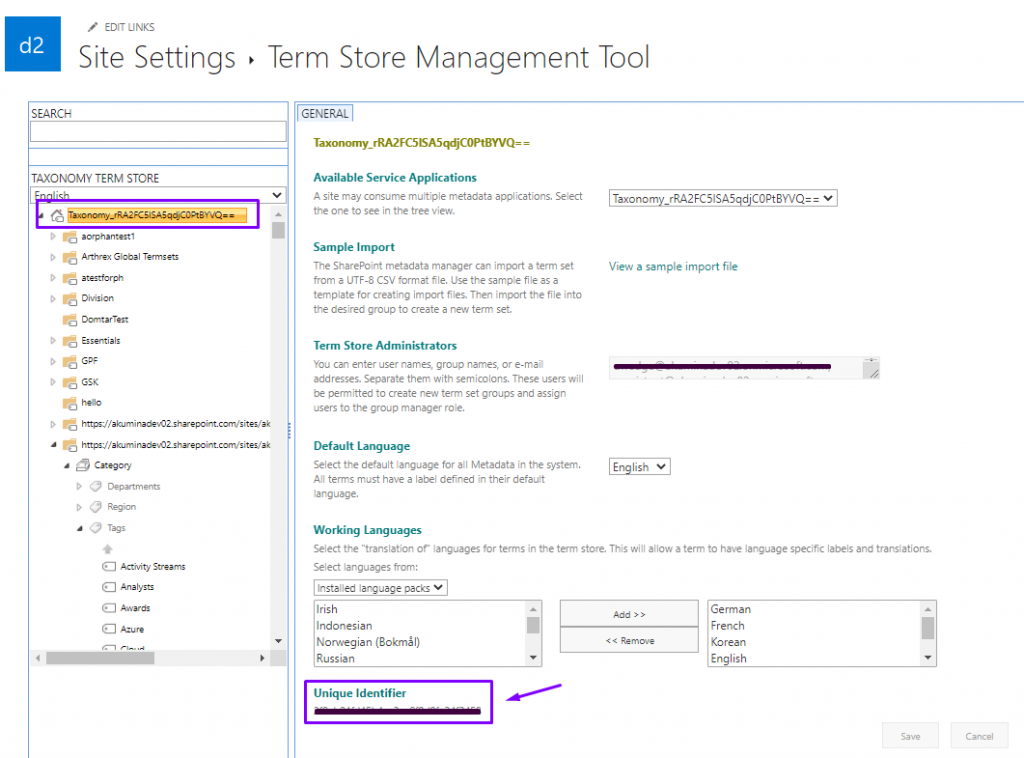
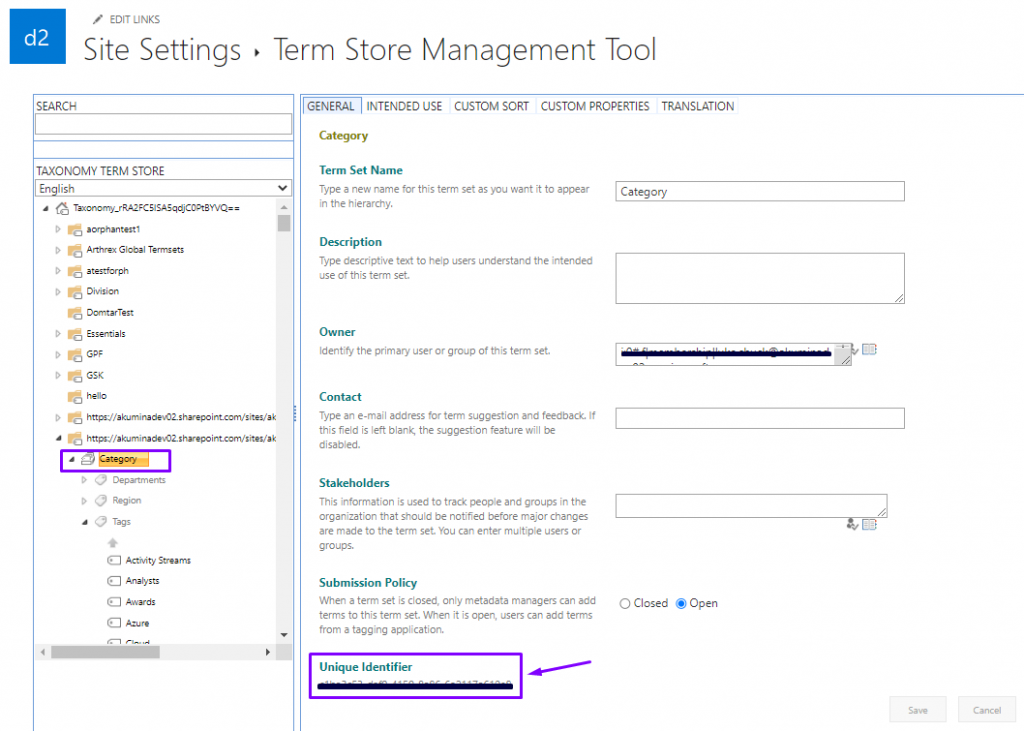
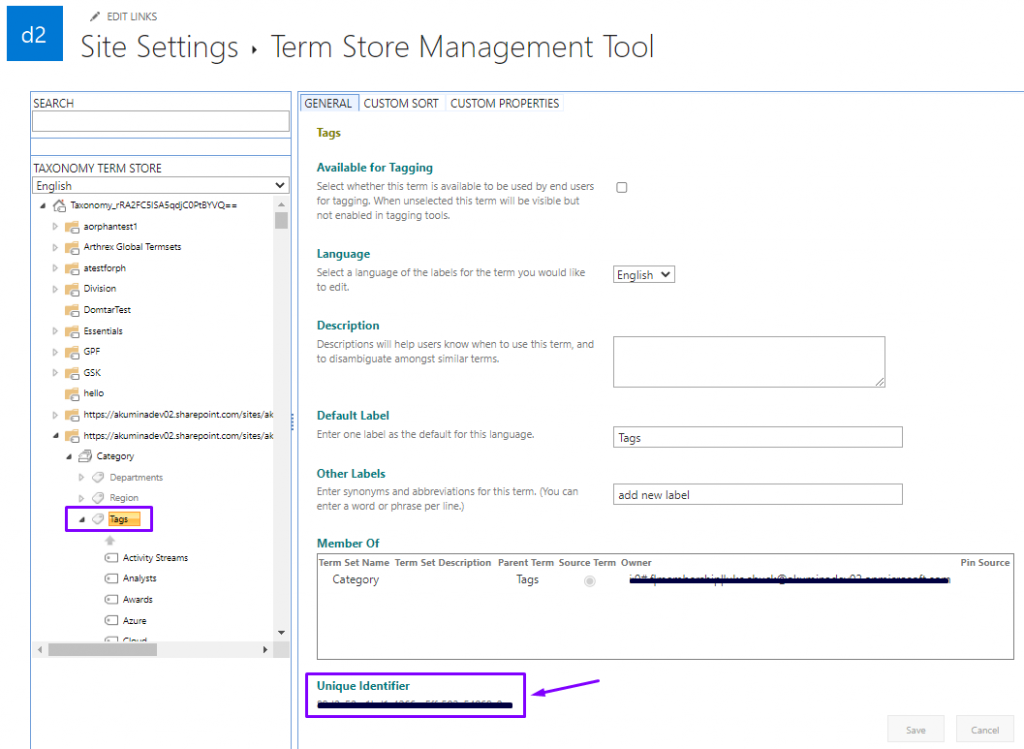
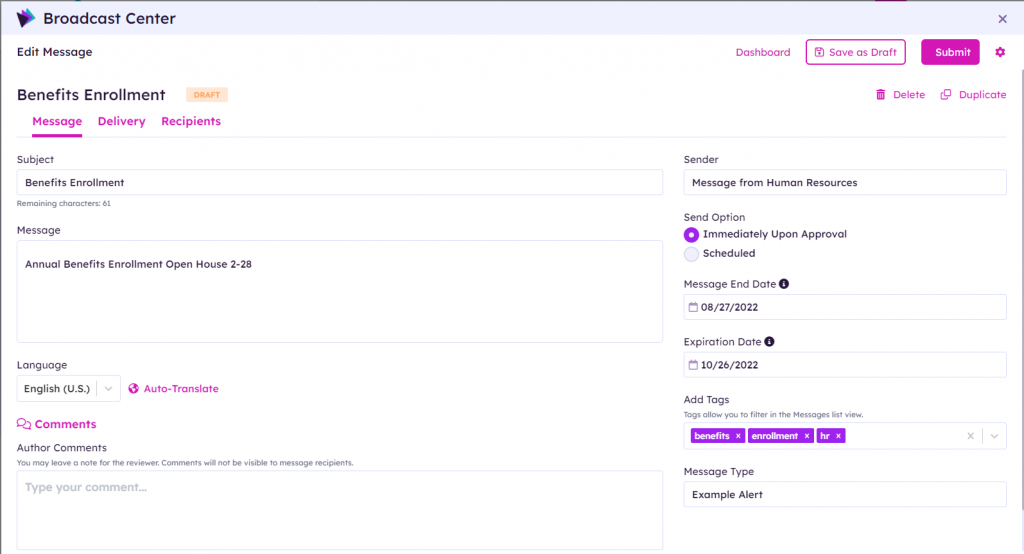
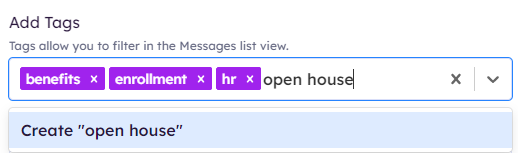
The edit message screen will be populated with the subject and message type. The author can customize the message by updating the subject and the body of the message. When a message type was created with required template guidelines (as noted in the example below), the author would complete the template as required. Select a message sender, the message sender will show in the notification bell with the name and avatar associated with the sender. This is typically an entity such as Desk of CEO, HR Group, Sales Campaign Desk, etc. Senders can be added using the Broadcast Center settings using the gear icon on the dashboard. Select if the message will be sent immediately upon approval or on a specified scheduled date. If scheduled date is selected, a valid date and time must be entered in the delivery send date field. To schedule the delivery date of the message, click on the calendar icon or type in the date and time for the message. Specify the message end date and expiration date. The message end date is the date when the message is marked as completed, the notifications are removed, and metrics are captured. The message end date defaults to 30 days from the message creation date. The expiration date is the date when the message will be permanently deleted from the system. The expiration date defaults to 90 days from the message creation date. If the site is multi-lingual enabled, the author can choose to auto-translate the message by selecting auto-translate and selecting the appropriate languages for translation. Example of a message auto-translated to Spanish. Message comments can be added by the author when creating a message. If the message type requires reviewer approvals, the reviewers can provide a feedback comment to the author. Message comments are viewable in the Broadcast Center based on a user defined permission. Comments are not visible to message recipients. From the dashboard, click on “Pending My Review” will display all the messages in your queue in review status. Click on the message to provide a comment and approve the message or send to author for rework. Select the Delivery tab to choose the message delivery method. Multiple options can be selected. Messages can be delivered to recipients via Notification bell, Popup Message, Alert Banner, and/or Emails. When delivery options are selected, the delivery method will be highlighted as shown below. All messages will appear in the notification panel accessible from the bell icon in the header, in addition to the other delivery options selected. Click on the checkbox to select the delivery option(s) for this message. Popup messages will be displayed to the user when the page loads. Popup messages will popup on page load until the user acknowledges the “Mark as Read”. When the Popup Message and Alert Banner are both selected, the Popup message will display on initial page load with a close button, and remain in the Alert Banner until the message expires. Alert Banner messages will be displayed to the user in the Notification Banner Widget on the page. Alert Banner messages provides a mandatory read option to require the user to acknowledge the message (mark as read) or have no indicator. If the “Hide when read” is unchecked, no indicator will be included in the message (example 1 above). The alert message will remain in the banner until the message expires. If the “Hide when read” is checked, the message will include an indicator to the user “Mark as Read” (example 2 above). The alert message will remain in the banner until the user acknowledges the message (mark as read). Email messages will be sent to the recipients email inbox. Select the Recipients tab to choose who the message will be delivered to. Message recipients can be sent to Azure Active Directory Groups, Personas, Specific users, or by using the Query Builder to define recipient parameters. The total recipient count field will display the number of recipients based on the selected criteria for delivery. With the Query Builder, field names can be entered or chosen from the drop-down selector. Click on “Verify Query” for the system to validate if the query parameters are valid. This will also populate the Total Recipients field count. Click on “Clear Query” to remove all query parameters or delete a certain parameter by clicking on the trashcan icon on that row. The Broadcast Center provides two different types of reporting, status reporting based on the approval times and message counts as well as analytic reporting to provide message statistics. From the dashboard page, click on reports tab to select a report. Click on the drop-down to select the desired detailed report. This report provides information by reviewer including the number of messages reviewed to date, the average, minimum and maximum time to review. This report provides information by role including the number of messages reviewed to date, the average, minimum and maximum time to review. This report provides the total number of messages a person has authored. This report provides the total number of messages by status. Clicking on a status will display all the messages in that status type and the details of the message. Analytics reporting is captured for all published messages based on delivery statistics (failed/delivered) and receipt (read/unread). Click on the published message from the dashboard to display the analytics reporting in the notification status section. This panel is dynamically updated based on the number of recipients the message was successfully delivered to. The read receipt is updated when the recipients opens/marks the notification as read. Clicking on Show Users will display the recipient’s name and the status of read receipt (read/unread) for this message. Users with access to the Notification Manager, which is a management app found in the central site, can click on the gear in the top right of the dashboard page to configure the global settings for senders and taxonomy to be used for this site’s Broadcast Center. A sender is required when creating Broadcast Center messages. The sender and associated logo icon will appear in the notification bell with the message. To add a new sender, type the name and click enter. The system will prompt you to select an image to be used for the logo icon. If an image is not selected it will use a default icon. The global senders will appear in the dropdown sender field when creating a message. The Term Store ID and Parent Term Set ID settings are required to define the global taxonomy term store to be used to add tags to a term set for this site. The Tags Term ID setting is an optional setting to define hierarchical terms to allow taxonomy to be added under a tag. To locate the Global Taxonomy Term Settings, go to SharePoint > Site Settings > Term Store Management > click return to classic (in upper right corner) > Term Store Management Tool To obtain the Term Store ID of the root store, click on the Taxonomy Term Store and copy the unique identifier into the Broadcast Center modal Term Store ID field. To obtain the Parent Term Set ID for the category, click on the parent term set (ex. Category) and copy the unique identifier into the Broadcast Center modal Parent Term Set ID field. To obtain the Tags Term ID for the tag hierarchy, click on the parent tags term (ex. Tags) and copy the unique identifier into the Broadcast Center modal Tags Term ID field. Click Save. Click on “Disable Term Creation” to disable tag creation in the Broadcast Center frontend. This is intended for clients that only want tag management to be created within AppManager. Select the SharePoint Groups from the dropdown of the authorized users that are allowed to create tags from the broadcast center dashboard. When the taxonomy store is configured and the SharePoint Groups are left blank, all users will be authorized to create new tags in the taxonomy term store. When the Taxonomy store is enabled for the Broadcast Center, an additional tags column will be displayed on the dashboard and tags can be added to the message. The keywords tags will be displayed on hover over the message tags on the dashboard. The tags column can be used to search for messages with certain keyword tags. During the message creation, users will be able to select available tags to be associated with the message and used for filtering. In addition, authorized users will be able to create new tags when creating a broadcast message. A Broadcast Center Message Type is configured by establishing the roles (author, review, etc.) for the message type in Akumina Flow. Roles can be permissioned based on an individual user, persona, or group during message type creation. An Author role is required (user with permissions to create or delete a flow) and additional optional roles can be defined for Reviewer role (user with permissions to review/approve a stage gate in the flow). Depending on the message type requirements, multiple reviewers/approvers can be assigned, or the message type can be set for automatic approvals without any review required. Broadcast Center Message Types are configured in Akumina Flow Designer Management App. To configure the message type, go to AppManager > Management Apps > Akumina Flow Designer App > Add > Broadcast Message Type. To learn more about Akumina Flow Designer click here. https://community.akumina.com/knowledge-base/working-with-akumina-flow-designer-management-app/ Enter a Broadcast Center Message Type name and click enter. On enter, the modal will expand and prompt you to define the roles required for the message type and the required approval processes. Below is an example of the Add Broadcast Center Message Type modal. Message Types must be Activated in Akumina Flow publish tab to appear in the broadcast center message type dropdown.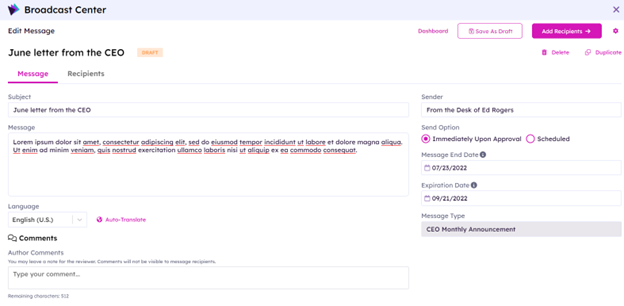

Comments
Pending My Review

Message Delivery Options
Popup Message

Alert Banner

Email
Message Recipients
Broadcast Center Reporting
Status Reporting
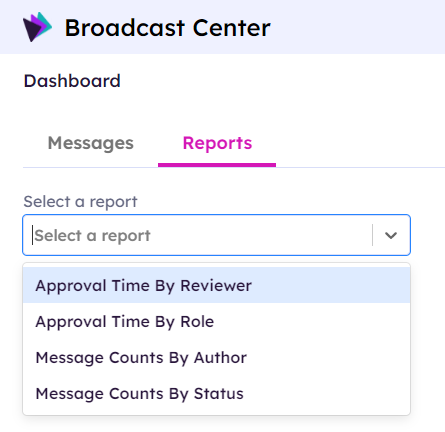
Approval Time by Reviewer
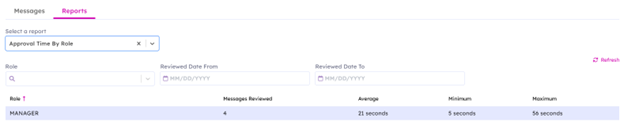
Approval Time by Role
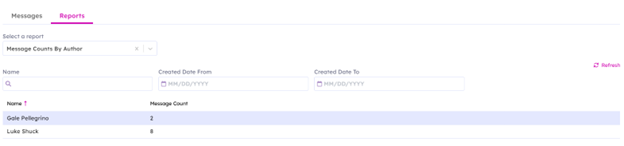
Message Counts by Author
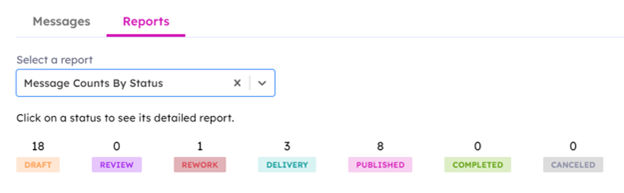
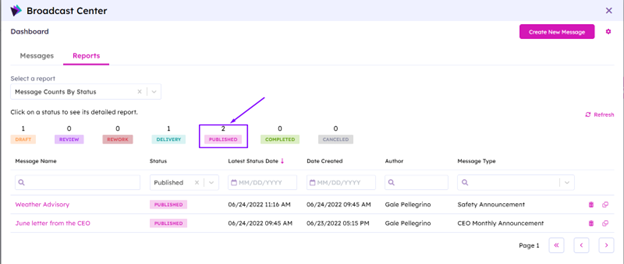
Message Counts by Status
Analytics Reporting
Broadcast Center Settings

Sender Settings
Taxonomy Settings
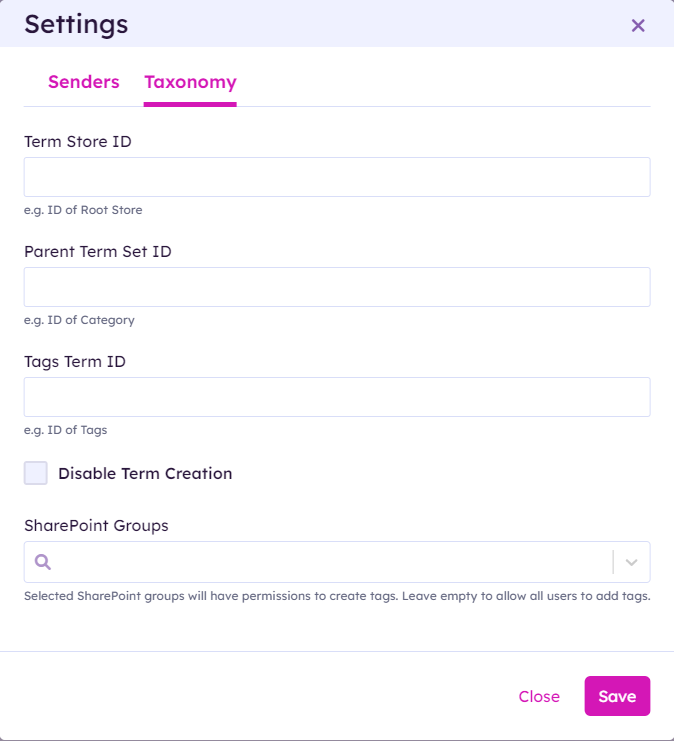
Disabling Tag Creation
Authorized User Groups
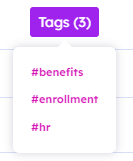
Using Taxonomy Tags in Broadcast Center
Broadcast Center Message Type Configuration