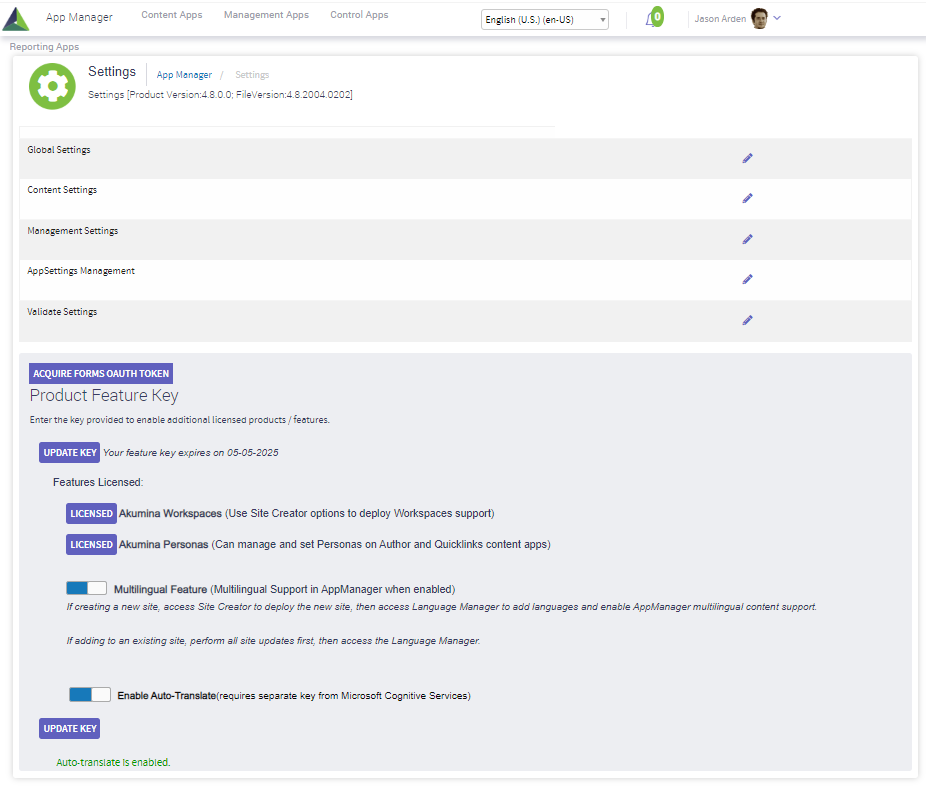
To Access the AppManger “Settings” screen, on the top bar, click on your user profile dropdown menu, and select “Settings.”

It only appears for users who are part of the Administrator Group for the current site. The Settings area consists of six sections:
- Global Settings
- Content Settings
- Management Settings
- AppSettings Management
- Validate Settings
- Product Feature Key
Global Settings
Global Settings are used to configure the AppManager to point to the correct site address, image path, system email, user groups, and other important connections to SharePoint for each site in the Site Collection. Global Settings is for the current site only. Each site in a Site Collection has its own Global Settings.
To view the Global Settings for a Site in AppManager, click the EDIT pencil icon for Global Settings.

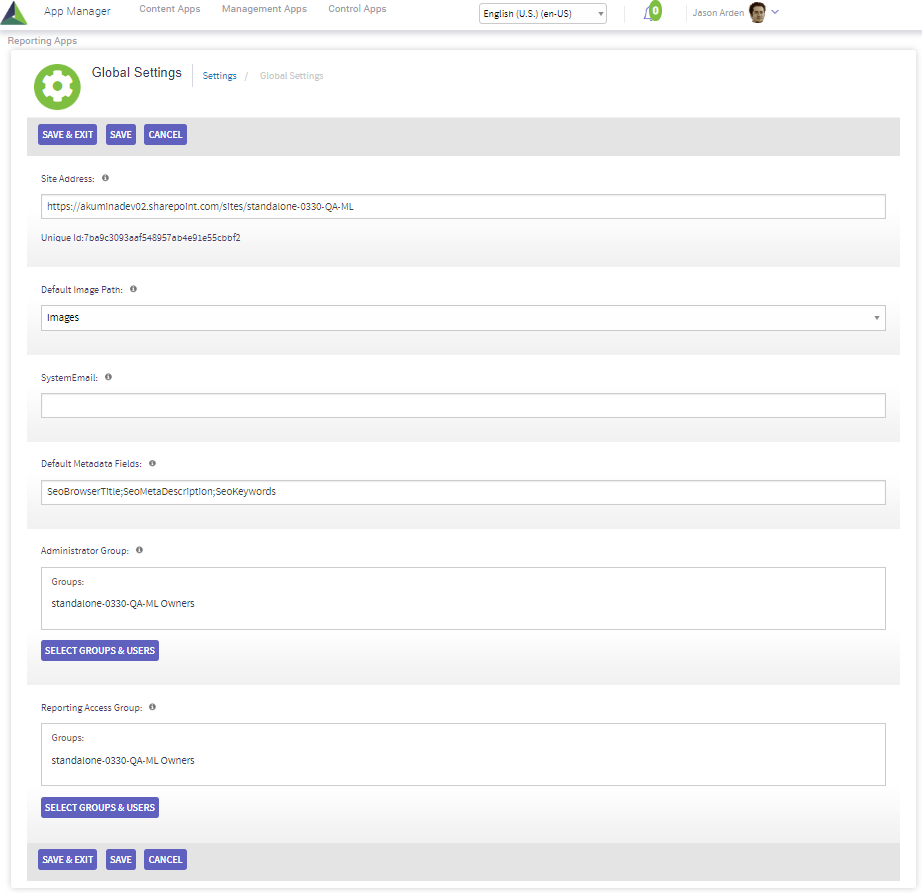
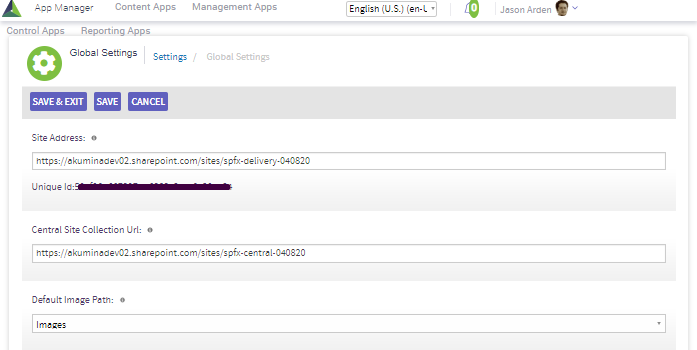
The following table outlines each of the fields on the Global Settings page.
| Field | Details |
|---|---|
| Field | Details |
| Site Address | When using claims authentication (i.e. Office365), this is the URL to the SharePoint site. |
| Central Site Collection Url | When using central/delivery support model, the delivery sites need to specify the URL for the Central SharePoint site. |
| Default Image Path | The name of the default document library used to store images. This can be overridden in each individual Content App as needed. |
| System Email | The email address used to send system emails. This value must be set as core functions such as notifications and commenting. |
| Default Metadata Fields | The fields to be shown in the metadata panel (and thus not in the main editing area) for authoring apps. |
| Administrator Group | If set, these are the groups a user must belong to access administrative functions including the settings area and the Management Apps. This should always be set otherwise any use will be able to access the settings area. More than one group can be selected if necessary as shown. |
| Reporting Access Group | IF USING THE FORMS FUNCTIONALITY, THIS GROUP MUST BE SPECIFIED TO ENABLE THE CREATION OR EDITING OF FORMS. This is also the group a user must be a member of to access the Reporting Apps. More than one group can be selected if necessary. |
Creating/Modifying Content Apps
AppManager Content Apps can easily be created or modified within the AppManager based on an existing SharePoint list or by creating a new SharePoint list as the source for the Content App.
The following section applies to AppManager 4.5 and higher.
The new Content App creation model allows for more than one Content App to be associated with a single SharePoint list. As an example, this could be used to generate two different Content Apps, one of which had access to set the “Start Date” and “End Date” for an article, and another which could only edit the heading and body content. These apps could be assigned to different content editors based on what you wanted each to have access to.
To create a new content app in AppManager, or change the settings for an existing content app, click the EDIT pencil icon for Content Apps on the AppManager Settings page:

A list of the existing Content Apps on the current site will be displayed.
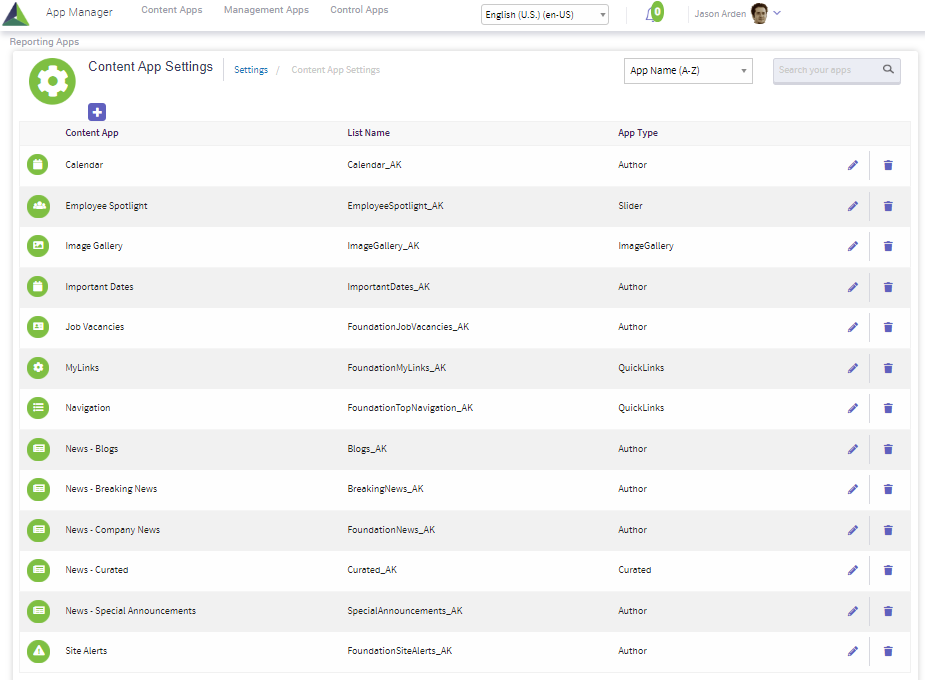
To add a new Content App, click on the “+” button. A modal window will open with the Content App info screen to begin the process.
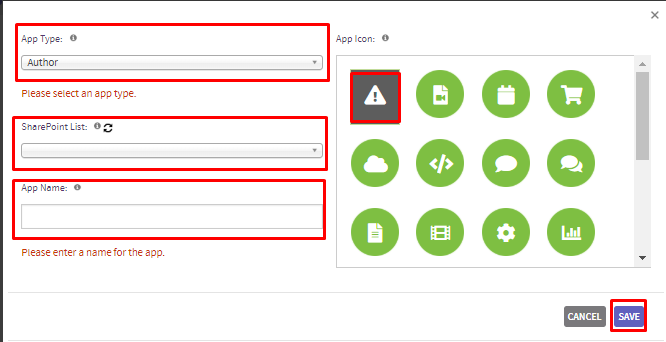
Complete the Content App info screen using the following information:
| Field | Value |
|---|---|
| App Type | There are seven App Types that are currently supported by AppManager:
Author – Basic content type of app File – document upload Slider – multiple “slides” of content (Banner e.g.) Quicklinks – hierarchical tree view of links (Menu e.g.) Image Gallery – Custom app type for managing images SinglePageApplication – Custom app type for future use Curated – Custom app type for managing a curated list of items (news, events, people, etc.) |
| SharePoint list | This is the name of the SharePoint list which has the content to be managed. |
| App Name | This is the title which will display as part of the Content App icon in AppManager. It does not affect the original SharePoint list title. |
| App Icon | Select the icon you want to use for the App. |
Click on the “Save” button and you will be brought to the Content App settings screen for your new app to complete the configuration.
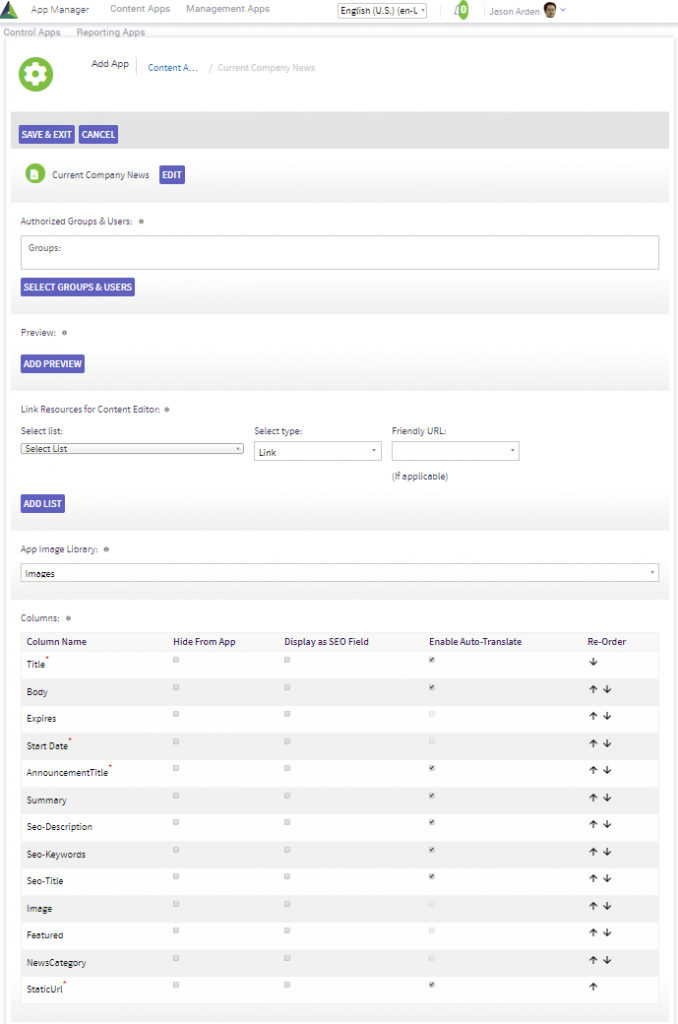
Configure (or update) the settings for your new Content App using the following table as reference:
| Field | Value |
|---|---|
| Authorized Groups & Users | Select one or more SharePoint groups who will have access to this Content App. Click on “Select Groups & Users” to display the list of available groups. |
| Preview | If preview is desired for this app, the pages which will be available are entered here. The Preview Name is what will appear in the preview menu in the Content App. The URL must be the fully qualified URL for the target preview page. Multiple preview pages can be defined. See Enabling Preview for the steps to enable the Preview function. |
| Link resources for content editor | Allows a content editor, using the AppManager rich text editor, to browse a specified set of SharePoint lists/libraries in the current site, select a list item, and have a link to that item be inserted into the current text area. |
| App Image Library | This is the image library which will be displayed if a user chooses to add an image to the content from the content editor. |
| SORT Field | Not shown in the image above. This field displays when configuring a Quicklinks or Slider App Type. Clicking on “Select” will display the list columns so that the column that contains the order to display items (DisplayOrder) can be selected. |
| Columns
|
“Hide from App” allows for the hiding of specified fields in the content app. A list may have fields that are not required for the business user to view.
“Display as SEO Field” defines which fields in the list are associated with SEO data. These fields are then grouped together in and SEO section in the Content App. “Enable Auto Translation” defines which fields in the list are allowed to be auto translated when multilingual is enabled. “Re-order” defines the display order for the content app selected. Allows columns to be moved up/down to change the field order display. |
| Enable auto-translate | If using the multilingual capability in the AppManager (Product Feature Key required), this option enables the auto-translate feature for the application. |
| Enable Created by Filter | Turning this on will cause the content listing for the Content App to only display items created by the current logged in user. Regardless of the filtering they choose on the listing page, the results will always be from the set they created. |
| Enable Title Uniqueness Check | This option (normally on) will enforce the title of each content item added in the app to be unique. Since there are circumstances where the title field DOES NOT have to be unique (as can be set in the SharePoint list), setting this to “Off” disables the check in AppManager and allows for duplicate item titles. |
| Enable Personas for this app | Turning this on enables the persona feature to be set for access control based on personas. |
| Enable Comments for this app | Turning this on enables the commenting feature which allows those with access to the Content App to add comments to an item. |
| Hide “Add New” | This option is only available for the Author App Type. Turning this on hides the “Add New” button from the Content App content list, preventing any new content from being created (existing content can still be edited). This is typically used for the Content Block application where only one content item is mapped to the Content Block, so creating a new one without changing the content block control would have no effect. |
| Hide “Delete” | Turning this “ON” hides the “Delete” button from the current app. This is the default setting when creating a new content app of type Author, Slider or File. Turning to “OFF” will display the delete button in the app. |
| Enable Permissions Setting for this app | Turning this on allows read/edit permissions to be set for this app. |
| Enable Content Distribution for this app | Turning this on allows user to push content from portal to market in the app. |
Click SAVE & EXIT when complete.
You will be returned to the Content Apps list with your new app added.
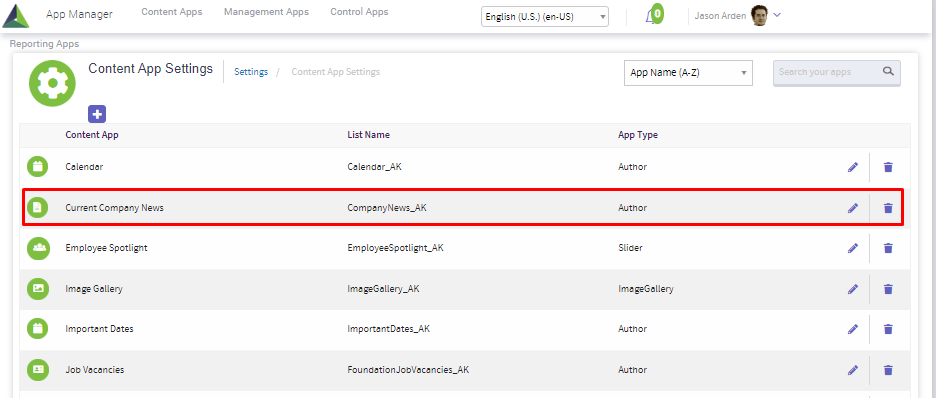
At any time, you may click on the “Edit” pencil icon for the Content App to access and update the settings.
You may also use the “Remove” trash can icon to remove an app.
Enabling Preview for a Content App
Preview allows the business user to make and view changes to content in AppManager without making them visible to site visitors who are not authorized to view draft content (SharePoint permission level).
To enable Preview mode for a Content App, use the following steps:
In SharePoint, enable Versioning for the SharePoint list connected to the target Content App. Note that both “Require content approval…” and “Create a version each time…” must be enabled.

In AppManager, navigate to the Content Setting screen for the target Content App. In the “Preview” section, add at least one site page on which the preview should be viewed (you can add multiple pages if desired using the Add Preview button). This page will appear with the new content to be previewed. The link should be the FULL URL to desired page.

- From within the target AppManager Content App, the “Preview” and “Save” buttons will now be active.
Adding the preview link for dynamic content (content that uses the Friendly URL) is slightly different. The preview URL which is used for this type of content should be formatted as follows:
https://{SharePoint Site Collection or sitsubsite URL}/SITE Navigation TERM/{Title}
Example:
https://akuminade.sharepoint.com/sites/akqa23onakuminacom41ICD0223/CompanyNews/{Title}
When a content author makes a change, they can Save the content and then click on the Preview button (if they forget to save and just hit Preview, they will be prompted to save first).

This will launch the preview page defined in the content app settings in a new window and display the updated version of the content. The updated version, however, will not be visible to users who cannot view draft content until the user publishes the content. In this way, they can make multiple edits/saves and continue to preview the content until it is finalized
Enabling/Modifying Management Apps
AppManager Management Apps can be easily enabled within the AppManager using the Management Apps Settings. A set of Management Apps is provisioned as part of the AppManager by default. Any of these apps can be removed if not needed, or additional instances of them can be created. In addition, new Management App types can be added by developers to manage specific functions of the target web site. In any case, the process for enabling a new Management App in the Settings area is the same.
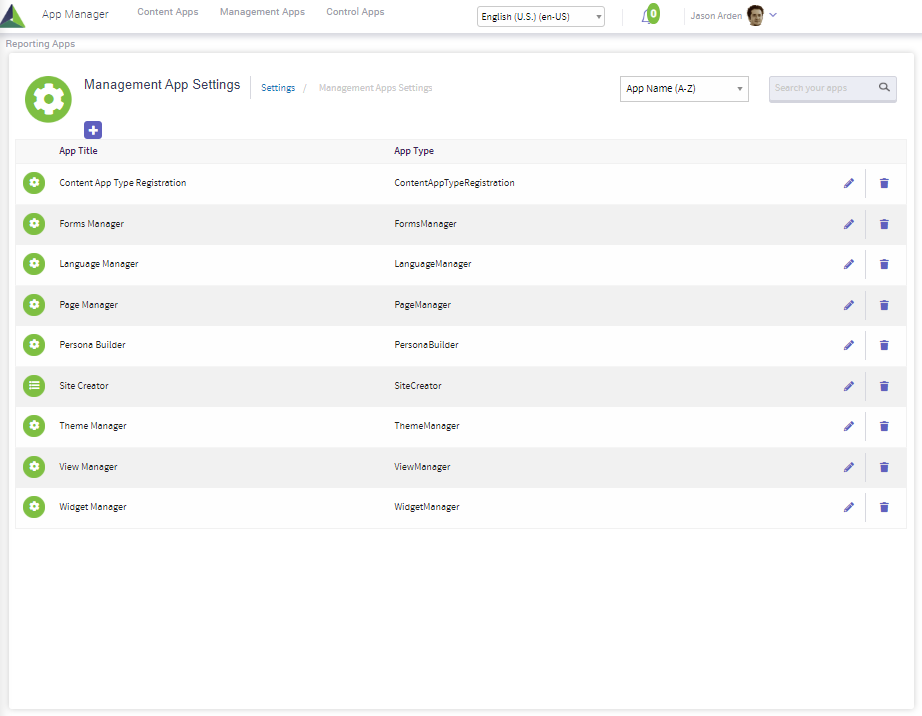
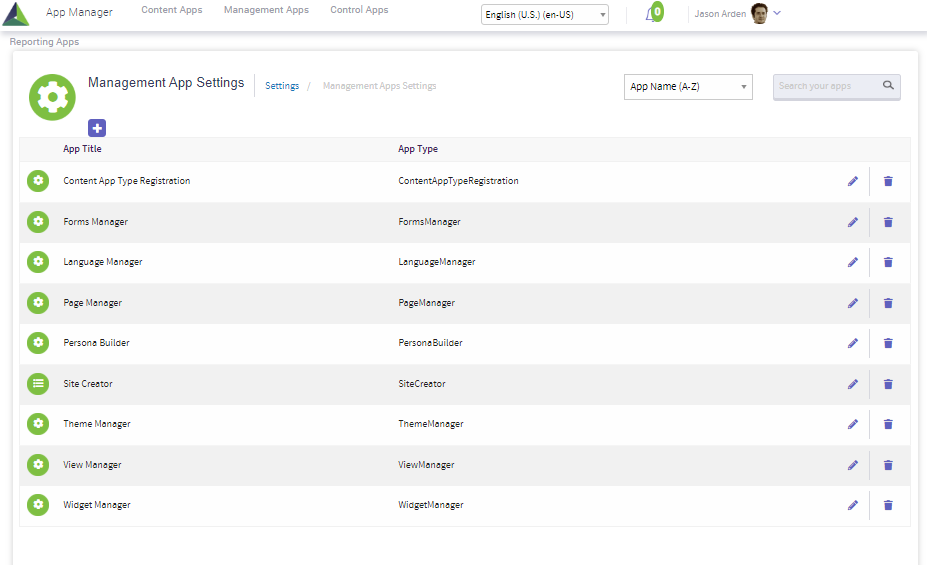
To enable a new management app in AppManager, or to change the settings for an existing management app, click the EDIT pencil icon on Management Settings:
![]()
A list of the existing Management App Settings will be displayed
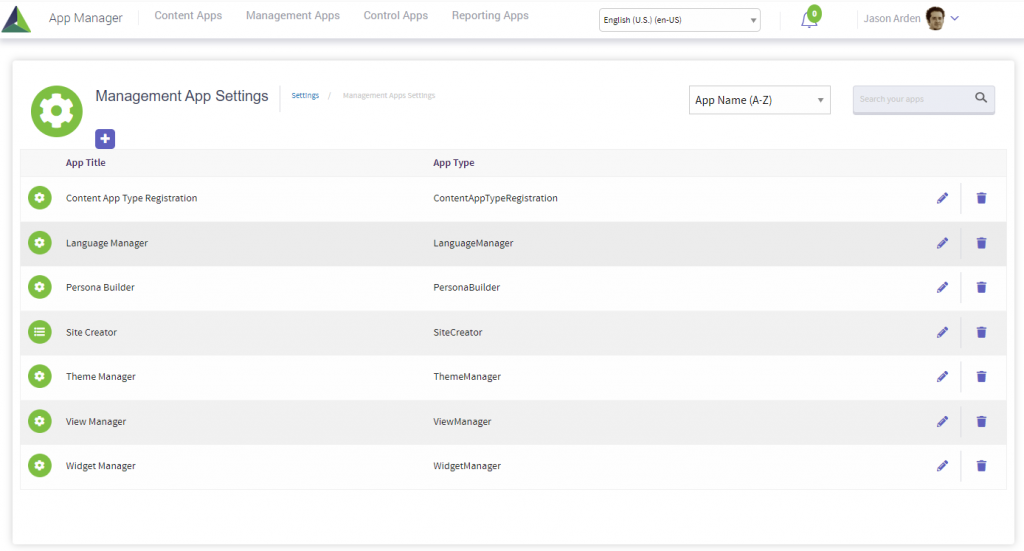
For sites using the AppManager Central/Delivery support model, a list of the existing Management App Settings located in Central:
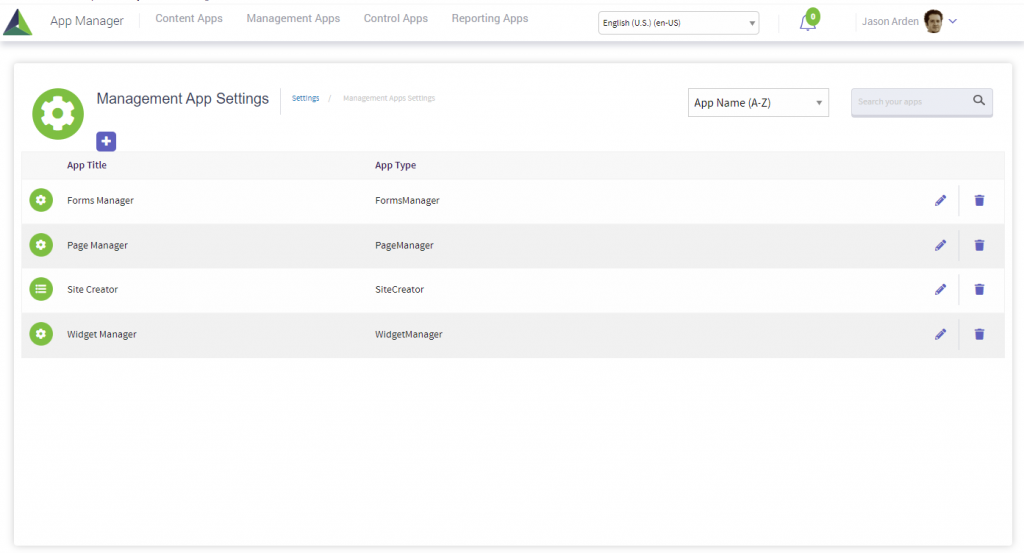
For sites using the AppManager Central/Delivery support model, a list of the existing Management App Settings located in Delivery:
To add a new Management App, click on the “+” button. A modal window will open to begin the add process.
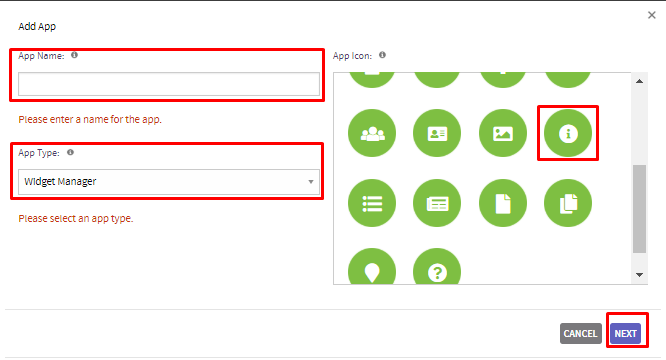
Enter a name for the management app, choose the appropriate App Type (explained in Section 2.3.2) and lastly choose an icon.
Click on the “NEXT” button and the new app will be added to the list of available Management Apps. (Management Apps are listed in alphabetical order).
To edit the properties of the new app, or any of the existing management apps, click on the Edit pencil icon the app. The properties editor modal for the management app settings is displayed.
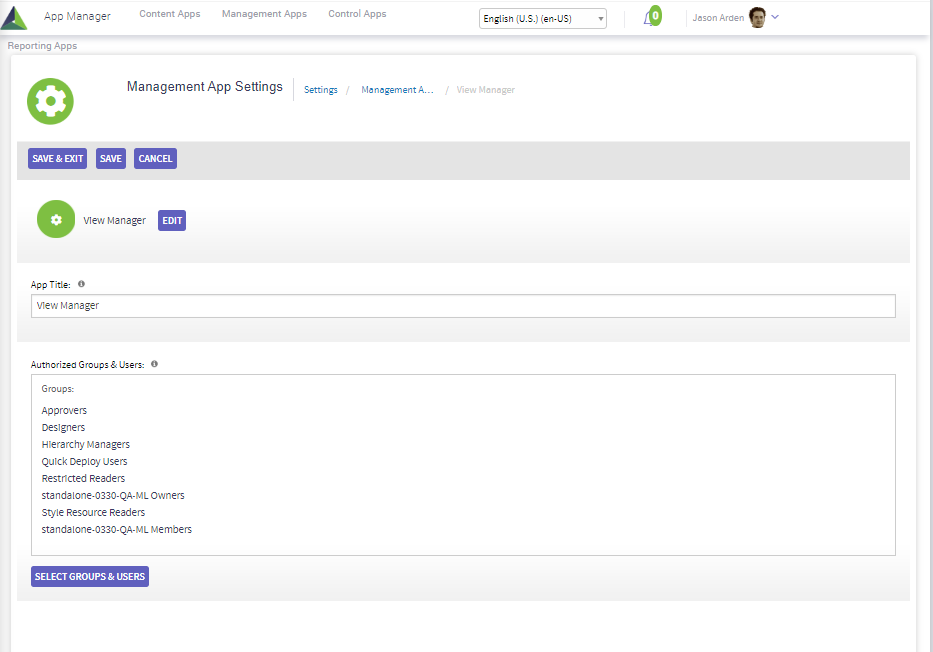
Configure (or update) the settings for the management app using the following table as reference:
| Field | Value |
|---|---|
| App Title: | This is the title which will display as part of the Content App icon in AppManager. It does not affect the original SharePoint list title. |
| Authorized Groups & Users | Select one or more SharePoint groups who will have access to this Content App. Click on “Select Groups & Users” to display the list of available groups. |
| App Icon | Click on “Select Icon” to view a library of icon images. |
In addition to the settings, a convenience link is provided at the top of the screen to edit the original definition modal for the management app if the App Type needs to be updated.

A Management App can also be removed by clicking on its “Remove” trash can icon on the Management App Settings listing screen.
Management App Types
The following is an overview of the Management App types available by default in the AppManager:
| App Type | Description |
|---|---|
| Content App Type Registration | Enables the ability to add a new custom Content App Type created by a developer. |
| Forms Manager | Used to create/edit form definitions and view form submissions if forms is enabled in the application. |
| Language Manager | Used to enable multilingual languages for the site and set the fallback language. Active only when enabled for multilingual content mode in AppManager. |
| Page Manager | Used to manage page cache for a site. |
| Persona Builder | Used to create/edit personas to be used on the site to group users based on AD attributes or another data source, people sync updates required as this grouping happens in the background automatically for quick retrieval on the front end. Also provides ability to Edit Schema with the directory source being used. |
| Site Creator | Used to create new sites, update the properties of existing sites, upgrade sites to new releases of the Akumina Platform and Framework. For detailed example of how to use Site Creator, reference Section 5 of the “Digital Workplace Installation and Configuration Guide”. |
| Theme Manager | Used to establish and change the front end sites theme and displayed logo to provide custom branding for the site. Theme Manager provides the ability within the appmanager site to select/edit an existing color theme, create a custom color theme, and select/edit the site logo. |
| View Manager | Used by designers to access the View Templates that are available in the system and used conjunction with the Akumina Widgets on the site. Allows for the modification of existing views, as well as adding new views quickly and easily without having to access SharePoint. |
| Widget Manager | Used by developers to add new widget types and define their properties. Used by Designers to map new views (added in View Manager) as available views in their targeted widgets. Used by Admins and Business Users to create instances of the widgets to be added to the site, including setting their properties and views. |
Validate Settings
![]()
- Please refer to AppManager Tool for Evaluating Configuration
Product Feature Key
The Product Feature Key is used to enable additional functionality to be supported by the Akumina AppManager and the Akumina Framework. Additional licensed functionality includes:
- Support for Akumina Workspaces
- Support for Multilingual Content
- Support for Personas
The Product Feature Key is a single license key provided by Akumina which can contain one or more Akumina features. The license key “Update Key” option is provided to renew your key or add additional features to your existing license. For your convenience the expiration date of the current key is displayed.
The listing will look as follows if all are enabled:
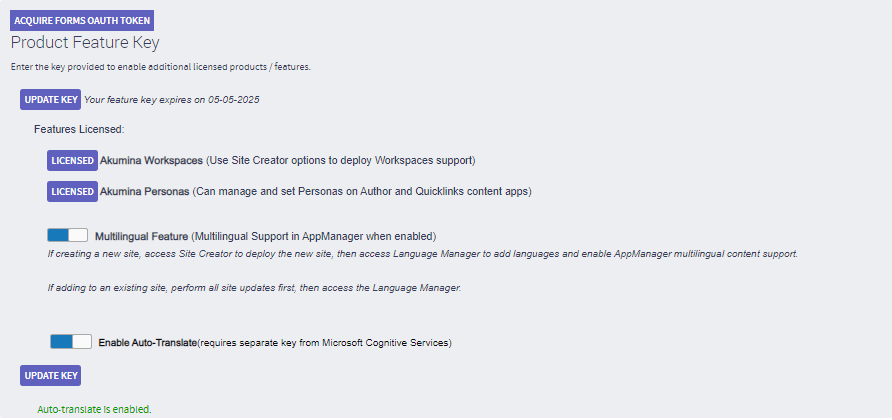
The Akumina Workspaces appears as a single line item which is enabled when licensed. Using the Site Creator, sites can be deployed with or without the Akumina Workspaces functionality when this is enabled.
For Multilingual, the feature will appear in the “Off” mode when it is detected in the license key. This allows you to deploy a new site with Multilingual turned off even if you have the license. When Multilingual is turned on, you will also see the “Enable Auto-Translate” functionality switch. See the Using Multilingual section for more information.