Creating an App Identifier for AppManager
A Client Identity and Client Secret must be created for the new incoming APP – AppManager. AppRegNew.aspx will be used to generate those items.
- Login as Administrator onto your SharePoint Admin Center.
- Click On apps in left column.

- Click on App Catalog.

- Navigate to http://<SharePointAppCatalogURL>/_layouts/15/AppRegNew.aspx.
- The App Information page will be displayed, where input field to create the Client Identity will be displayed:
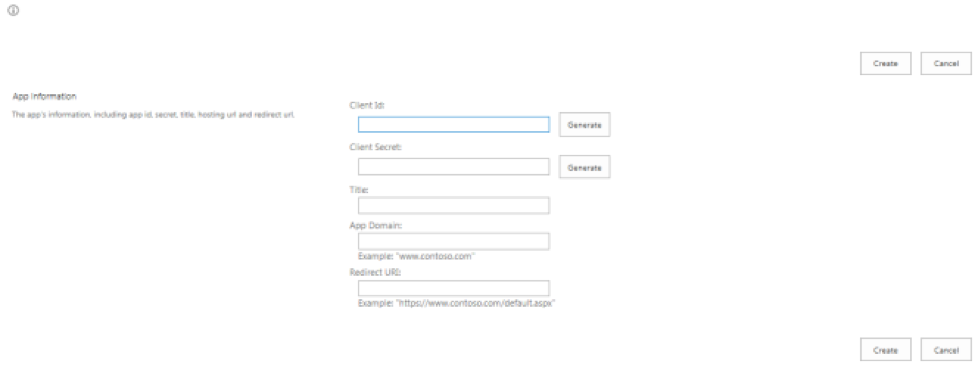
Set the following fields:
- Client Id: – Click the Generate button and SharePoint will generate the Client ID.
- Client Secret– Click the Generate button and SharePoint will generate the Client Secret.
In the example below the redirect for the appmanager website is: https://myappmanager.onakumina.com. The domain is the redirect without the https example: myappmanager.onakumina.com
- TITLE – Is usually the domain of your AppManager plus a client secret expiration date (one year from the generation of this secret, which is what we are doing right now). The “TITLE” is the app title seen in “Site Settings” > “Site app permissions”. Example:
myappmanager.onakumina.comExp071720 - App Domain – Domain example:
myappmanager.onakumina.com - Redirect URI – The endpoint in your remote application “AppManager” (website). This must be of the form https://DomainName. Example:
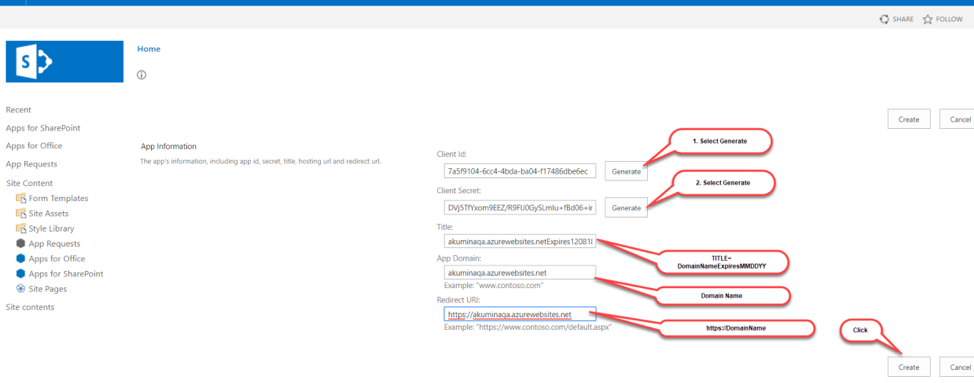
Click the “Create” Button
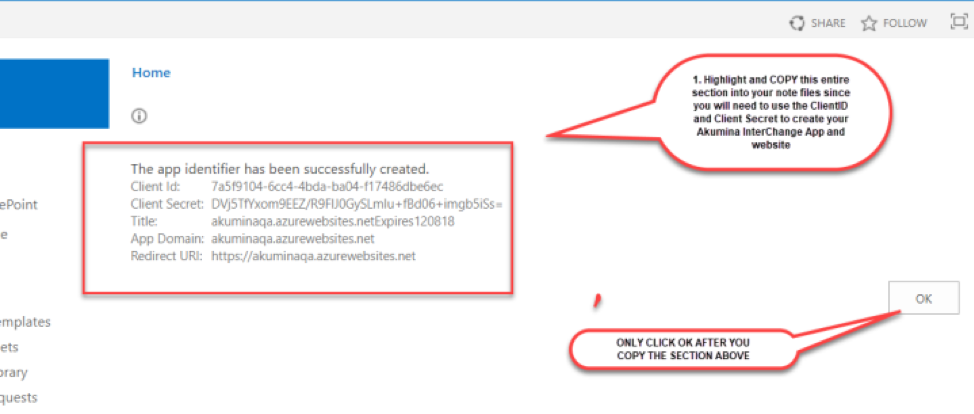
- Verify that the Identifier was generated successfully.
- Click on OK button
Acquiring the AppManager App Package
Contact Akumina at support@akumina.com or call 603-943-7109 to acquire the AppManager App Package.
When the app package has been received, create a folder on your local machine called C:\Akumina. Copy the provided package to C:\Akumina.
Setting up the AppManager Website
This document assumes that your cloud hosting administrator has created your website for AppManager to be installed on. In the example below we have verified that www.akuminaqa.azurewebsites.net has been created and that we have FTP access to the site, required for installing AppManager.
Setting Your SharePoint URL, Client ID and Client Secret
- On your local machine navigate to C:\Akumina, where you previously copied the App Package provided by Akumina.
- You should see the following zips, installer (msi) and app files:
Note: Version numbers before each *.* name will be different as this data will be based upon when your package was generated

Extracting the Cloud Base AppManager Solution
- Right click on “*InterChange.zip” file and from the dropdown menu select Expand
- The Extract Compressed (Zipped) Folders popup will appear

Click on Extract
You will see the AppManager Installation files and folders
