Working with Experience Builder (X-Builder)
As part of release 4.5, the Akumina Page Builder functionality has been significantly enhanced to create Experience Builder (X-Builder), the next generation technology. X-Builder allows for maximum flexibility to define pages, page layouts and page types based on a desired user experience using the new Virtual Experience Canvas (VXC) page editor component.
The Akumina tray has been enhanced to provide tool tips with the tray buttons and includes a new edit page content button on the right of the screen to invoke the Experience Builder VXC trays.
The Akumina tray for VXC has been enhanced to include two trays; a bottom tray and a right panel tray. The VXC bottom tray provides functionality to customize the page layout by specific cells. The VXC right panel tray enables page edit mode to allow for update, publish and save functionality of the page. (Note: permissions can be set on the various tray buttons to limit control of users.)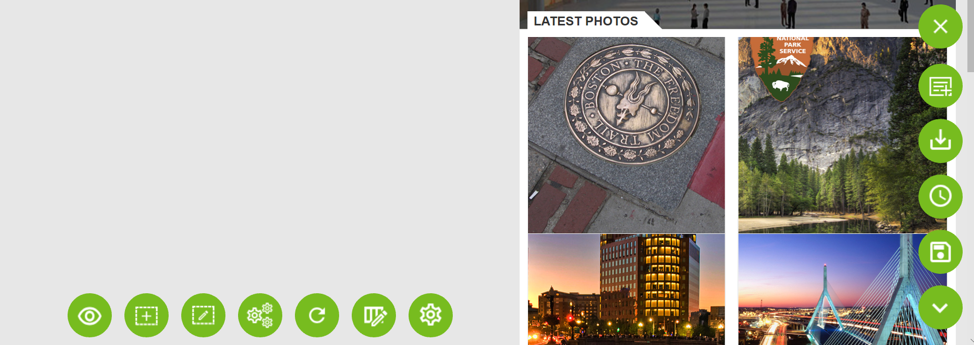
The VXC bottom tray button description are as follows:
|
Button |
Description |
|---|---|
|
|
Preview page: preview the newly created page before publishing |
|
|
Add row: add a new row to the page layout |
|
|
Toggle row editing: select a specified row layout |
|
|
Toggle widget editing: select widgets to be added in the specified cell on the page |
|
|
Reset edit mode: reset multiple edit buttons with one button click |
|
|
Set widget restriction: configure the type of widget instances allowed in the cell (Note: only one widget type can be restricted per column, although multiple instances of that widget type can be used in the column.) |
|
|
Change grid: change the page container layout. This button will only appear when widgets have not been selected on the page |
|
|
Page properties: change the defined page properties (details, permissions, metadata, and personas) |
Note: The VXC bottom tray button color will change to purple when selected.
The VXC right panel tray button description are as follows:
|
Button |
Description |
|---|---|
|
|
Exit edit page: exits page editing mode, closes VXC trays and displays page |
|
|
Add to menu: adds the new friendly URL page name to menu |
|
|
Save layout: allows authorize user to save new page layout and will be available in “Saved layouts” for future use |
|
|
Schedule publish: select date and time when the new page will be published |
|
|
Save page: save the page for additional editing prior to being published |
|
|
Show page actions: makes the right panel tray visible |
For the latest tray functions, please reference Understanding Akumina Tray Functions
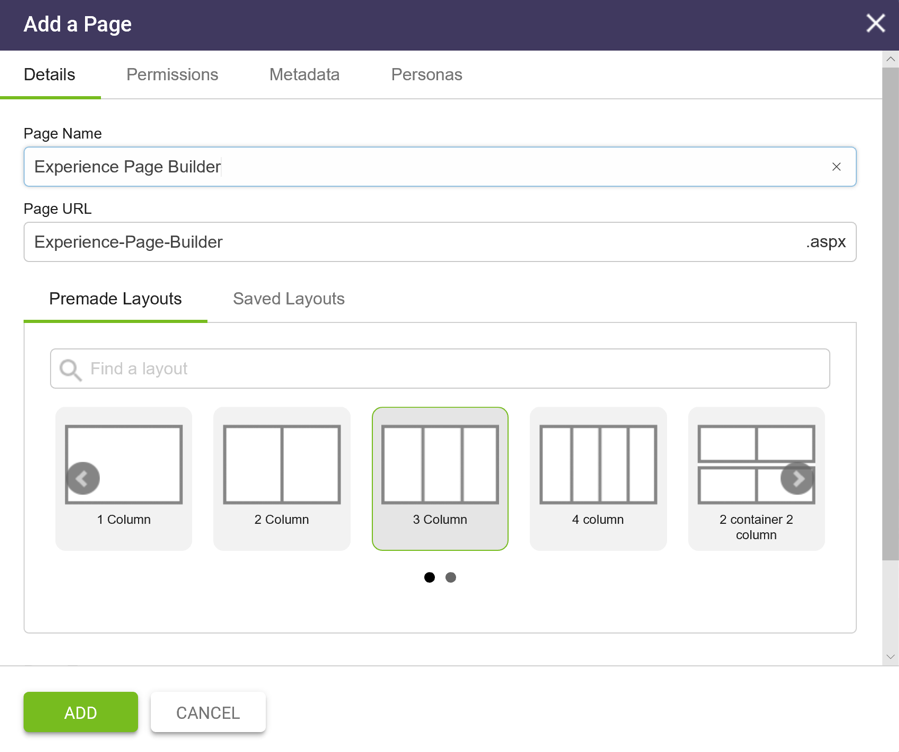
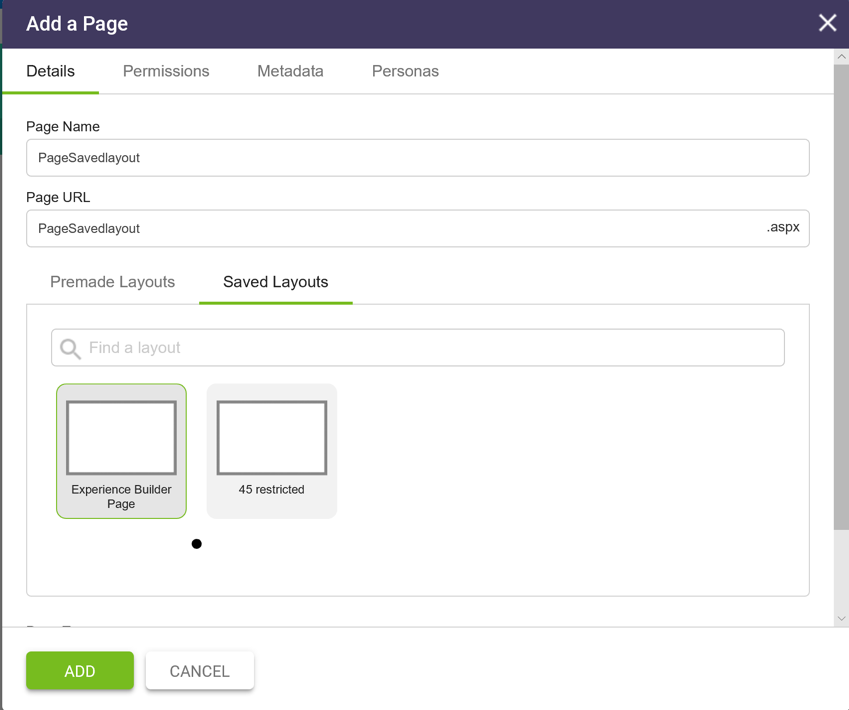
Add a Page: Details
Clicking on the ![]() X-Builder from the Akumina bottom tray creates a new page with personalized and targeted experiences. A new popup window, “Add a Page” will be displayed. The page properties are defined using the tabs at the top of the page for Details, Permissions, Metadata and Personas; then click the
X-Builder from the Akumina bottom tray creates a new page with personalized and targeted experiences. A new popup window, “Add a Page” will be displayed. The page properties are defined using the tabs at the top of the page for Details, Permissions, Metadata and Personas; then click the ![]() button to create a new page.
button to create a new page.
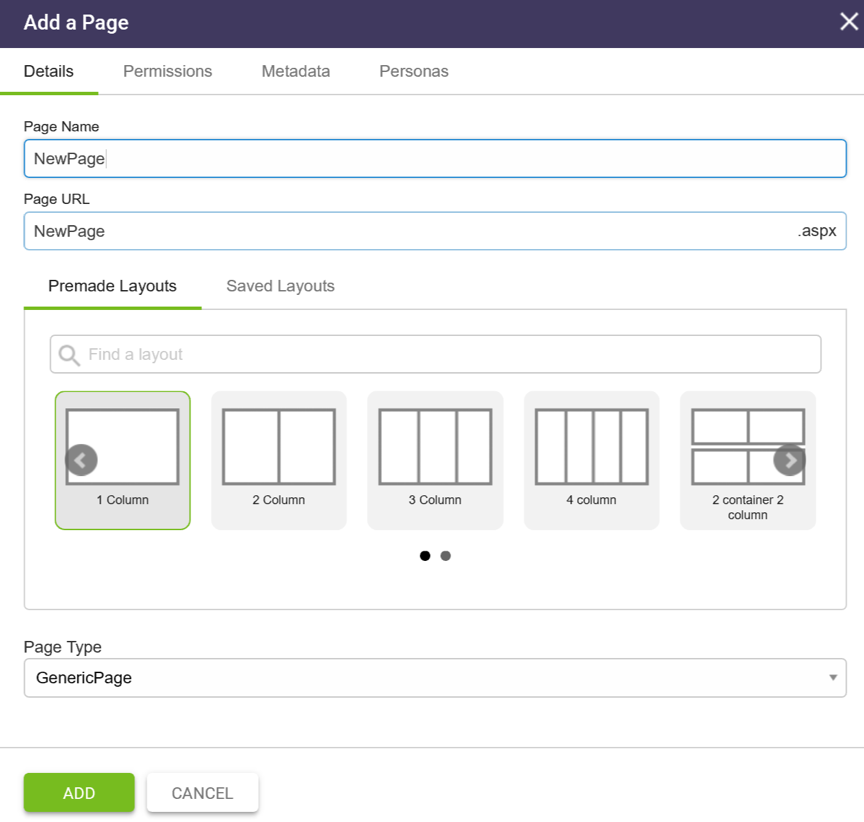
On the Details tab, enter a new page name and the system creates an associated Friendly URL. The Friendly URL name can be overridden if desired. (Note: specialized characters used in the Friendly URL page name will be defaulted to a dash (-) when creating the Friendly URL page). Select a page layout from Premade Layouts or Saved Layouts. See Create a Saved Layout section for details on how an authorized user creates a customized saved layout.
Add a Page: Permissions
The Permissions tab defines the Groups & Users authorized to view/edit the page. The page permissions can be established by selecting “Inherit from website” to use the website permissions or by selecting “Unique permissions”. Selecting unique permissions allows the page permissions to be modified for the Groups & Users able to view/edit the page by clicking on the radio buttons. The default for a new page is to “Inherit from website.”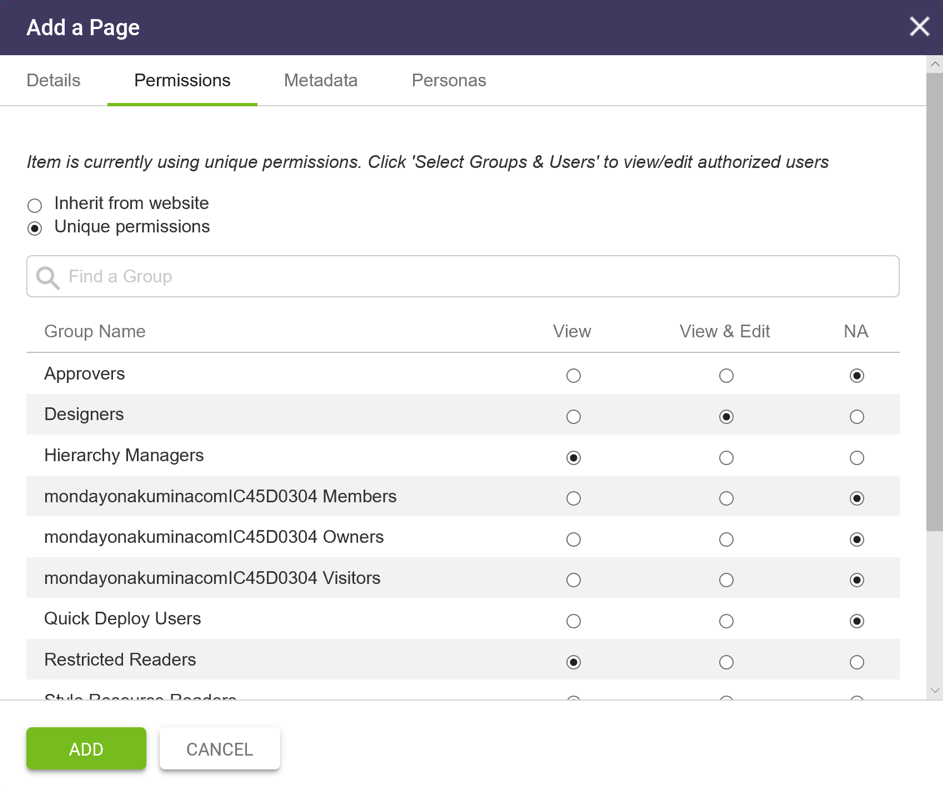
Add a Page: Metadata
The Metadata tab allows the metadata content to be tagged which may show up on the page; or used when querying multiple pages. Metadata content selected for the page is displayed on the right-hand column of the screen. A new page defaults to allow all content on the new page.
Add a Page: Personas
The Personas tab defines the Personas allowed to view the page when navigating directly to that page; or if the page appears in a Page Listing control, the control will only show the pages based on the personas that the user is associated with. By default, if you do not select a persona when adding a new page, every employee will be able to view the page.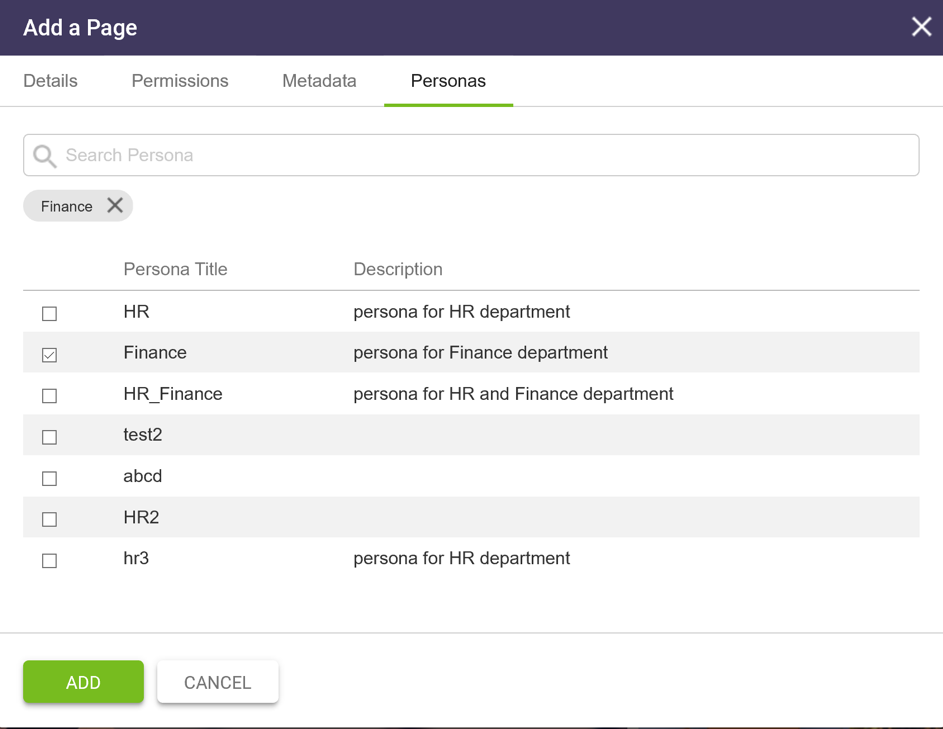
After clicking the ![]() button, a new browser window is displayed with the new friendly URL page with the Virtual Experience Canvas (VXC) bottom tray to allow for customization of the rows and columns on the page (defined as cells); define the widgets within a page layout and restrict cells to specified widget instances; and filter content by permissions or personas.
button, a new browser window is displayed with the new friendly URL page with the Virtual Experience Canvas (VXC) bottom tray to allow for customization of the rows and columns on the page (defined as cells); define the widgets within a page layout and restrict cells to specified widget instances; and filter content by permissions or personas.
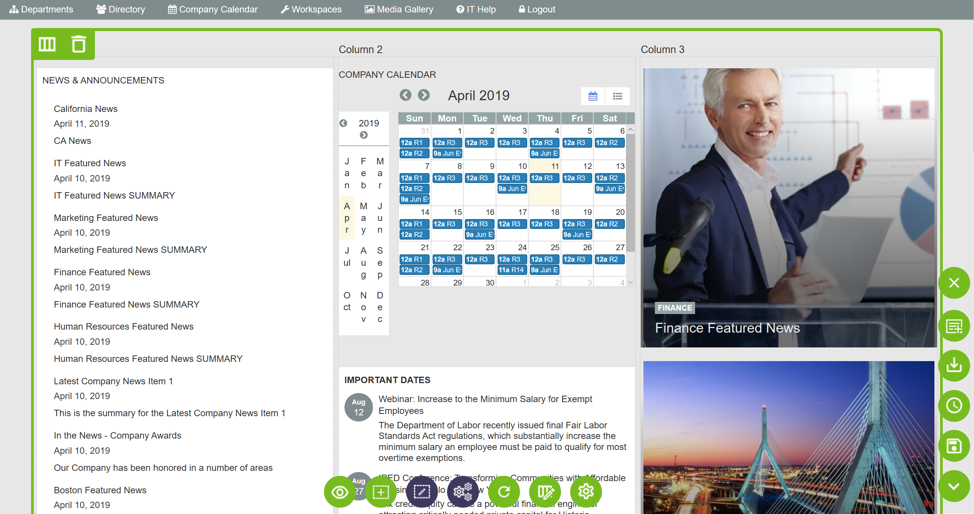
Creating a New Page Experience
In the below example, a new page experience has been created with three columns and one row. The existing page layout can easily be modified using the VXC bottom tray to create a new experience.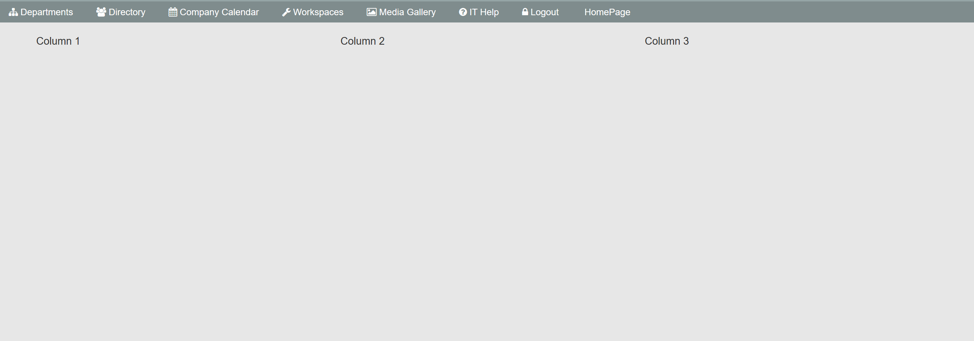
By selecting ![]() add row, additional rows will be added to the new page layout.
add row, additional rows will be added to the new page layout.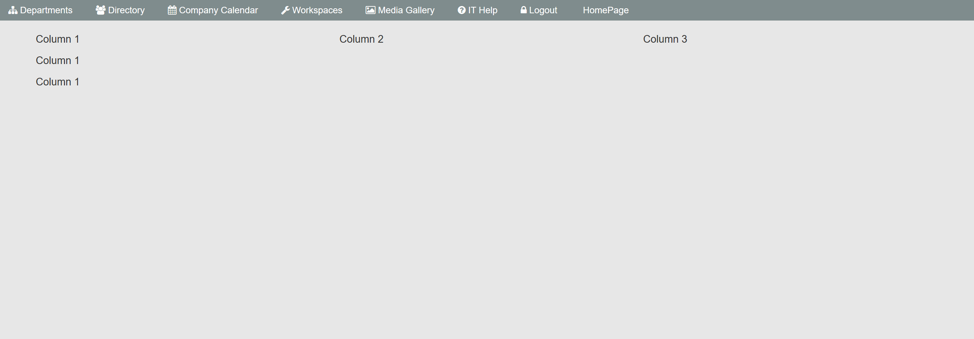
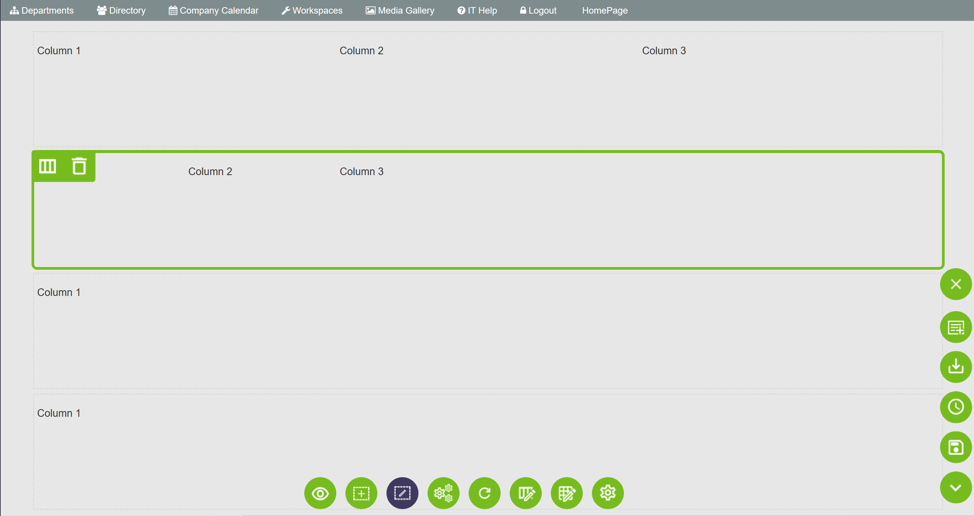
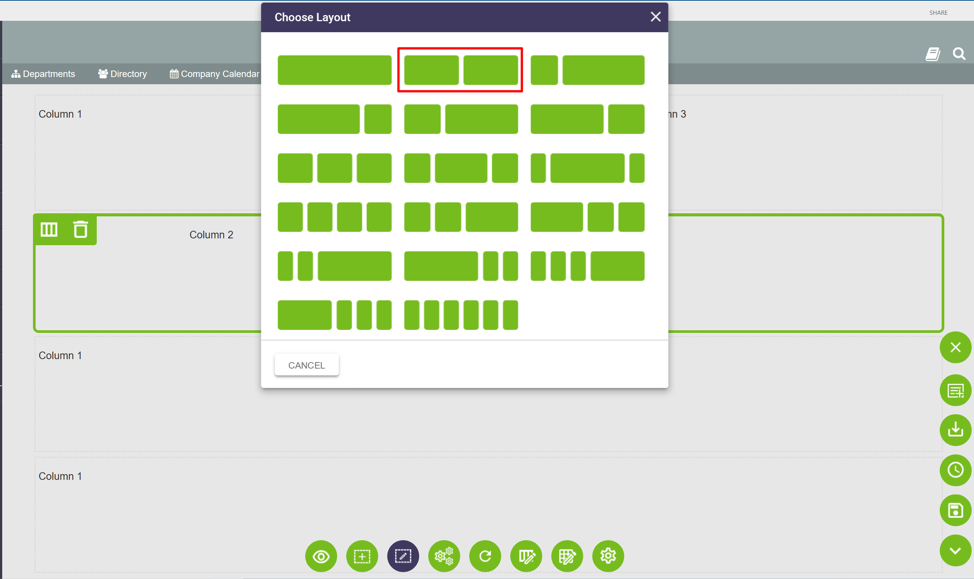
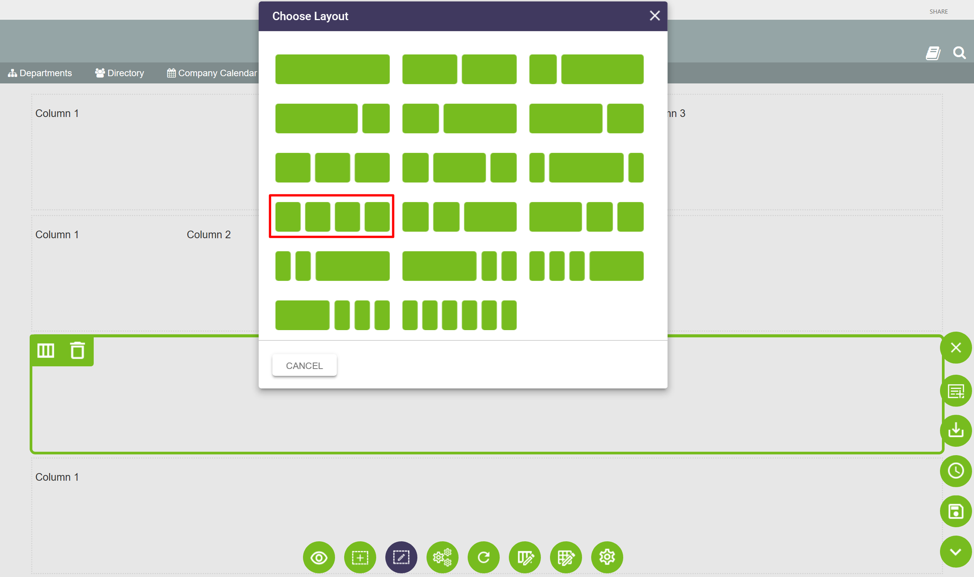
To modify the row layout or delete a row, select ![]() toggle row editing from the VXC tray. The page layout can be modified for each row by clicking on a row, selecting
toggle row editing from the VXC tray. The page layout can be modified for each row by clicking on a row, selecting ![]() choose layout, and selecting the desired column layout for the row. To delete an entire row, select the row and click
choose layout, and selecting the desired column layout for the row. To delete an entire row, select the row and click ![]() delete.
delete.
Choosing a Page Layout
In the below examples, the page layout has been modified to change the layout of the second row from a three column layout to a two column layout. And change the third row from a one column layout to a four column layout.
Now the initial page layout has been defined, widgets can be added to the page, or the page layout can be further modified by repeating the steps above. 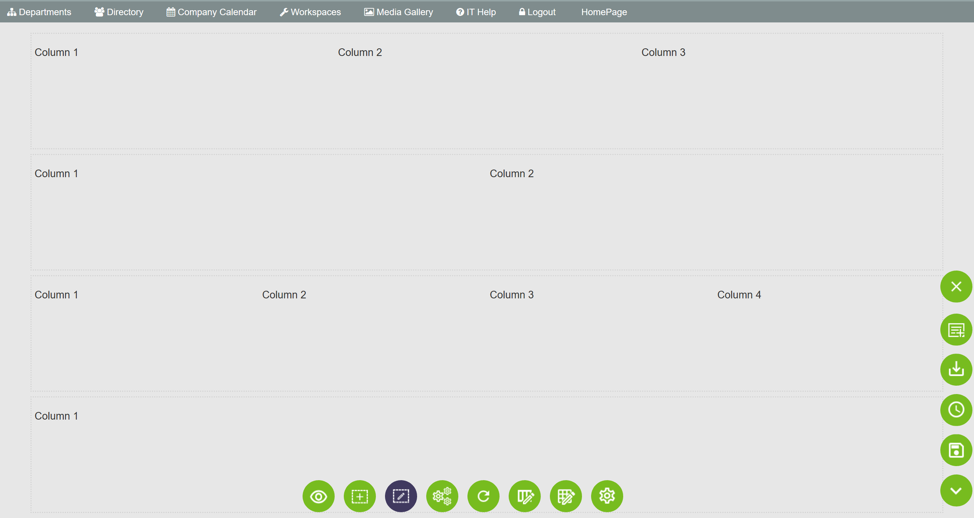
Adding Widgets to the Page
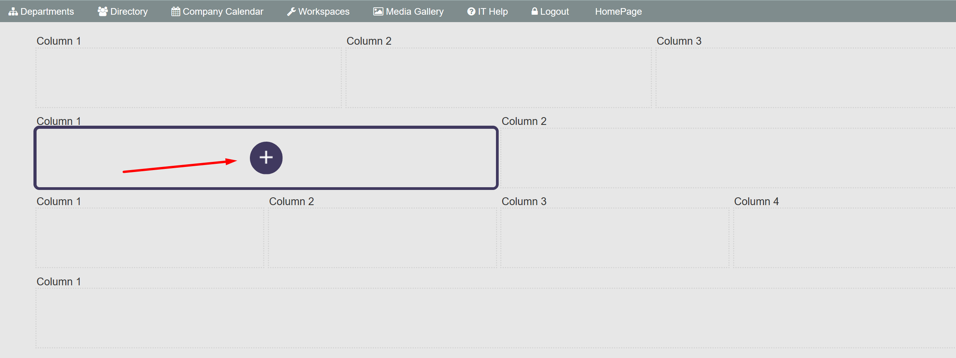
To add widgets to the page layout, select ![]() toggle widget editing from the VXC tray. To add widgets to the page, select a cell
toggle widget editing from the VXC tray. To add widgets to the page, select a cell ![]() on the page to update.
on the page to update.
To edit an entire row, select both![]() toggle widget editing and
toggle widget editing and![]() toggle row editing from the VXC tray. To add widgets to the row, select a cell
toggle row editing from the VXC tray. To add widgets to the row, select a cell ![]() in the row to update. With toggle row editing on, the row layout can be modified; or the entire row can be deleted.
in the row to update. With toggle row editing on, the row layout can be modified; or the entire row can be deleted.
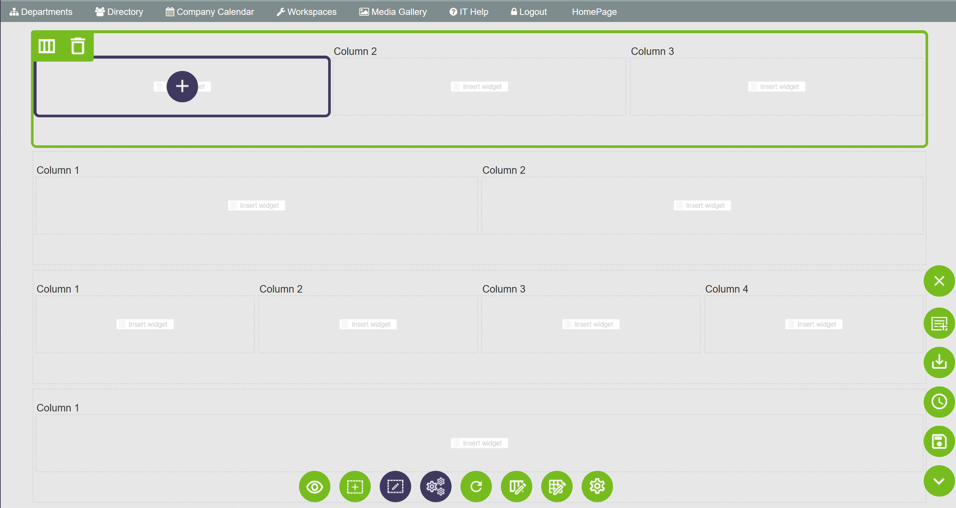
When a cell is selected  , a pop up window “Add a Widget” will be displayed to choose a widget instance or a new instance for the cell.
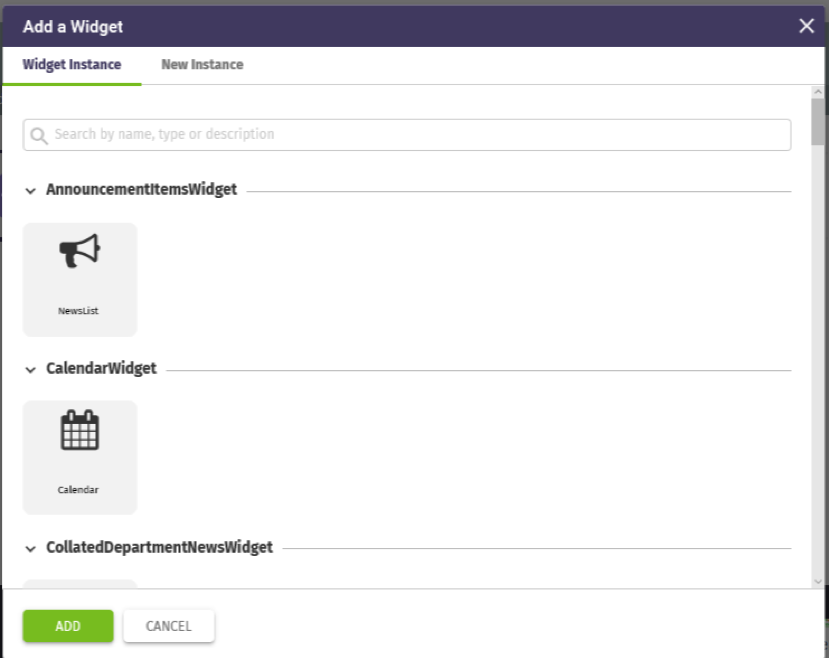
To add a widget instance, select the widget name from the list or locate using the search bar to find the widget instance.
After clicking the ![]() button, the widget will be displayed in the cell on the page. If there are multiple widget instances in the cell, the added widget will be appended to the end of widgets already in the cell.
button, the widget will be displayed in the cell on the page. If there are multiple widget instances in the cell, the added widget will be appended to the end of widgets already in the cell.
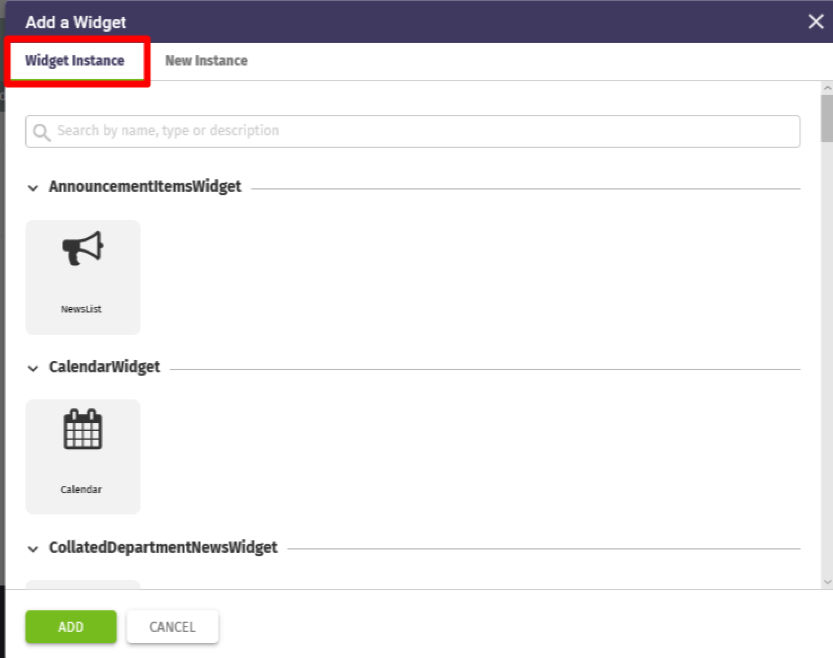
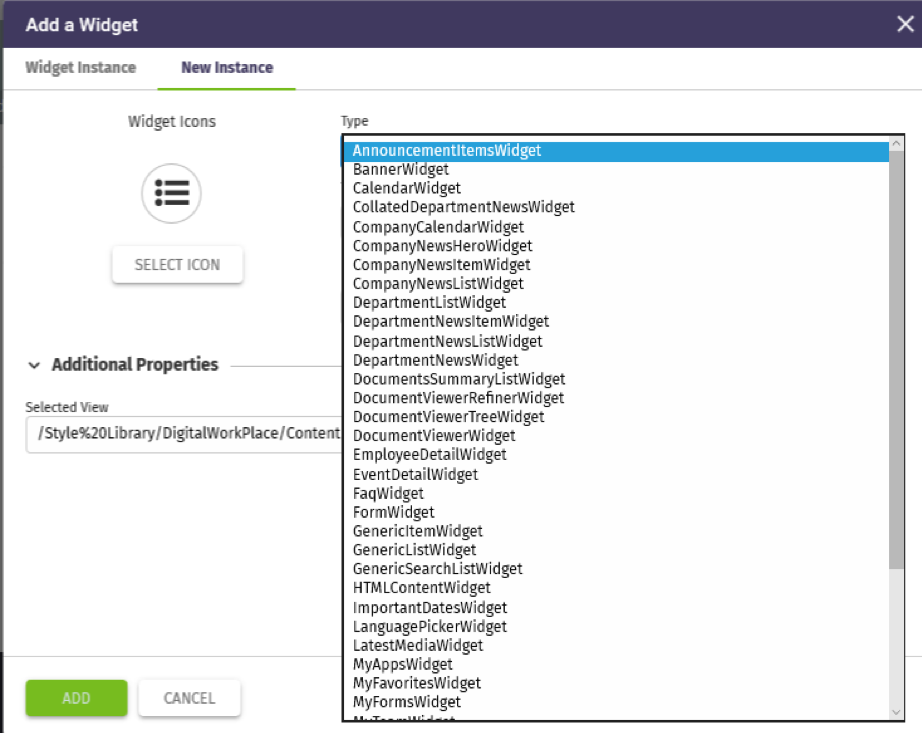
To add an instance of an existing widget on the page, select the new instance tab in add a widget.
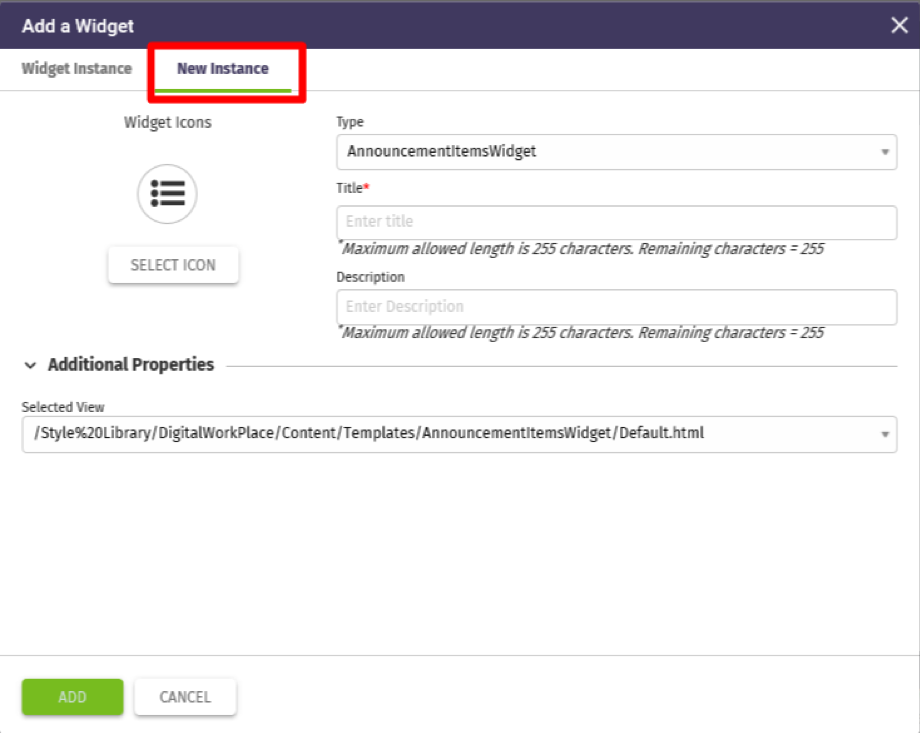
Select the widget instance type from the drop down list, as shown below.
Enter a title (required), description (optional), and select an icon for the new widget instance.
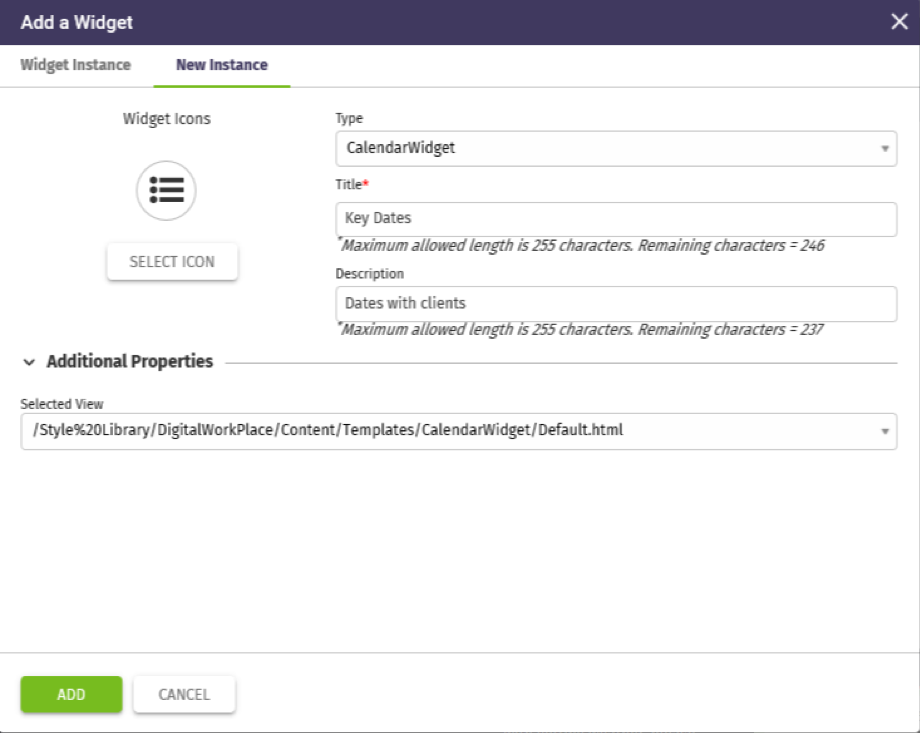
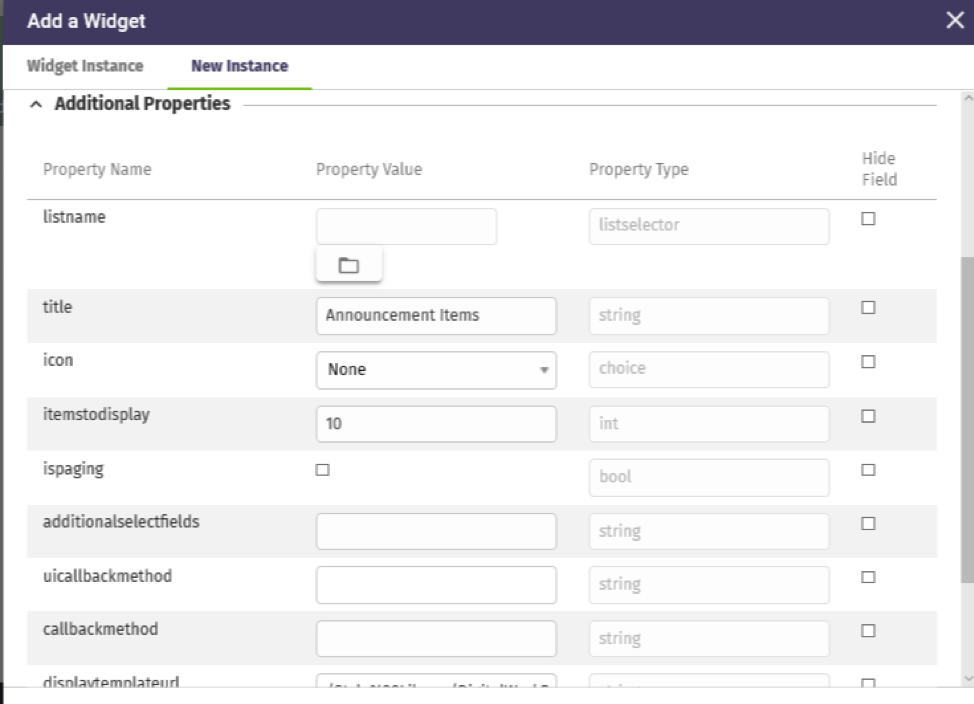
Additional properties must be defined for the new widget instance to render on the page.
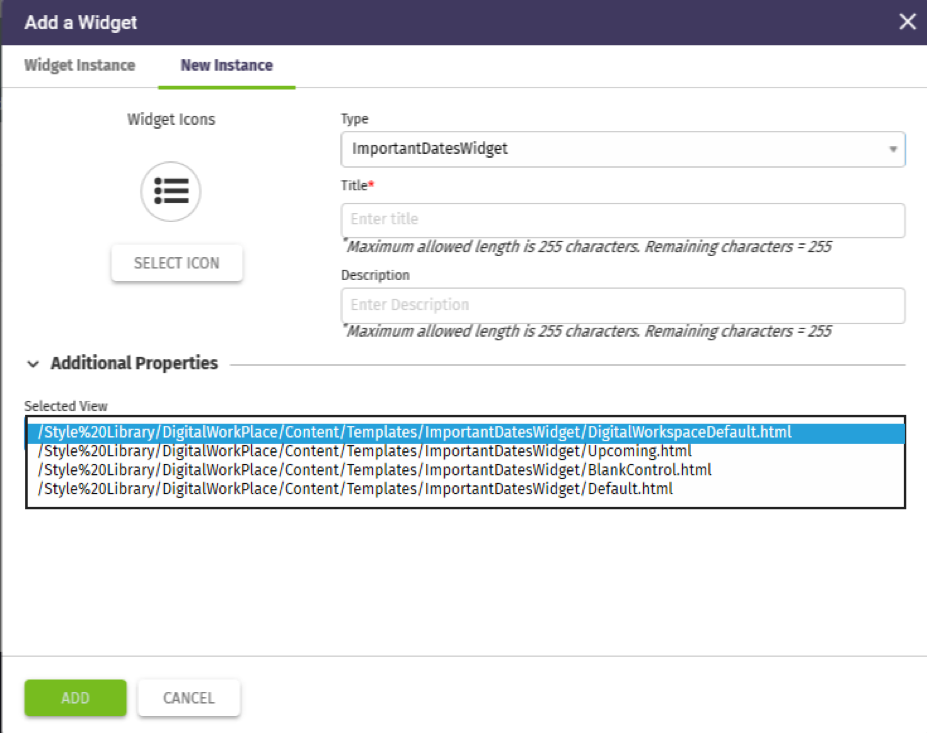
For widgets with multiple views, select the view URL for the widget instance. In the example below, ImportantDatesWidget has four different views for rendering the widget instance. For widgets with a single view, the view URL will default in the selected view.
After clicking the ![]() button, the new widget instance will be displayed in the cell on the page.
button, the new widget instance will be displayed in the cell on the page.
Continue to add widget instances for each cell on the page layout to create the desired user experience, as shown below.
Editing the Widgets on the Page
After widgets have been added to the page, they can be modified further. With toggle widget editing enabled ![]() , you can choose
, you can choose ![]() to swap, move or delete widgets; or choose
to swap, move or delete widgets; or choose ![]() to add a new widget instance to a cell.
to add a new widget instance to a cell.
When in swap, move, delete edit mode, a tool tip will display in the lower left corner and the VXC tray will change to an ![]() to exit back to toggle widget edit mode. Note: Swap will only appear when there is more than one widget instance in a cell.
to exit back to toggle widget edit mode. Note: Swap will only appear when there is more than one widget instance in a cell.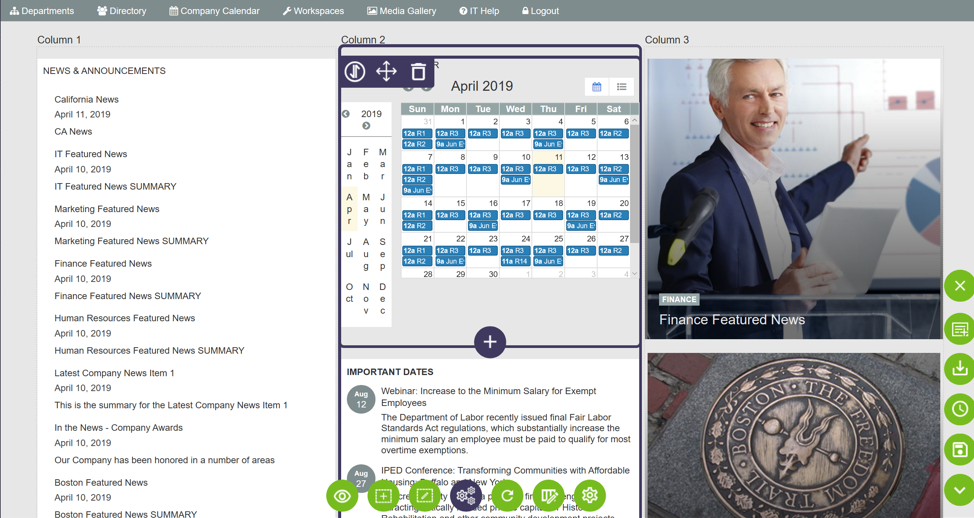
To swap widget instances, choose a widget instance within a column and select ![]() swap. Choose
swap. Choose ![]() target location within the column cell to select the widget instance to swap.
target location within the column cell to select the widget instance to swap.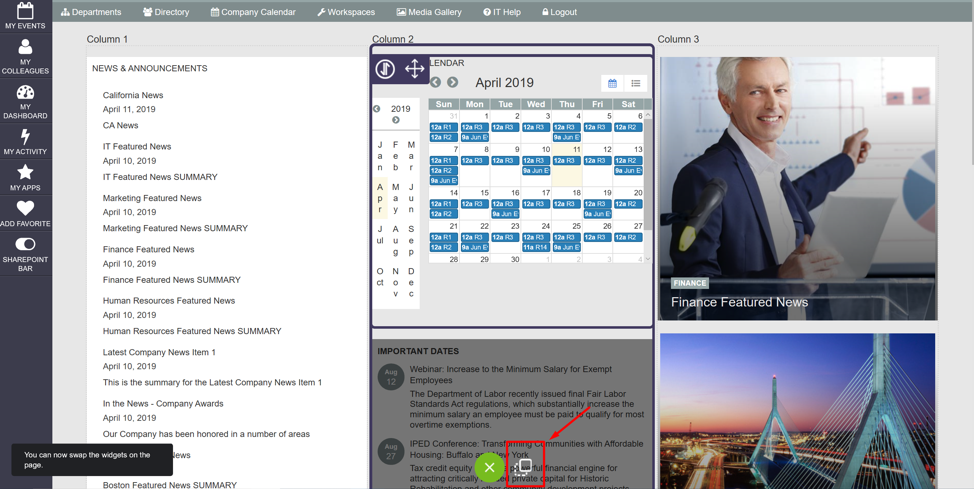
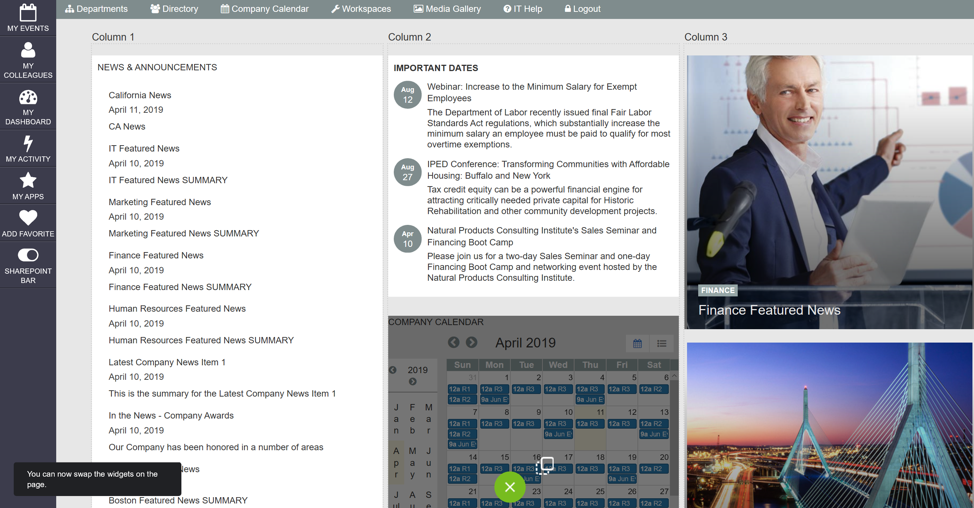
After clicking ![]() , the widget instance will display in the new location. In this example, the company calendar and important dates widget were swapped.
, the widget instance will display in the new location. In this example, the company calendar and important dates widget were swapped.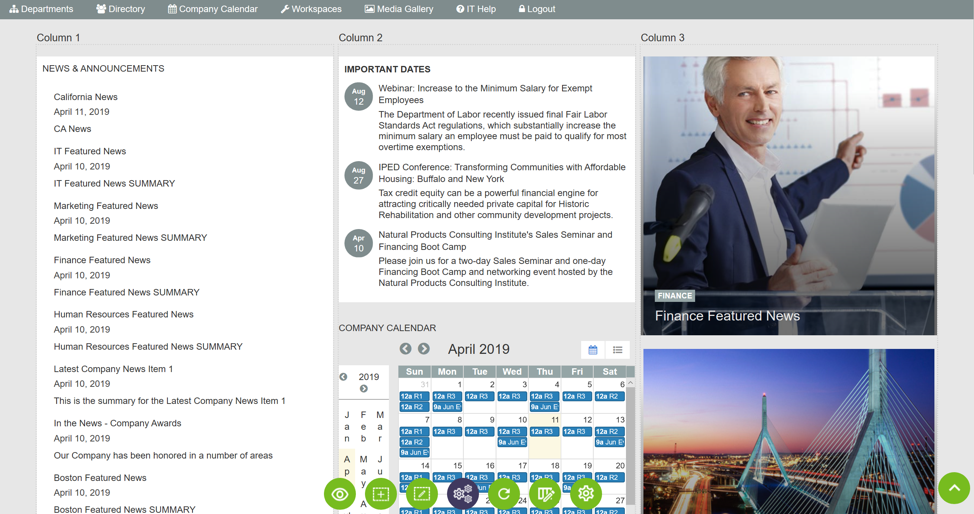
To move widget instances, choose a widget instance within a column and select ![]() move.
move.
Choose ![]() target location of the column cell to move the widget instance. The moved widget instance will be appended to the end of widgets already in the cell.
target location of the column cell to move the widget instance. The moved widget instance will be appended to the end of widgets already in the cell. 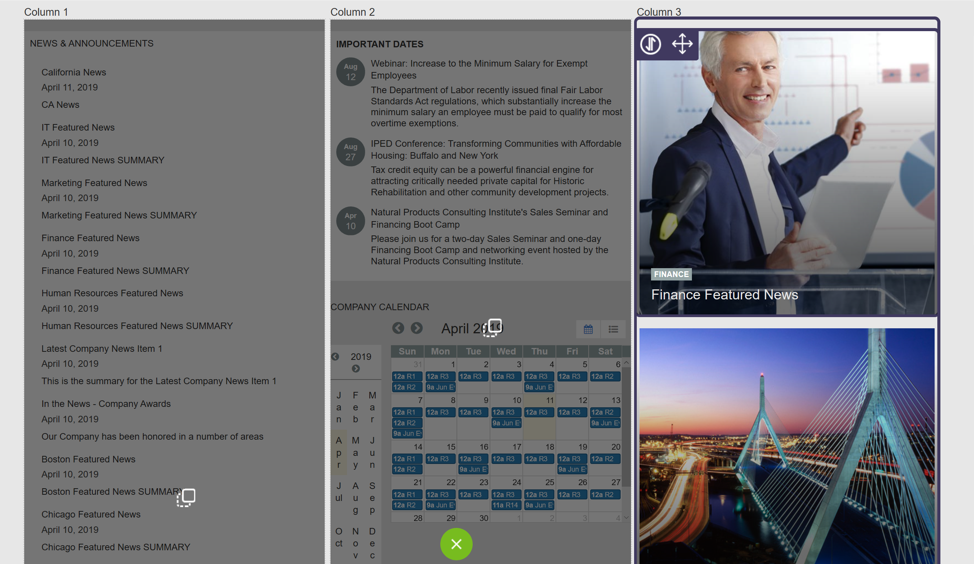
After clicking ![]() , the widget instance will display in the new location. In this example, Finance Featured News was moved after the last widget instance in column 2, below company calendar.
, the widget instance will display in the new location. In this example, Finance Featured News was moved after the last widget instance in column 2, below company calendar.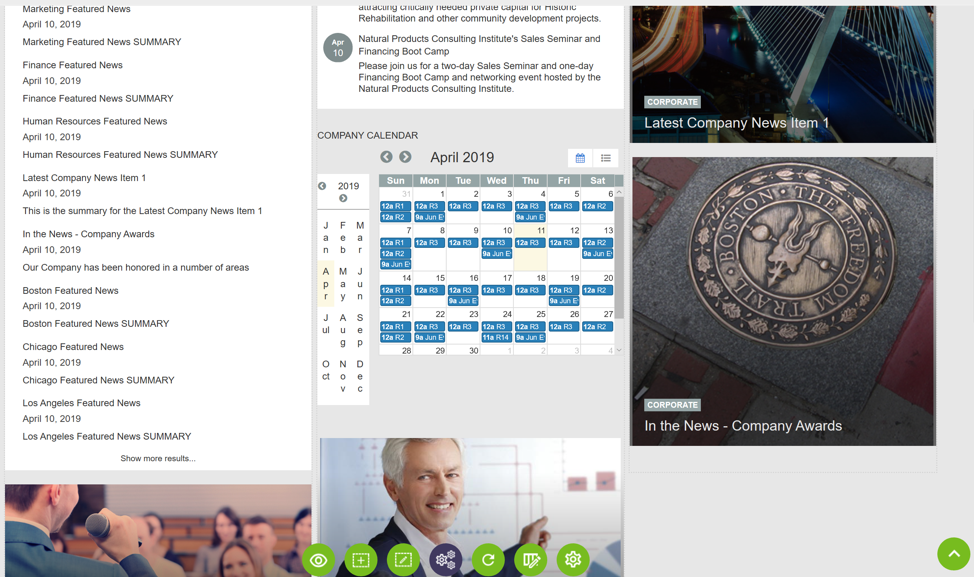
To delete a widget instance, choose a widget instance within a cell and select ![]() delete.
delete.
The VXC bottom tray provides unlimited flexibility to modify and edit the page layout. To exit from edit mode, each edit enabled button can be selected separately; or with a click of one button, select ![]() reset edit mode, to remove all the VXC tray buttons in edit mode (enabled edit mode buttons display in purple).
reset edit mode, to remove all the VXC tray buttons in edit mode (enabled edit mode buttons display in purple).
Set a Widget Restriction
An authorized user can select ![]() set widget restriction, to establish widget restrictions on a page. See Creating a Saved Layout section below to use the widget restrictions feature.
set widget restriction, to establish widget restrictions on a page. See Creating a Saved Layout section below to use the widget restrictions feature.
Change the Column Layout
Select ![]() change grid, to quickly change the layout of the page. A new pop-up window “Change Grid” will be displayed to choose a new page layout. After clicking the
change grid, to quickly change the layout of the page. A new pop-up window “Change Grid” will be displayed to choose a new page layout. After clicking the ![]() button, the page will automatically be converted in to the new page layout. (Note: This button will only appear when widgets have not been selected on the page.)
button, the page will automatically be converted in to the new page layout. (Note: This button will only appear when widgets have not been selected on the page.) 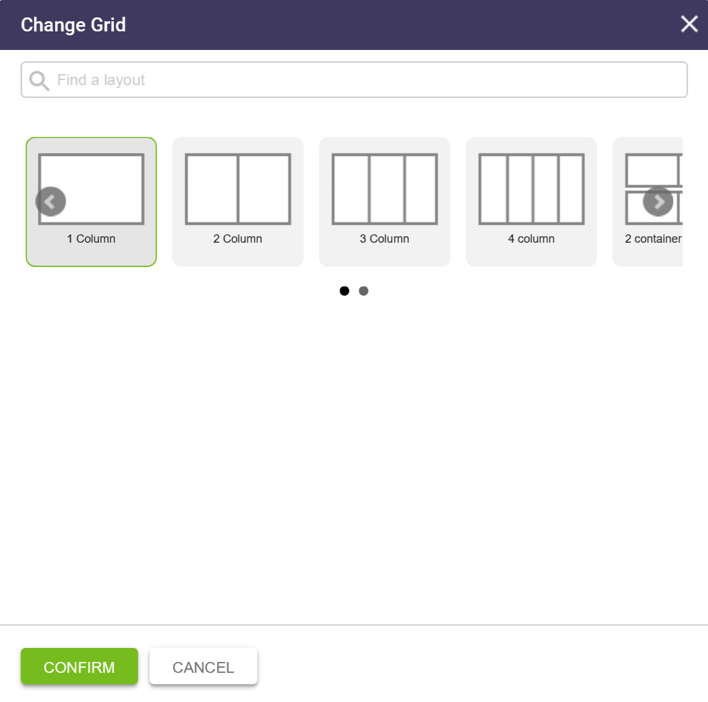
Select ![]() page properties, to edit the original page properties of the page for Details, Permissions, Metadata and Personas; then click the
page properties, to edit the original page properties of the page for Details, Permissions, Metadata and Personas; then click the ![]() button to update the properties. (Note: On the details tab, only page title can be updated.)
button to update the properties. (Note: On the details tab, only page title can be updated.)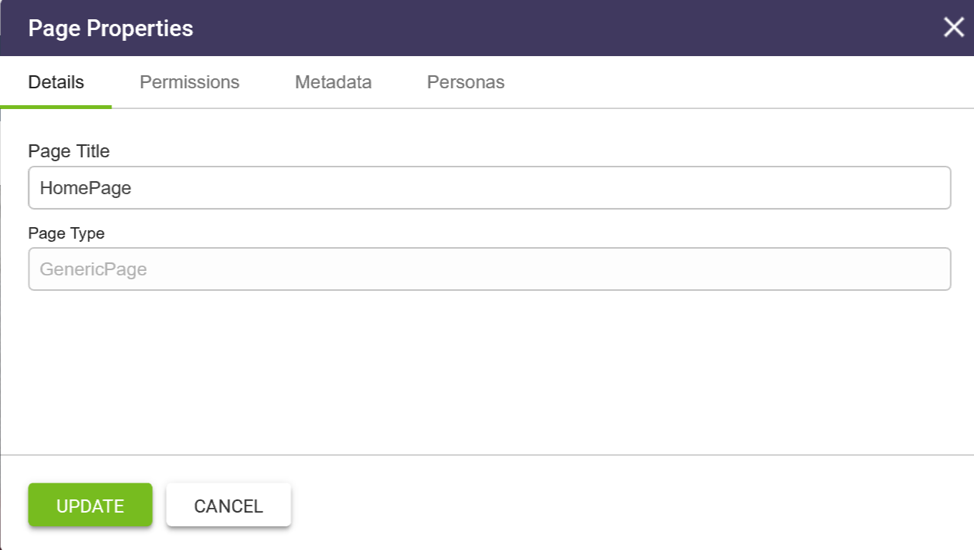
The VXC right panel tray enables page edit mode to allow for the new page to be added to a menu, save the page layout, save page for future editing, and publish the page.
Exit Edit Page
Select ![]() Exit edit page, exits page edit mode, closes both VXC trays and displays page. A warning box will display if unsaved changes to the page are pending.
Exit edit page, exits page edit mode, closes both VXC trays and displays page. A warning box will display if unsaved changes to the page are pending.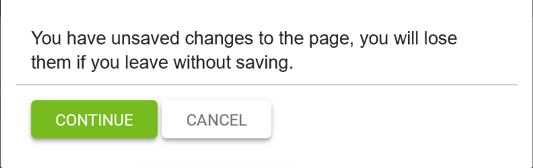
Add Page to a Menu
Select ![]() Add to menu, to choose the menu for listing the new page.
Add to menu, to choose the menu for listing the new page.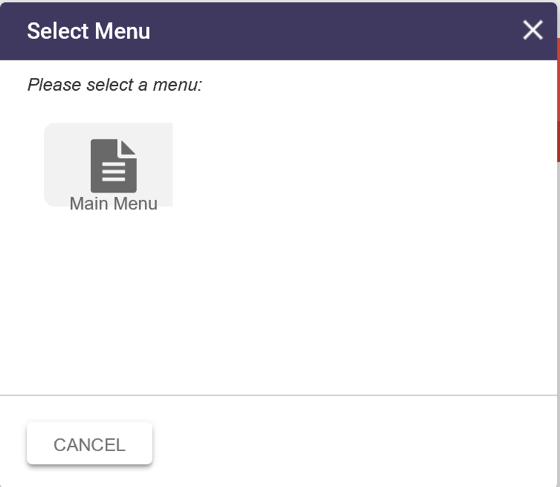
In the example below, the new page has been added to the Main Menu list in Content Apps and the page URL link will display on the main menu.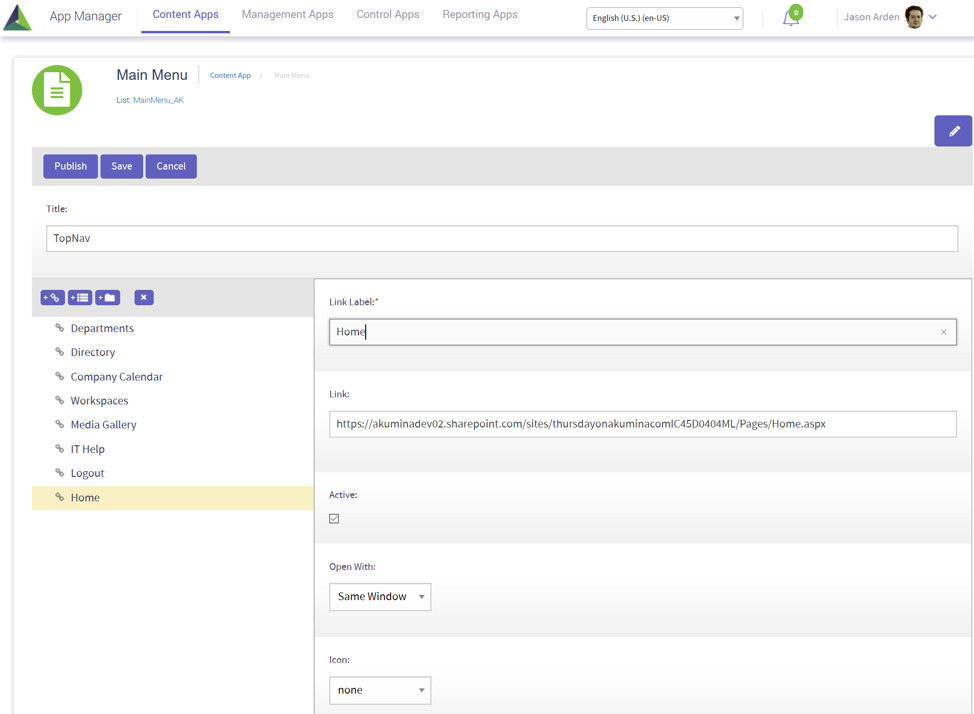
Creating a Saved Layout
An authorized user can create a saved layout that is available on the details tab of the X-Builder for new page creation. A saved layout defines the rows and columns of the page layout and can include widget definition restrictions for the page. (Note: Saved layouts will save rows, columns, widget definition restrictions but does not save the widget instances on the page.) Saved layout features has been enhanced with version 5.0, see Working with Advanced Saved Layout Features.
To establish widget definition restrictions on a page, click ![]() set widget restriction, then select the cell to restrict the widget instance type.
set widget restriction, then select the cell to restrict the widget instance type.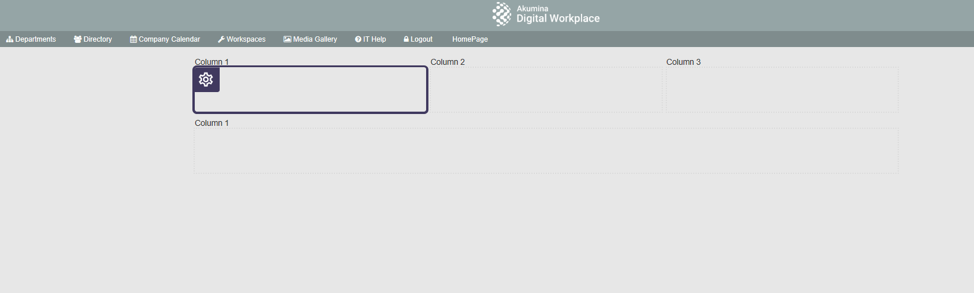
Select the ![]() configure zone, to choose the widget instance type to define the widget definition restriction for the cell, then click the
configure zone, to choose the widget instance type to define the widget definition restriction for the cell, then click the ![]() button.
button.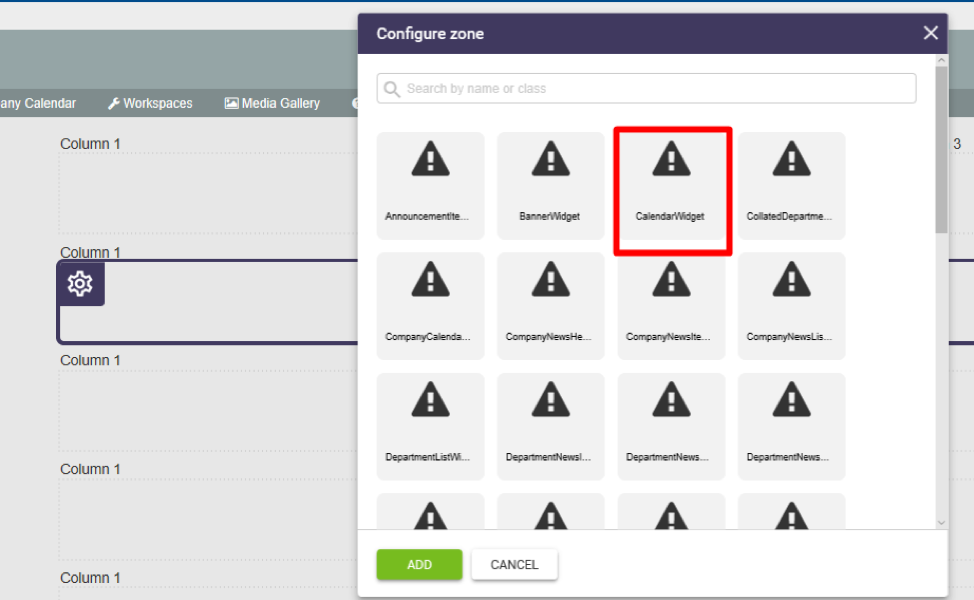
In the example above, column one is now restricted to only use a calendar widget instance in this saved layout. (Note: only one widget type can be restricted per column, although multiple instances of that widget type can be used in the column.)
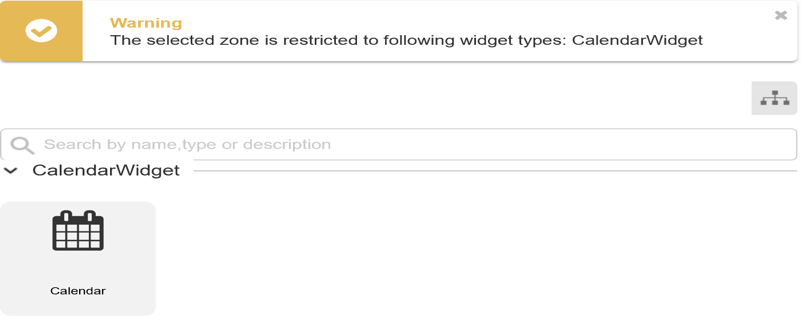
When a new page is being created using this saved layout, and toggle widget editing is enabled ![]() , selecting the cell in column one
, selecting the cell in column one ![]() , a calendar widget instance must be selected in the cell or a warning message will be displayed to indicate the cell is restricted to certain widget types, in this example, the calendar widget instance.
, a calendar widget instance must be selected in the cell or a warning message will be displayed to indicate the cell is restricted to certain widget types, in this example, the calendar widget instance.
Select ![]() Save layout, to save the rows, columns, widget definition restrictions on the page. Enter a page layout title and click save.
Save layout, to save the rows, columns, widget definition restrictions on the page. Enter a page layout title and click save.
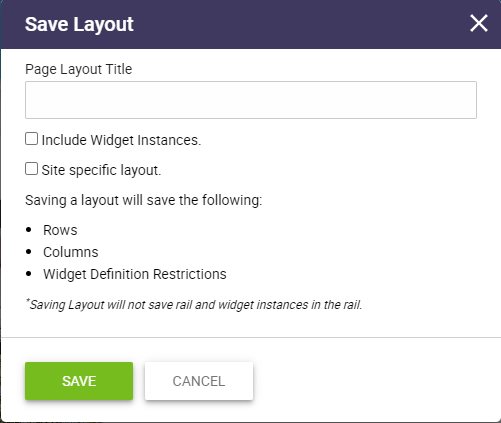
After a layout is saved, it will be available for selection in the Details tab of the X-Builder for future new page creation. (Note: Saved layouts only saves the widget instances on the page when include widget instances is checked.)
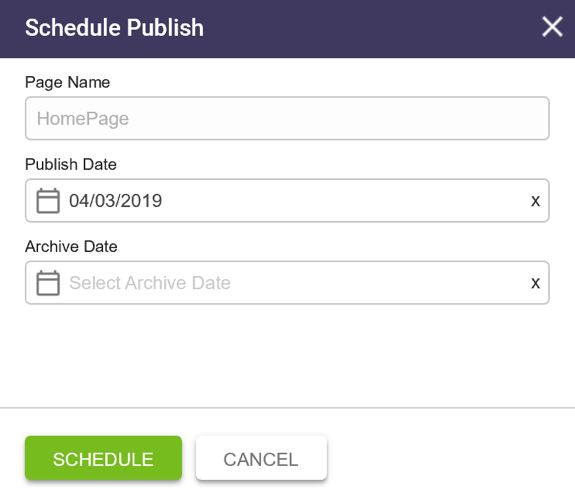
Schedule Publish
Select ![]() Schedule publish, to select the publish date for the new page to be published; and click schedule. An optional archive date can be specified to hide the page from view after the date specified.
Schedule publish, to select the publish date for the new page to be published; and click schedule. An optional archive date can be specified to hide the page from view after the date specified.
Select ![]() Save page, to save and publish the page. A pop up box will indicate changes have been saved and ask if you want to exit page edit mode.
Save page, to save and publish the page. A pop up box will indicate changes have been saved and ask if you want to exit page edit mode.

For additional details on page version personalization, please reference Experience Builder 3.0 .