The purpose of this document is to outline how to create new content (news, blogs, events, internal pages) and options for review processes prior to publishing.
Creating New Content
The example below uses the “News – Company News” content app on the root site, but the flow applies to all content created in the AppManager using content apps of the “Author” type. Fields per content app/list may vary.
Adding a new content item
There are two methods for adding a new content item.
You can select the “Quick Content Edit” button from the Tray on a page, then click the pencil icon:

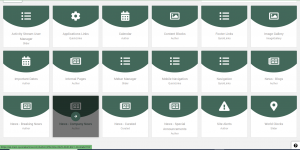
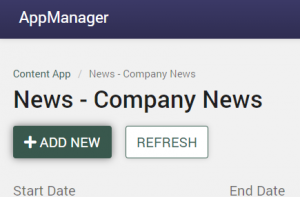
Or you can launch the AppManager from the Tray (first icon on the left) and navigate to the appropriate site (if needed) then click to enter a content app, then click Add New
Creating a new item
Using either method, will bring you to the screen where you can add a new content item:
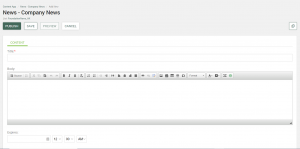
All fields marked with a red asterisk (*) required fields. The AnnouncementTitle is the title shown on the site page and the StaticUrl field will auto populate based on the Title field (removes special characters automatically). FriendlyUrl will automatically be created based on the value of the StaticUrl field once the content is saved or published.
Once you have filled out the fields, you can either “save” or “publish” the content. Save will put the content in a “pending” state, while “publish” will put the content in an “approved” state. Only users with access to view content in a “draft” state (pending) can view the content if it is not published.
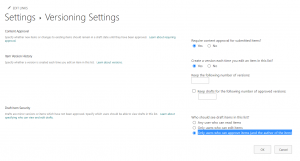
This is controlled via the SharePoint List Settings > Versioning Settings > Draft Item Security
Please note that if a user can view the content (even in a draft state) and the start date is the current date or prior and the expiration is in the future, they will be able to see the content on the page (such as the home page) even if it is still “pending.”
Once an item is saved or published, if you re-edit the item, the FriendlyUrl at the bottom will be a clickable link where you can navigate to the detail page to view.

Review Process Options
There are a few ways to have a review process for items prior to them being published/live.
Option 1: Give a subset of users and/or group access to edit/approve items for a specific site/list*
If there is a specific set of users, such as C-level, that need to review content prior to it being published but you do not want to allow “any user who can read items” to see items in a draft state (option 1), you can give a set of users (or a group) higher access to a site/subsite and/or list(s).
The users/group would need at least “Design” as a permission level and “Full Control” will always have the access as well. The users technically will be able to add/edit items, but if their only responsibility is to review content, they can be sent a link to the detail page when it is still “pending” and be able to review.
The start date does not need to be set into the future, in this case, as only users who can see draft state items would see the content on the site itself; however, setting a future start date will reduce confusion in general for all admins/content editors.
Option 2: Open draft viewing to all users but have a start date in the future
In the SharePoint List Settings > Versioning Settings > Draft Item Security, you can set it to “Any user who can read items”

This means any user will be able to view the content in a draft state. You can then send the URL to any user (can get it from editing the item in the content app and using the FriendlyUrl at the bottom) so they can access the detail page and review.
Having a start date in the future will prevent the item from showing up on the site (on the home page/department home pages, in news lists, etc.) but will still allow users with direct links to view the content.
* Akumina recommends option 1 as a best practice.
Additional: Creating new virtual pages
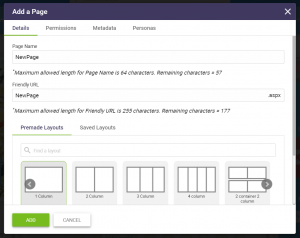
Admins can create new virtual pages for sites by selecting the “Add a new experience/page” button from the Tray.

All you need to do is give the page a name – you can use the same value for the Friendly URL or provide something different. You can start with a layout that makes sense or start with the default “1 Column” and adjust on the page later in the page builder mode (using the pencil in the lower right).
While pages will not be available immediately to users without a direct link (they are not added automatically to a menu, for instance), they are still on the site and may be available via search and can always be accessed via direct link.