Introduction
In this document, we will describe how to configure XOAuth2 SMTP using OAuth2 authorization code flow. For alternative configuration approaches, please refer to the reference section at the bottom of this document.
Configuration Using Stored OAuth Token
This approach uses the OAuth2 authorization code flow with MailKit SMTP client library.
Configuration Steps
-
- Create a new User in your Azure AD and assign a desired O365 license to establish a user mailbox, which will be used as the sender mailbox.
- Enable SMTP AUTH for the Sender mailbox, following the steps below:
- Download and install the ExchangeOnlineManagement 2.0.5 PowerShellV2 Module by running the below command in PowerShell console.
Install-Module -Name ExchangeOnlineManagement –RequiredVersion 2.0.5
-
-
- After the ExchangeOnlineManagement 2.0.5 PowerShellV2 Module is installed, run the below command to import the module.
-
Import-Module ExchangeOnlineManagement
-
-
- Connect to the Exchange Online using the below command. Note you must replace the <user@domain> with the appropriate user’s email address and you will be prompted to enter the password for authentication.
-
Connect-ExchangeOnline –UserPrincipalName <user@domain>
-
-
- Once you are connected successfully to the Exchange Online, run the below PowerShell command to enable the SMTP AUTH for the Sender mailbox, you must replace the <sender@domain> with the email address of the Sender.
-
Set-CASMailbox -Identity <sender@domain> –SmtpClientAuthenticationDisabled $false
-
-
- After verifying the SMTP AUTH for Sender box has been enabled, run the below command.
-
Get-CASMailbox -Identity <sender@domain> | Format-List SmtpClientAuthenticationDisabled
-
-
- You should receive FALSE from the above command and can now disconnect from the Exchange Online using the below command.
-
Disconnect-ExchangeOnline
-
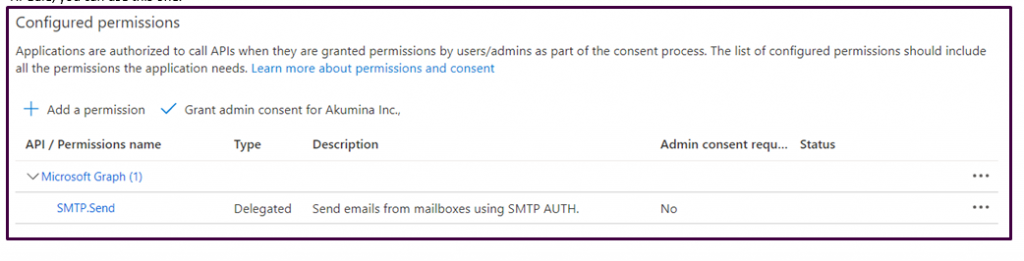
- Create a new Client App in Azure AD with the following setups:
- Add Web Platform
- Add Redirect Url (https://<APPMANAGERHOST>/oauth2/acs)
- Select tokens: Access Token and Id Token
- Create a Secret
- Add permission: SMTP.Send as shown below.
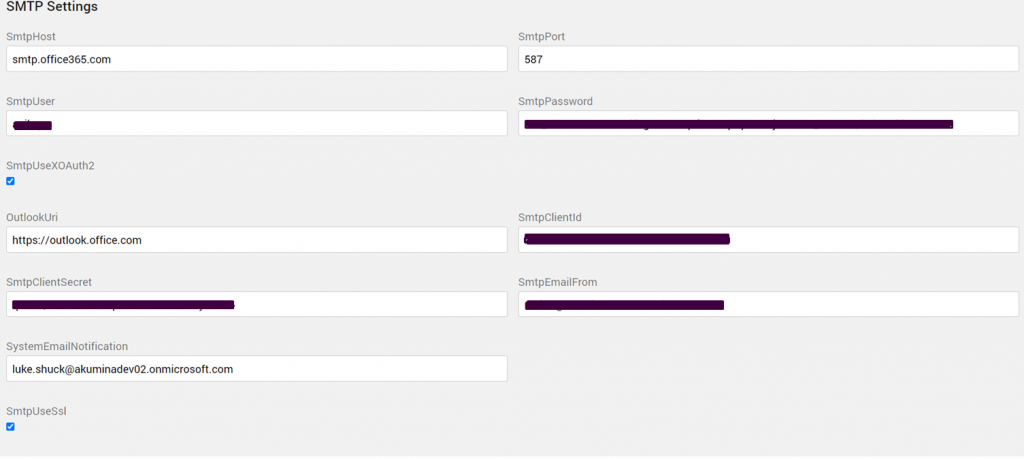
- Turn on the SmtpUseXOAuth2 flag in Tenant Config/Settings and provide the following Smtp Settings.
- SmtpClientId: Client Id of an App you created in step #3
- SmtpClientSecret: Client secret of an App you created in step #3
- SmtpEmailFrom: Email address of the Sender you created earlier
- OutlookUri: https://outlook.office.com
- Create a new Client App in Azure AD with the following setups:
Note: Use the SMTP host as smtp.office365.com when using OAuth, otherwise use smtp.sendgrid.net in tenant.settings/config
-
-
- AppSettings: BackgroundUser must be set to configure the limited access to Acquire Button located on Settings page.
- Format => OAuth:Background~<email address of user who can see the Acquire Button>
- Sample => OAuth:Background~luke.shuck@akuminadev02.onmicrosoft.com
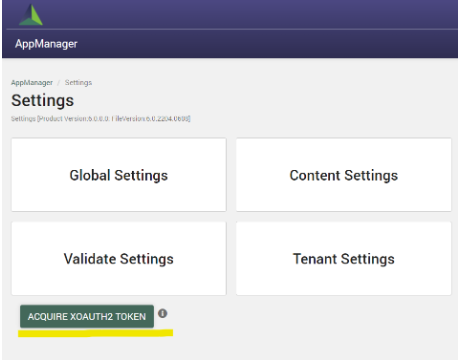
- Acquire Token: Navigate to App Manager > Settings page, click on the
 to acquire the new Smtp OAuth token.
- AppSettings: BackgroundUser must be set to configure the limited access to Acquire Button located on Settings page.
-
Note: A red info ![]() indicates the token is not yet acquired, a grey info
indicates the token is not yet acquired, a grey info ![]() indicates the token is acquired.
indicates the token is acquired.
-
-
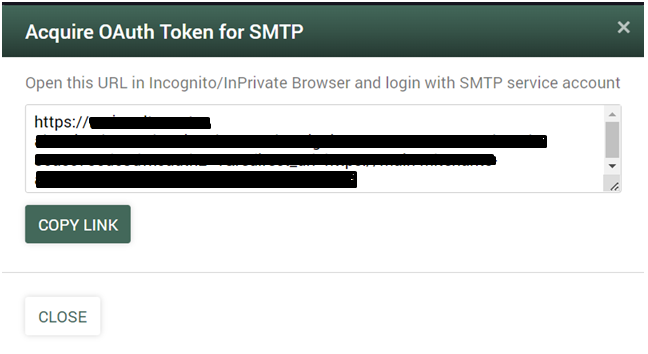
- Copy the link given in the popup and open it in the Incognito/InPrivate browser and login with the user (configured in SmtpEmailForm) that was created in the first step.
-
-
-
- Once the token is acquired successfully, refresh the Settings page and the “Acquire XOAuth2 Token” will appear as follows in AppManager Settings:
- Once the token is acquired successfully, refresh the Settings page and the “Acquire XOAuth2 Token” will appear as follows in AppManager Settings:
-
References: