Creating a Self Signing Certificate using Akumina’s github powershell
Certificate Purpose: In AppManger v5+, Akumina Streams, Site Manager and Forms Manager, uses the “App Graph” (AAD App), SharePoint “Application” level permission.
- Activity Streams – To monitor changes to subscribed SharePoint Lists and Libraries.
- Site Manager – To add sites to the AppManager.
- Forms Manager – To create SharePoint lists to store the form data.
To enumerate those changes in the SharePoint tenant, SharePoint needs a certificate as a secret via the “App Graph”.
To configure a Tenant to the Akumina Cloud, a certificate is required for the AppManager to make Graph App “Api” calls. A purchased (length 2048) or self-signing certificate can be used. The certificate will be uploaded as a thumbprint to the Graph App’s “Certificates & Secrets”. A text version of the certificate and certificate password is required during the tenant configuration for the AppManager. Below we will discuss creating a self-signing certificate.
Creating a Self Signing Certificate
To create a self signing certificate visit: https://github.com/akumina/automation and download the cert.ps1 from common folder

- Run as ADMINISTRATOR “Windows PowerShell ISE”
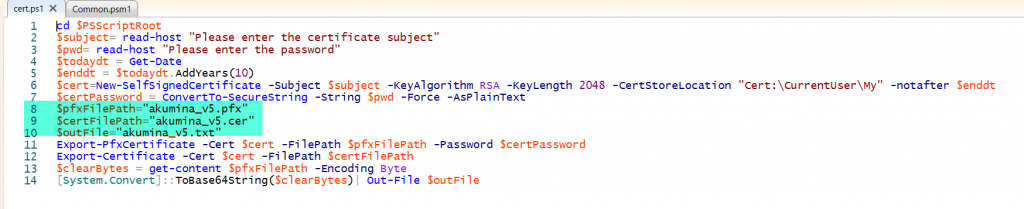
- Click on File, and open cert.ps1
- On tab, “cert.ps1”, lines 8, 9 and 10 – will be the name of the certificate files generated.
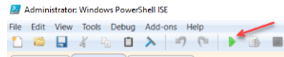
- Run the PowerShell command
- Fill in the “certificate subject” example: Akumina Application cer for ….
- Enter a password: Note the password, it will be needed when configuring the tenant to the AppManager.
- When Completed, navigate to the directory where the PowerShell was run and find files:
- akumina_v5.pfx
- akumina_v5.cer – This will be uploaded into the Graph App’s “Certificates & secrets” thumbprint.
- akumina_v5.txt – The value of this file is required for configuring the tenant, on the AppManager tenant config page enter the value in this file into “ClientAssertionCertificate”.
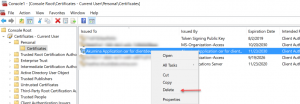
Removing the certificate from your local machine by running mmc
- File (Add/Remove snap-in)
- Add “Certificates”
- Left column, expand Certificates > Personal > Certificates
- Right click on the certificate just created and Delete.
The Certificate *cer will be uploaded into the App Graph’s Secret, thumbprint. To learn more about configuring the App Graph please visit here.
The value of the *.txt , along with the password, will be placed in the tenant configuration settings of the AppManager in version 5+.