The Akumina Experience Builder functionality has been enhanced to allow for page customization using Rail Layouts, with release 4.8. Rail layouts allow for widgets to be quickly set to the left or right of the main widget columns and easily resizes columns for a professional and custom look.
To access a page’s Rail layout click to Edit page content:

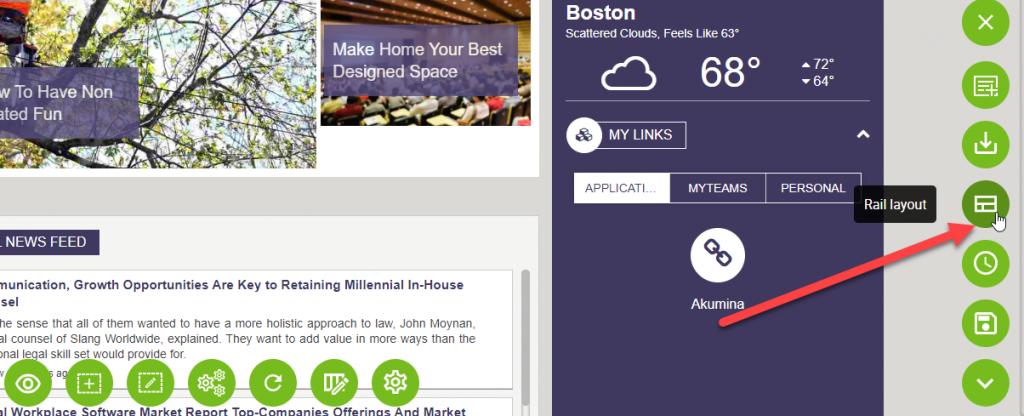
This will open the Experience Builder. Click on the Show Page Actions button to expand the right tray:

Once the right tray is opened, select the middle icon on page actions that says “Rail layout”:
This will open the Rail Layout window that allows authorized users to customize the Rails to be included on the page, the widget instances included in the rail, and the specified CSS class for the rails.
Selecting the Rail Layout
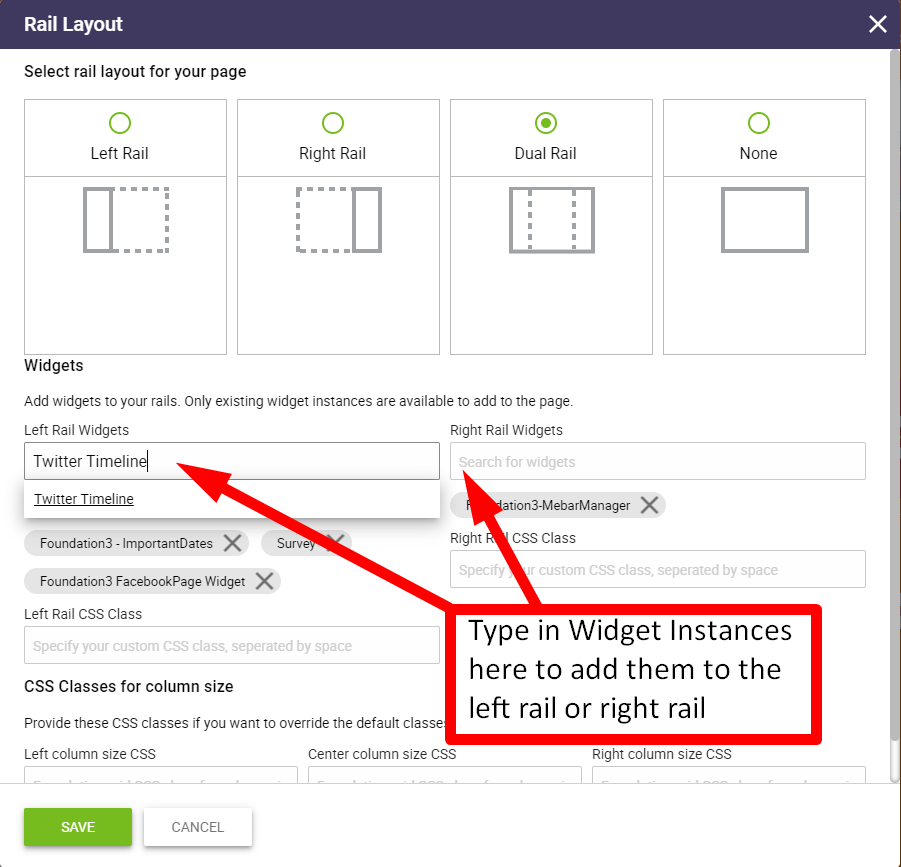
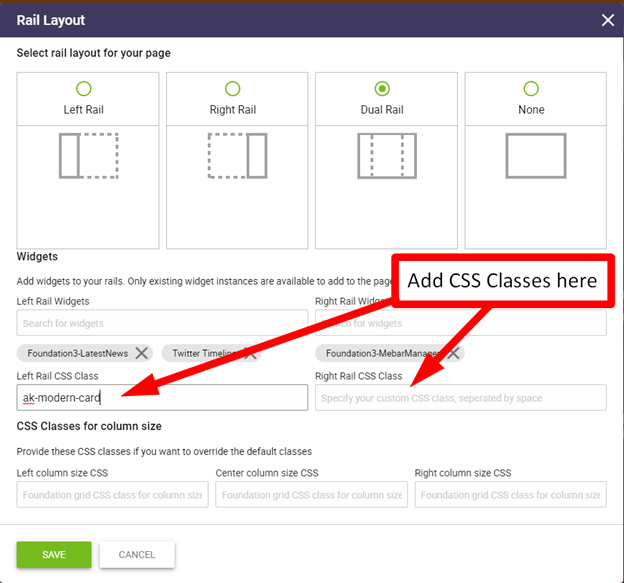
There are four options available for Rail Layouts on a page: Left, Right, Dual, or None.
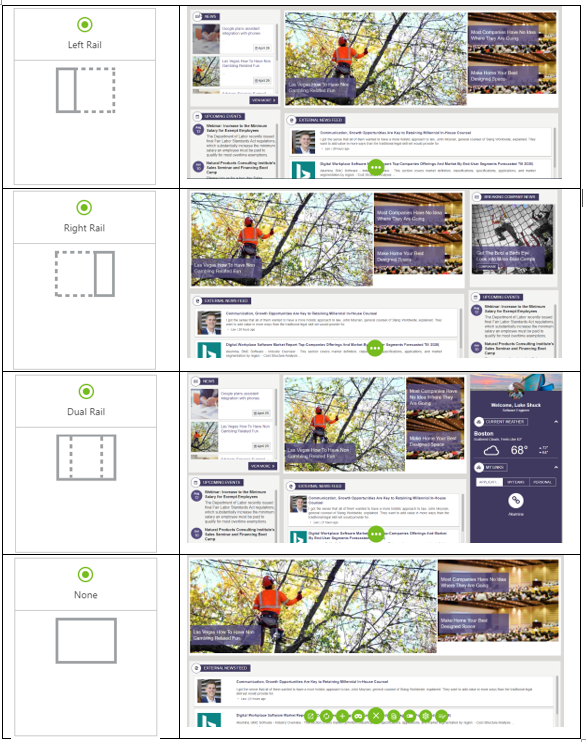
With each Rail Layout the main center column remains unchanged, although the positioning and size of the rail on the page differs based on the layout selected.
Adding and Removing Widgets from the Rail Layout
When selecting a Rail Layout, the Adding Widgets and CSS Class fields will appear according to what rail layout is selected (left, right, dual, none). For example, for the Left Rail Layout, only the Left Rail Widgets and Left Rail CSS Class fields will appear. And for the Right Rail Layout, only the Right Rail Widgets and Right Rail CSS Class fields appear.
To add widgets to the Rail, select the field that you want the widget to go in and search by typing widget names or widget instances:
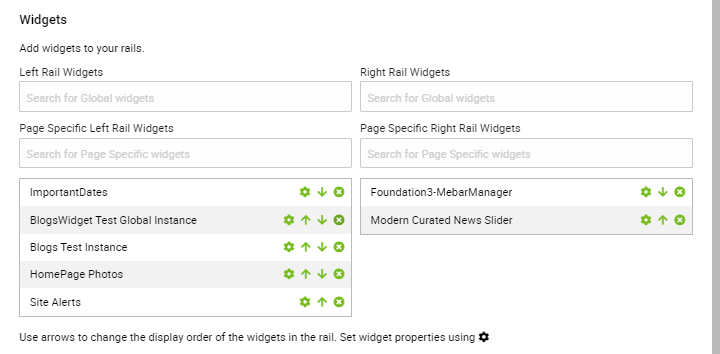
With release 5.5, you have the option to select global and local (page specific) widget instances to add to the rail.
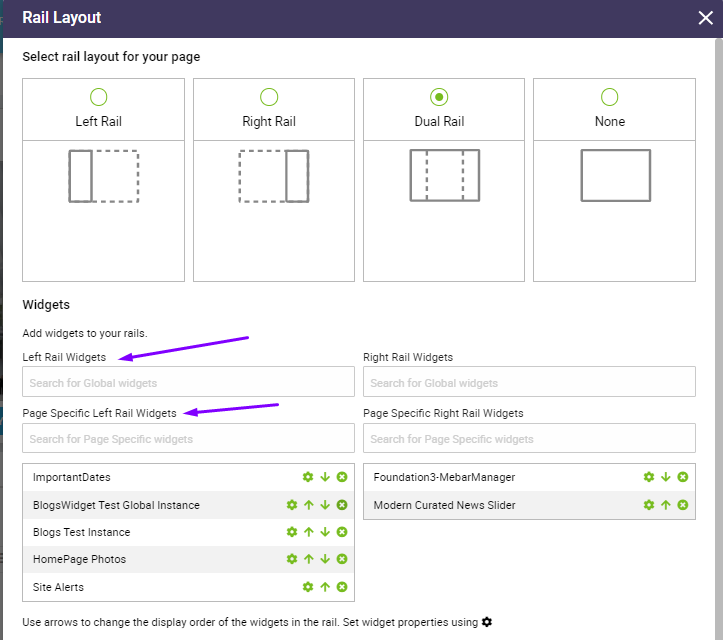
Select the rail area field (global or local) that you want the widget to display in and search by typing the widget name. Select the widget from the drop down list and the widget instance will be added to the rail.
Managing the rail widgets
The rail widgets selected can easily be modified from the rail layout modal. To change the order of the widgets in the rail, use the arrows to move the placement of the widget up or down in the rail. To remove widgets from the rail, just click the X on the widget instance to be deleted. To set widget properties, click on the gear on the widget instance to be updated.
With release 5.5, you also have the ability to add new widget instances to the rail. If a new widget is selected, the widget modal will be displayed to add the new widget instance.
Once you have added all of the widgets and determined the order that you want on the Rails, click Save to add the widgets and the rails to the page.
Applying CSS Classes to Rails
If you want Rails on your page to have a special CSS class different from the page’s normal theme you can add it in the Rail CSS Class field.
To add more than one CSS classes to a Rail, add them separated by a space.
If you want to change the left, center or right column size of the rails you can do so in the Column Size CSS Classes:

Similar to the previous CSS classes these must be specifically designed for Rails.
This allows for more customization of column width and height.