The purpose of this document is to provide the steps necessary to configure a connection from the Digital Workplace to the O365 Graph API which is used to enable and display data for:
- People Directory
- Employee Detail
- Personas – Applying personas to content
- AppManager to recognize users who have been added to the site collection via Azure AD Groups (via People Sync)
- Activity Stream (monitoring changes in SharePoint list)
- Akumina Social Engine (mentioning users and notifications)
- Retrieving Email – (for the logged in user)
- Retrieving Outlook/Team Calendar Events (for the logged in user)
- Retrieving Recent files (for the logged in user)
- Workspaces v4.5
- Company Calendar (O365 shared calendar)
- MyTeamsLinkWidget – display teams and channels (with links) that the logged in user has access to.
- MySitesWidget
- Akumina Forms
- Teams Presence – displays teams status on several widgets
To learn more about how Akumina interfaces with Azure Graph App, please visit: https://community.akumina.com/knowledge-base/akumina-security-and-infrastructure-overview/
To learn more about how Akumina uses Azure Graph App to gather people data, please visit: https://community.akumina.com/knowledge-base/peoplesync-v5/
Creating Azure Graph App and Setting the Appropriate Permissions
This document will describe how to create the Azure AD application that provides the required connection and authentication.
The qualified user to be able to perform the functions below needs to be an Azure Active Directory Global Administrator.
See article https://azure.microsoft.com/en-us/documentation/articles/active-directory-administer/
This document applies to installations of the Graph API connection to support Digital Workplaces running AppManager and Akumina Framework versions 4.0 and higher.
Creating the AzureAD Application
Access the Admin Console in your Office 365 tenant.
Under Admin Centers, select Azure AD. If you do not see this option, you must first sign up for the Azure AD Management console (see Azure AD Requirements section).
On the left nav, click on the Azure Active Directory. Then click on App registrations in the right pane. 
Select “New Registration”
![]()
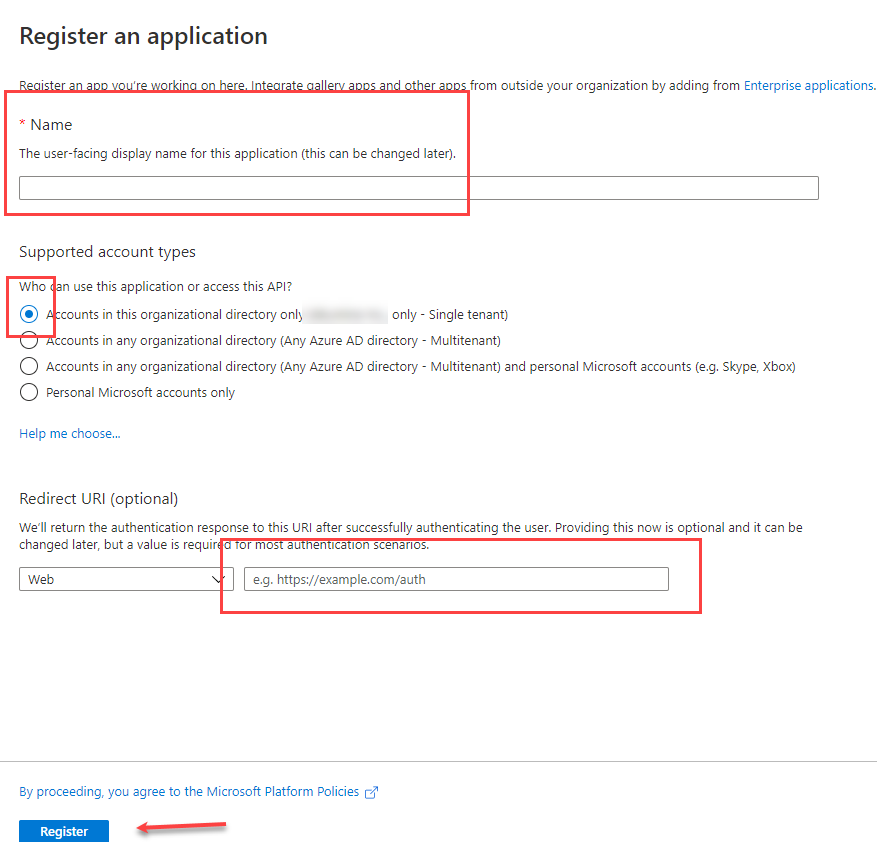
Register the New Application
Enter App Graph Name
For “Support account types”, usually “Single tenant” is appropriate.
Enter the Redirect URI. The Redirect URI is the {AppManagerURL}/oauth2/acs (note that /oauth2/acs must be lowercase) and click on Register.
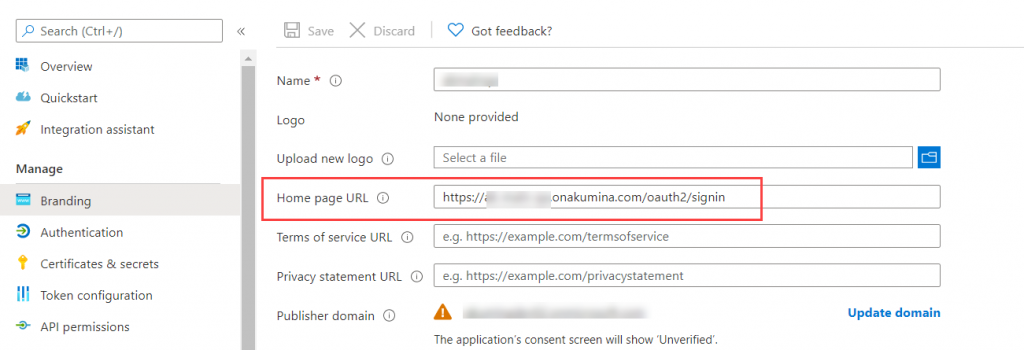
Visit the Branding page and set the Home page URL
Under “Manage” click on “Branding”, the branding blade will open set the “Home page URL” to {AppManagerURL}/oauth2/signin, and SAVE.
Understanding API permissions
For further understanding of “permissions and consent in the Azure Active directory v1.0 endpoint,” please see Microsoft’s documentation:
https://docs.microsoft.com/en-us/azure/active-directory/develop/v1-permissions-and-consent
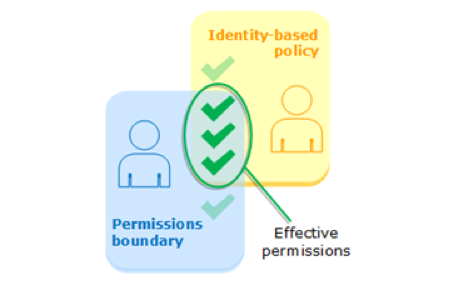
When the AppManager makes a call to the APIs, these calls are made using the identity of the current logged in user that is initiating the request (via the AppManager).
Setting Required API Permissions for AAD App
Setting the API permissions for the AAD App is important because this controls which services within O365 that the app will be able to access. There are four APIs we must request permissions from.
- Microsoft Graph
- SharePoint
- Azure Active Directory Graph (supported legacy API – in the future this will not be required)
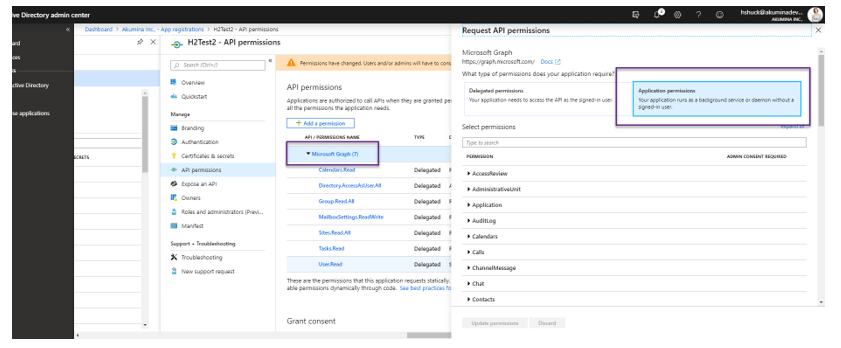
Microsoft Graph – DELEGATED Permissions
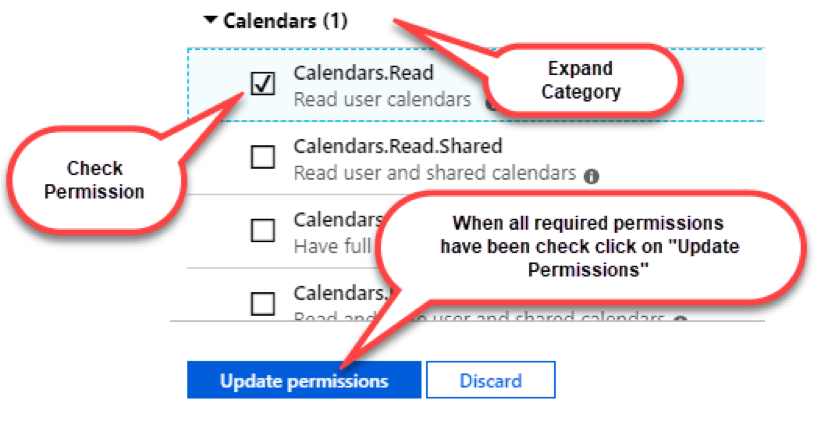
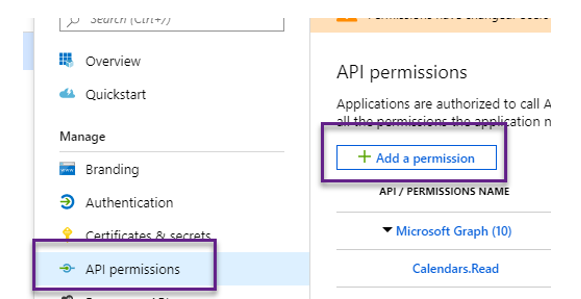
Click on “API permissions,” “Microsoft Graph” will appear click on “Microsoft Graph,” the interface will display the “Delegated Permissions” by default.
Expand the following Categories and Check the box for the following permissions:
Please note the purpose of the permissions as it is selected to understand the purpose of the selection.
DELEGATED Permissions for “Microsoft Graph”
|
Category – Expand |
Permission Name |
Feature/Purpose |
|---|---|---|
| Calendar | Calendars.ReadWrite | (My Events | Company Calendar |Activity Stream). Write is used when the user accepts a calendar event via Activity Stream. |
| Channel | Channel.ReadBasic.All | (MyTeamsLinkWidget) Allows for the “Channel” names to be read and displayed. |
| Directory | Directory.AccessAsUser.All | (EmployeeDetailPage) |
| MailboxSettings | MailSettings.ReadWrite | (Company Calendar) |
| Mail.Read | (MyEmailWidget) This is a manual step to be configured if using the web app powershell deploy. | |
| Sites | Sites.Read.All | (MySitesWidget) Allows for the “frequent sites” and “following” tabs. |
| Team | Team.ReadBasic.All | (MyTeamsLinkWidget) Allows for the Teams and Channels to display. |
| User | User.Read | (EmployeeDetailPage) |
| User | User.Read.All | (EmployeeDetailPage) |
| Files | Files.Read.All | (MyRecentFiles) |
| Tasks | Tasks.Read | (MyTasks) |
| Presence | Presence.Read | (Multiple widgets to display users team presence) |
| Presence | Presence.Read.All | (Multiple widgets to display users team presence) |
Click on “Update permissions”
Microsoft Graph – APPLICATION Permissions
Click on “Microsoft Graph” and “Application Permissions”
Check each of the “Permission Name” as required for your site.
APPLICATION Permissions for “Microsoft Graph”
|
Category – Expand |
Permission Name |
Feature/Purpose |
|---|---|---|
| Calendars | Calendar.Read | (Activity Stream) Required if Outlook subscription enabled. Outlook subscription lets you stream outlook events directly to subscribed users. |
| Directory | Directory.Read.All | (People Sync) |
| Group | Group.ReadWrite.All | (Workspaces) v4.5 |
| User | User.Read.All | (People Sync) – Required for Schools, Skills and Profile Image |
Click on “Update permissions.”
SharePoint – DELEGATED Permissions
To add permissions to SharePoint, click on the “API permissions” click on “Add a Permissions.”
From the “Request API Permission” scroll and select “SharePoint.”
Click on “Delegated permissions,” expand the categories, and check the permissions below:
Delegated Permissions for “SharePoint”
|
Category – Expand |
Permission Name |
Feature/Purpose |
|---|---|---|
| AllSites | AllSites.Manage | Allows the app to manage all site collections on behalf of the signed-in user. If you leverage site creator to deploy your site, with inheriting permissions for visitor group access, we need “AllSites.Fullcontrol”. Breaking inheritance to set visitor access will fail on headless mode if full control is not set. To fix this issue, navigate to lists to break permissions and add visitor groups to the following lists: PageWidgets_AK,PageData_AK,WidgetProperties_AK,DashboardDragDrop_AK,AppDisplayOrder_AK, Comments_AK,MyDashboard_AK,NewIntranetFeedback_AK,IntranetSurvey_AK,NewsComments_AK |
| AllSites | AllSites.FullControl | Allows the app to have full control of all site collections on behalf of the signed-in user. Required for headless mode to index pages in PageData_AK and break inheritance for page permissions. |
| MyFiles | MyFiles.Read | Allows the App to read current user’s files. |
| MyFiles | MyFiles.Write | Allows the App to read, create, update and delete the current user’s files. |
| Sites | Site.Search.All | Allows the app to run search queries and to read basic site info on behalf of the current signed-in user. Search results are based on the user’s permissions instead of the app’s permissions. |
| TermStore | TermStore.ReadWrite.All | Allows the app to read, create, update, and delete managed metadata from the term store on behalf of the signed-in user. |
| User | User.ReadWrite.All | Allows the app to read and update user profiles and to read basic site info on behalf of the signed-in user. |
APPLICATION Permissions for “SharePoint”
|
Category – Expand |
Permission Name |
Feature/Purpose |
|---|---|---|
| TermStore | TermStore.Read.All | Required for personas on version 5.0 and above (applying personas to content). |
| User | User.ReadWrite.All | Forms processing (edit, record processing status), Employee Detail (edit), Activity Streams (read) and People sync (read). If the intranet is not using Forms or Employee detail (edit) then this permissions can be reduced to “User.Read.All”. |
Granting admin consent for the API permissions
After all permissions have been selected, the “Azure Active Directory Global Administrator” needs to click on the “Grant admin consent for the API permissions” button and then click on the YES button.
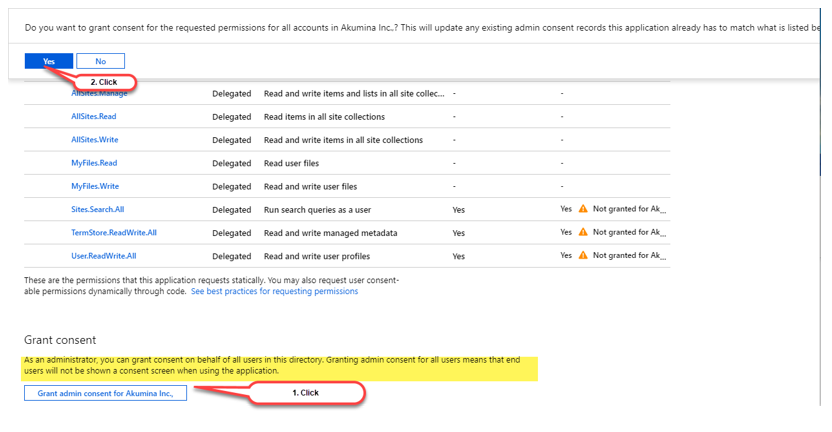
Please verify the success message has been displayed else permissions will not have been granted.
Configuring the Graph App for version 5.0 and above
For 5.0 versions and above, the Graph App’s “Certificates & secrets” must be configured to use a thumbprint. A purchased certificate or self signing certificate can be used.
If a purchased certificate is to be used, the certificate must be of length 2048, a text version of the certificate and password will be required for the AppManager tenant configuration.
If a self signing certificate is to be used please visit here to learn more about creating the certificate.
Adding the certificate to “Certificates & secrets”
On the Graph Apps, under Management click on “Certificates & secrets”, then click on “Upload certificates”
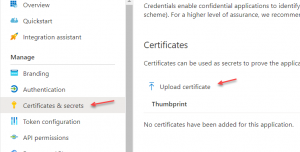
- Browse to the certificate (*.cer) and select.

Acquire keys to complete the AppManager Install
AAD Client Secret
A “AAD Secret” is required to complete the installation. On the Graph App’s “Certificate & secret” blade, click on “+ New client secret”. Enter an appropriate name for the secret and click on Add.
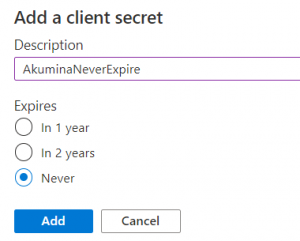
Copy the value of the secret, this will be the only time you see this value.
![]()
This value is the AAD Client Secret – used in the Tenant Configuration of the AppManager.
Application (Client) ID
On The Graph App, navigate to Overview, copy the value for the “Application (client) ID”
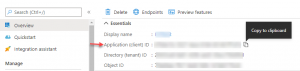
This value is the Application (Client) ID – used in the Tenant Configuration of the AppManager.