Overview
Newsletters is an expansion to our Broadcast Center module. Along with an updated user interface, the old Broadcast Center has been renamed to Broadcast Messages and two new delivery methods have been added: SMS and Push Notifications. Newsletters allows authorized users to send Newsletters to a target audience via email by leveraging PeopleSync and AzureAD data. Newsletters also optionally incorporates workflow to review, approver, and reject Newsletters before they are sent to the target audience.
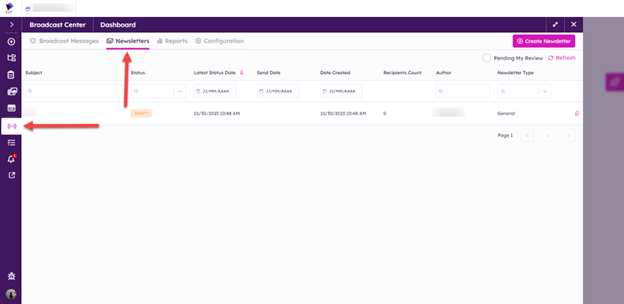
To access Newsletters, open the rail and open the Broadcast Center module, then access the Newsletters tab. Groups who have access to Newsletters are configured in the Module Manager app in App Manager.
Broadcast Center Configuration
Broadcast Center Configuration can now be accessed through the configuration tab in the Broadcast Center module.
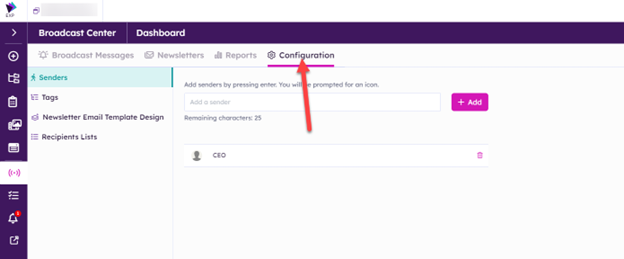
Senders, Tags, and Recipients lists are shared between Broadcast Messages and Newsletters.
Senders
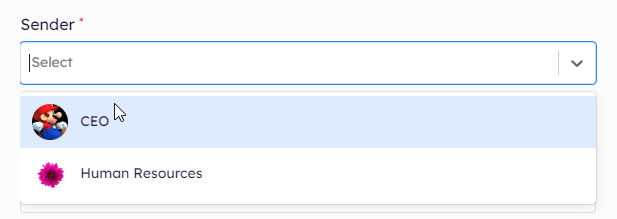
A sender is required when creating Newsletters. The sender will appear as the sender of the associated email.
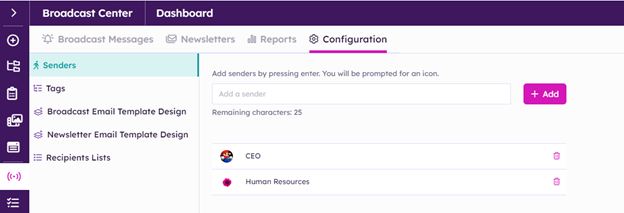
To add a new sender, type the name and hit enter or click the ‘Add’ button. The system will prompt you to select an image to be used for the logo icon. If an image is not selected it will use a default icon. The global senders will appear in the dropdown sender field when creating a message.
Changes must be saved before leaving this screen.
Tags
The Term Store ID and Parent Term Set ID settings are required to define the global taxonomy term store to be used to add tags to a term set for this site. The Tags Term ID setting is an optional setting to define hierarchical terms to allow taxonomy to be added under a tag.
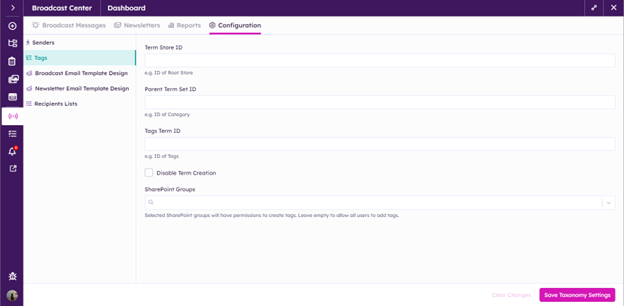
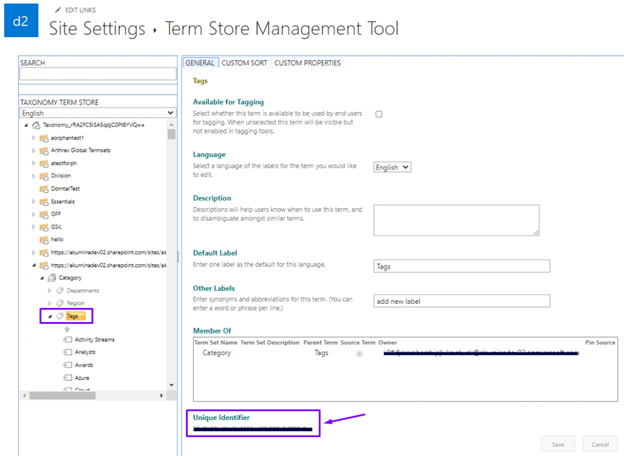
To locate the Global Taxonomy Term Settings, go to SharePoint > Site Settings > Term Store Management > click return to classic (in upper right corner) > Term Store Management Tool
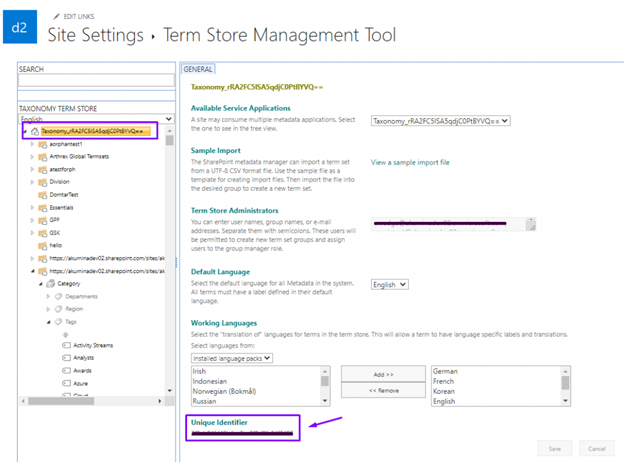
To obtain the Term Store ID of the root store, click on the Taxonomy Term Store and copy the unique identifier into the Broadcast Center modal Term Store ID field.
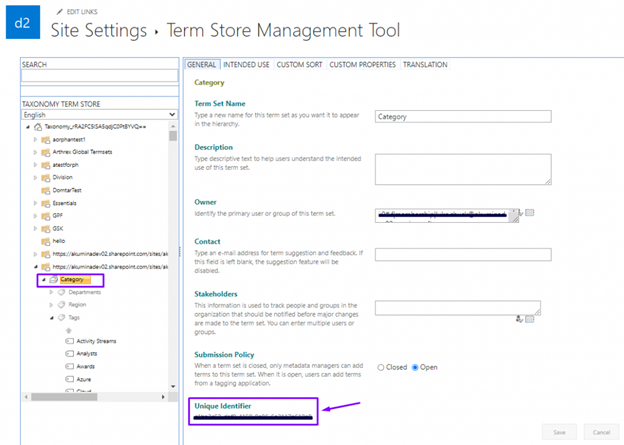
To obtain the Parent Term Set ID for the category, click on the parent term set (ex. Category) and copy the unique identifier into the Broadcast Center modal Parent Term Set ID field.
Note: Tags Term ID is optional and not required to configure the Broadcast Center Taxonomy Settings.
To obtain the Tags Term ID for the tag hierarchy, click on the parent tags term (ex. Tags) and copy the unique identifier into the Broadcast Center modal Tags Term ID field.
Click Save.
Disabling Tag Creation
Click on “Disable Term Creation” to disable tag creation in the Broadcast Center frontend. This is intended for clients that only want tag management to be created within AppManager.
Authorized User Groups
Select the SharePoint Groups from the dropdown of the authorized users that are allowed to create tags from the broadcast center dashboard. When the taxonomy store is configured and the SharePoint Groups are left blank, all users will be authorized to create new tags in the taxonomy term store.
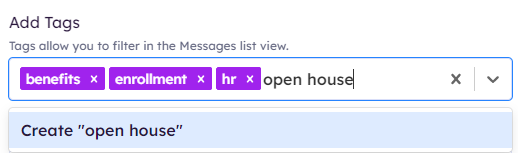
Using Tags in Newsletters
When the Taxonomy store is enabled for the Broadcast Center, an additional tags column will be displayed on the dashboard and tags can be added to the Newsletter.
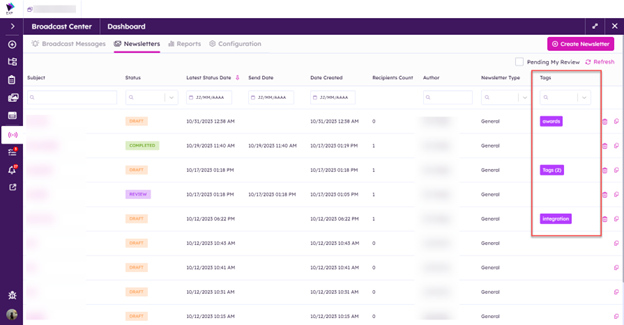
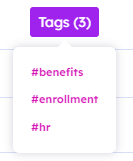
The keywords tags will be displayed on hover over the message tags on the dashboard.
The tags column can be used to search for messages with certain keyword tags.
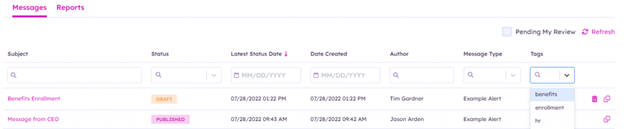
During the Newsletter creation, users will be able to select available tags to be associated with the Newsletter and used for filtering.
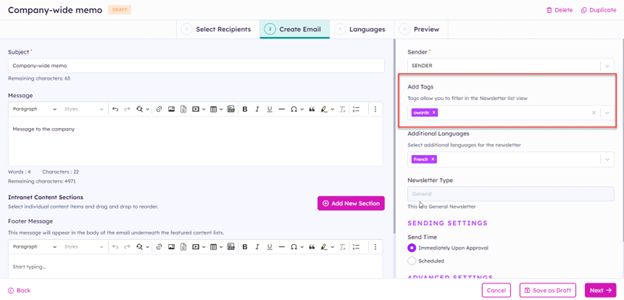
In addition, authorized users will be able to create new tags when creating a Newsletter.
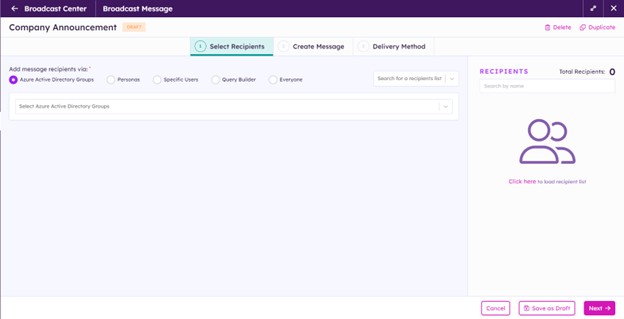
Recipients Lists
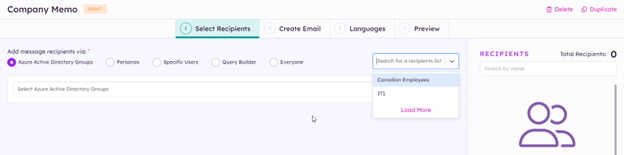
Recipients lists can be saved for use in Broadcast Messages and Newsletters. Available options for choosing recipients are Azure AD groups, Personas, Specific Users, Query Builder, and Everyone. The total recipients count will update based on the selected filters.
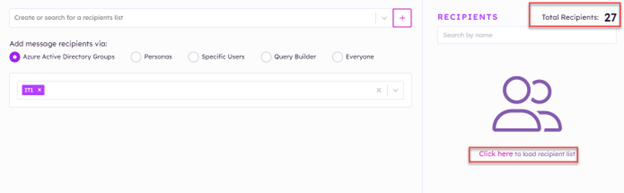
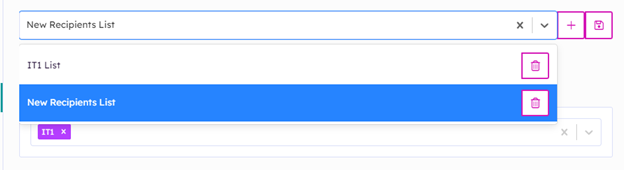
To validate which users are mapped to the recipients list, you can click the button highlighted above to load the recipients list. This list will display the mapped users’ display names and email addresses.
To create a recipients list, add recipients to the list, then give it a name and click create.
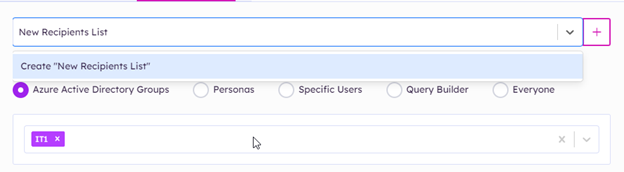
To edit a recipients list, select it in the drop-down menu, make your edits, then click the save icon. To delete a recipient list, open the drop-down menu and click the delete button for the corresponding recipient list.
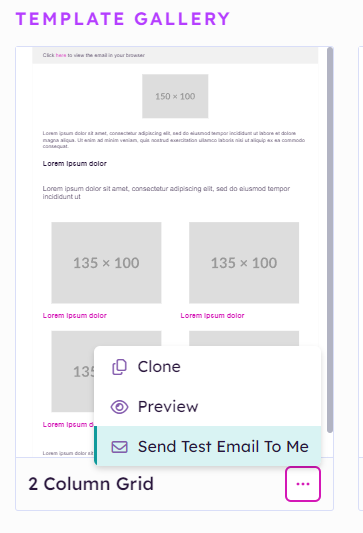
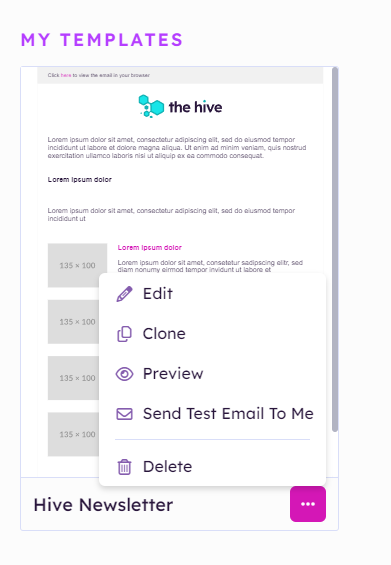
Newsletter Email Template Design
There are default templates that come with Newsletters. These templates can be customized, or new templates can be created from scratch.
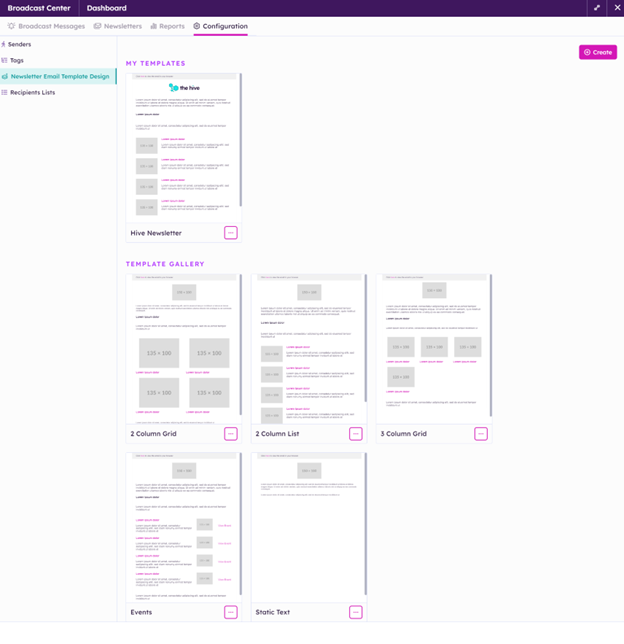
To clone, preview, or send a test email using a default template, click on the button on the bottom right of the template card:
Custom templates can be edited, cloned, previewed, deleted, or sent in a test email:
To create a new template from scratch, click on the create button.

Whether you are creating a new template, cloning a template, or editing a template, the template editing screen will be shown.
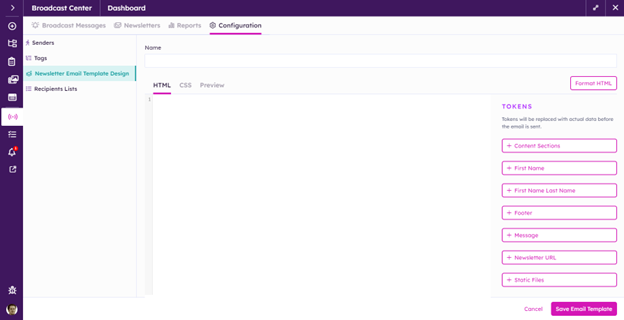
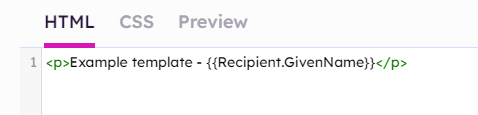
To assist with creating the HTML for your template, some default tokens are provided. Click on the button to insert them into the HTML. For example, you can add a token for the user’s given name:
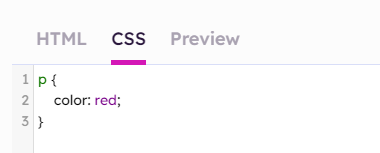
You can customize your template with CSS on the CSS tab:
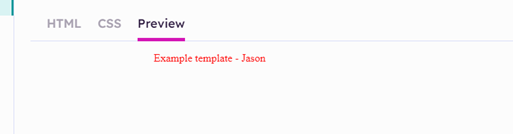
When you are ready, you can preview your template on the preview tab. Note that the token has been replaced with the corresponding data:
Finally, click on the ‘Save Email Template’ button to finish creating your template, and it can now be used with Newsletters.
Create Newsletter
While on the Newsletters tab of the Broadcast Center, click the button to create a newsletter.
![]()
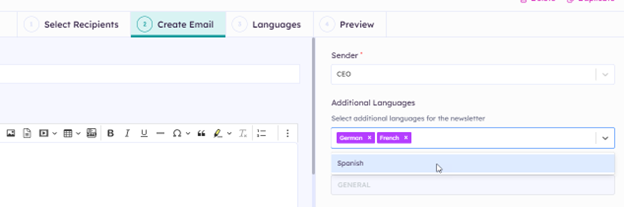
Enter a subject and select a Newsletter Type (defined in Akumina Flow). Optionally, add additional languages to the Newsletter.
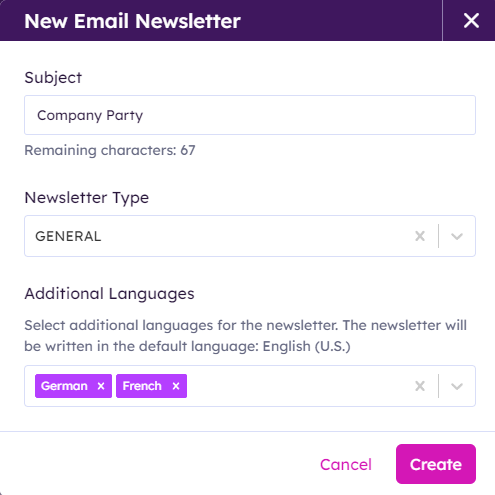
Click ‘Create’ to finish creating the draft Newsletter.
Adding Recipients to the Newsletter
When creating a Newsletter, either a saved recipients list can be used, or a custom list can be created or modified that is specific to the current Newsletter.
To use a custom list, select one of the filter options and fill out the details. Optionally, load the recipients list to verify that the expected users are associated with the recipients list.
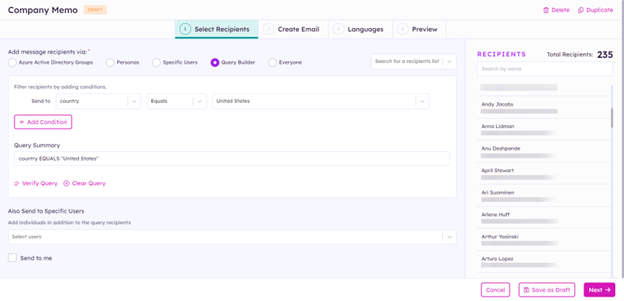
To select a predefined recipients list, select it from the dropdown menu. Results can be filtered by using a search term.
Once a recipients list has been selected, it can be used as-is or modified. The modified list is specific to the current Newsletter and will not be saved as a global list.
Creating the Email

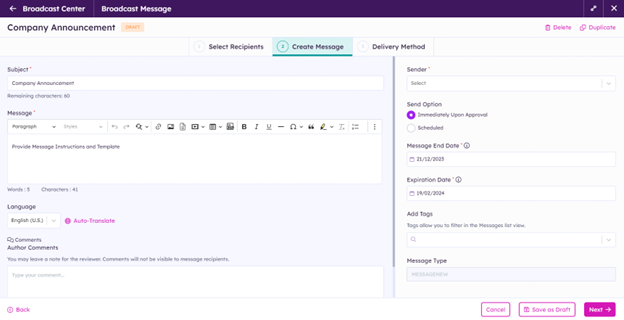
Subject
The subject will be defaulted to the value specified when creating the Newsletter and can be modified until the Newsletter is submitted.
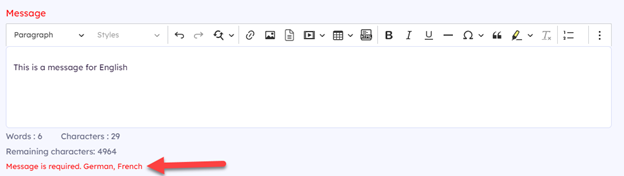
Message and Footer Message
Optionally, a Message and/or Footer Message can be provided for a Newsletter. If it is provided, it becomes required in all languages.
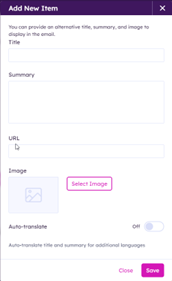
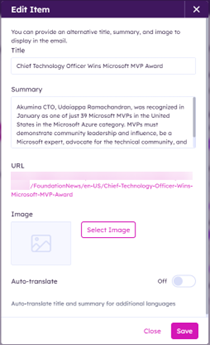
Adding Content
Click the ‘Add New Section’ button to add a new section to the Newsletter. The section can optionally be given a title and description. If there are multiple sections, they can be reordered by clicking and dragging them.
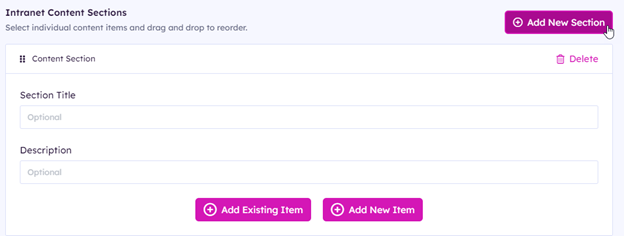
‘Add Existing Item’ will allow you to select items from SharePoint lists that have an associated Pages-type Author app. There is a site picker that allows you to select content from any of your available site collections. Only Published items are available for selection.
‘Add New Item’ allows you to create simple new content with a title, summary, URL, and image.
Up to 6 content items can be added to each section.
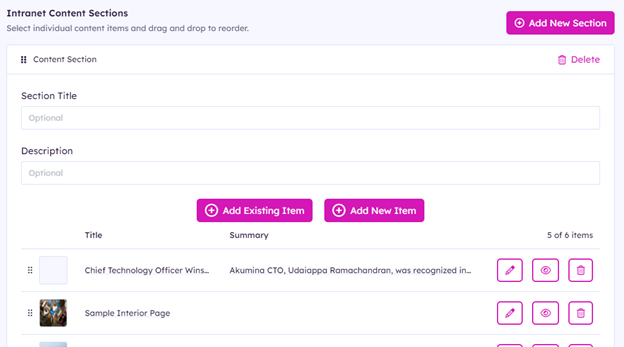
Basic information displayed in the Newsletter can be modified by clicking the pencil icon.
Content items can be previewed, deleted, or reordered within a section by clicking and dragging them.
Sender
Using the dropdown menu, select a sender. A sender is required to send a Newsletter.
Sending Settings
Newsletters can either be sent as soon as they are approved or they can be scheduled to be sent in the future.
Database Expiration
The database expiration is defaulted to 90 days. A different expiration date can be specified. After the expiration date, data for this Newsletter will be removed.
Multilingual
Languages can be added to or removed from a Newsletter on the ‘Create Email’ tab.
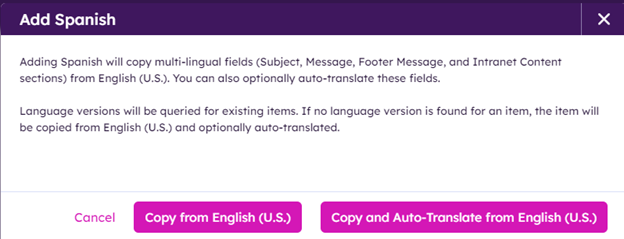
When adding a language to a Newsletter, you will be prompted to either copy from English or copy and auto-translate (if enabled).
On the Languages tab, you can customize the Newsletter content for each language or choose to copy and/or translate selected fields from English.
![]()
Sections and content items cannot be added, deleted, or removed from the Languages tab, but they can be edited to customize the Title, Summary, and Image in each language.
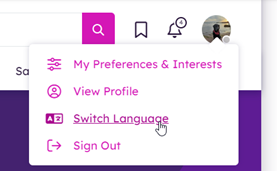
Note: Email will be sent according to the user’s language ID in People Sync. This language ID corresponds to the language that is selected in the ‘Switch Language’ setting. If the user’s language ID does not have a corresponding language version in the Newsletter, the English version will be sent.
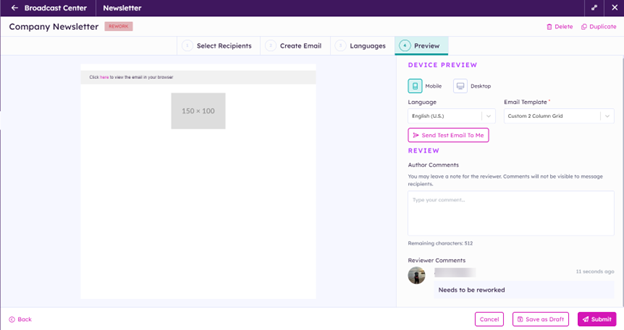
Preview
On the Preview tab, you can get a preview of what your Newsletter will look like in each language and on mobile and desktop. An email template must be selected, then you can generate a preview in the chosen language. You can also send a test email to yourself before submitting the Newsletter.

Additionally, the author can add comments before submitting the Newsletter to help the reviewer. These comments are not visible on the Newsletter.
Newsletters Dashboard
The Newsletters dashboard displays up to 10 Newsletters based on sorting and filtering options that are chosen. To display more Newsletters, there are paging buttons available at the bottom of the screen.
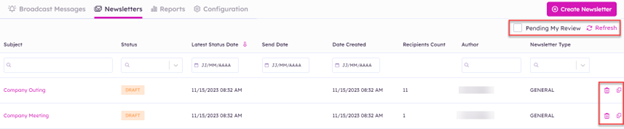
There is an option to duplicate any Newsletter, as well as delete Newsletters that are created by the current user or for which the current user is an owner of the associated flow. When the ‘Pending My Review’ toggle is activated, it will display Newsletters that are waiting for review by the current user. When the refresh button is clicked, the latest information will be displayed about the Newsletters without having to refresh the page.
Reporting
Reporting for Broadcast Messages and Newsletters can now be accessed on the Reports tab of the Broadcast Center. See the Broadcast Center documentation for information about the available report types.

Analytics
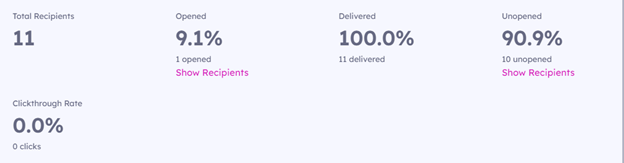
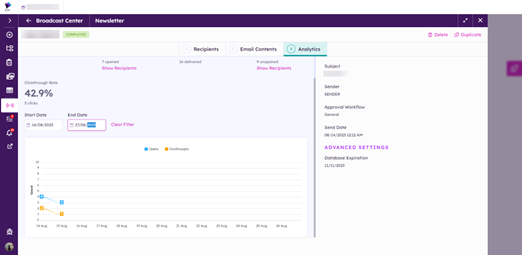
After a Newsletter has been sent, reopening it will show a new Analytics tab. On this tab, you can see metrics like the percentage of recipients who opened the Newsletter, the percentage of successful deliveries, and the clickthrough rate. You can also click ‘Show Recipients’ to see who has opened or not opened the Newsletter.
There is also a visual representation of your Newsletter’s opens and clickthroughs. The graph can be filtered using the Start Date and End Date fields.
Broadcast Center Email Newsletter Type Configuration
A Broadcast Center Email Newsletter Type is configured by establishing the roles (author, review, etc.) for the Newsletter type in Akumina Flow. Roles can be permissioned based on an individual user, persona, or group during Newsletter type creation. An Author role is required (user with permissions to create or delete a flow) and additional optional roles can be defined for Reviewer role (user with permissions to review/approve a stage gate in the flow). Depending on the Newsletter type requirements, multiple reviewers/approvers can be assigned, or the Newsletter type can be set for automatic approvals without any review required.
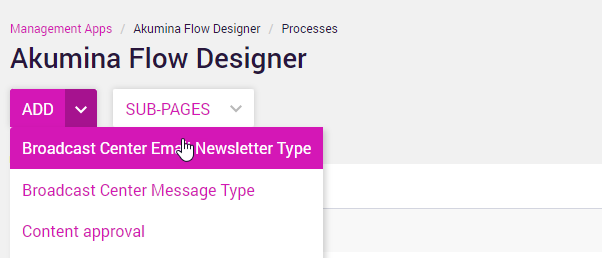
Broadcast Center Email Newsletter Types are configured in Akumina Flow Designer Management App. To configure the Newsletter type, go to AppManager > Management Apps > Akumina Flow Designer App > Add > Broadcast Center Email Newsletter Type. To learn more about Akumina Flow Designer click here.
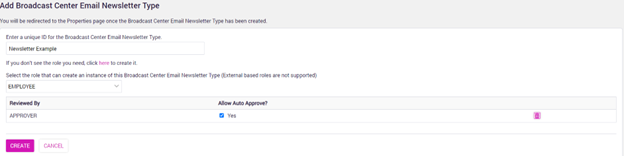
Enter a Broadcast Center Email Newsletter Type name and click enter. On enter, the modal will expand and prompt you to define the roles required for the Newsletter type and the required approval processes. Below is an example of the Add Broadcast Center Email Newsletter Type modal.
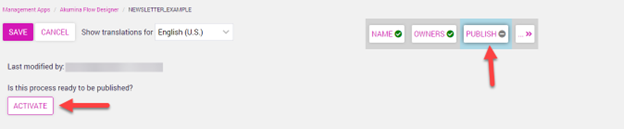
Message Types must be Activated in Akumina Flow publish tab to appear in the broadcast center message type dropdown.
Workflow
If there are approver tasks set on the associated Akumina Flow, Workflow can be used to approve or reject a Newsletter before it is sent out. Reviewers can read the author comments and make comments of their own. When sending a Newsletter back to the author to be reworked, a comment is required.

If a reviewer sends the Newsletter back to the author for rework, it will get a status of ‘Rework’ and the author can make changes and resubmit the Newsletter or cancel it.
Broadcast Messages Redesigned UI
The Broadcast Messages UI has been redesigned to give a consistent look and feel between Broadcast Messages and Newsletters. Functionality has not been changed, except for the addition of Push and SMS delivery methods.
The Select Recipients and Create Message tabs have been updated to be consistent with the new Newsletters UI:
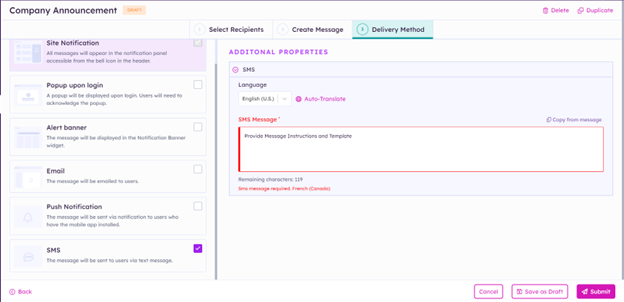
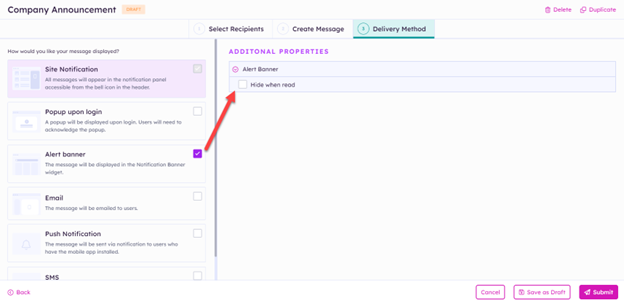
The Delivery Method tab has also been redesigned. The delivery types are now shown on the left. When enabled, some of the delivery types will prompt you for additional information. For example, enabling the Alert banner delivery type allows you to decide if the banner should be hidden when read:
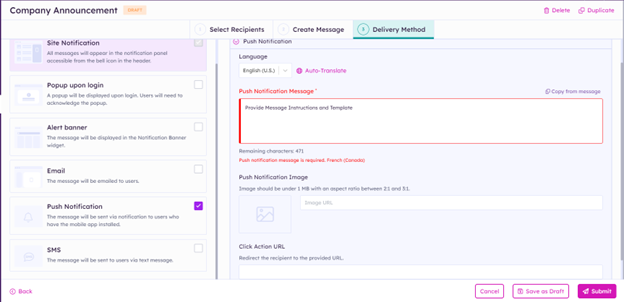
Push Notification
Push Notification allows Broadcast Messages to be pushed to devices with the mobile app installed. When this option is enabled, you are able to customize the message that is sent to the push notification for each language, as well as the image and click action URL associated with the notification.
SMS
SMS allows you to send text messages to users who have a mobile phone number configured in People Sync. When this option is enabled, you can provide a custom message for each language.